
How to Train, Register, and Deploy a Model in Azure ML
This is second tutorial on MLOPS. First being the Mastering MLflow Tracking for SVM Models on the Digits Dataset. Here we will learn how to train, register and Deploy a Model in Azure ML. We will use the Mnist dataset along with basic neural network with the help of Sklearn.
Creating a Compute Resource
Go to your homepage and you will see

Click on Azure Machine Learning and the create New Workspace

Fill the Following Form
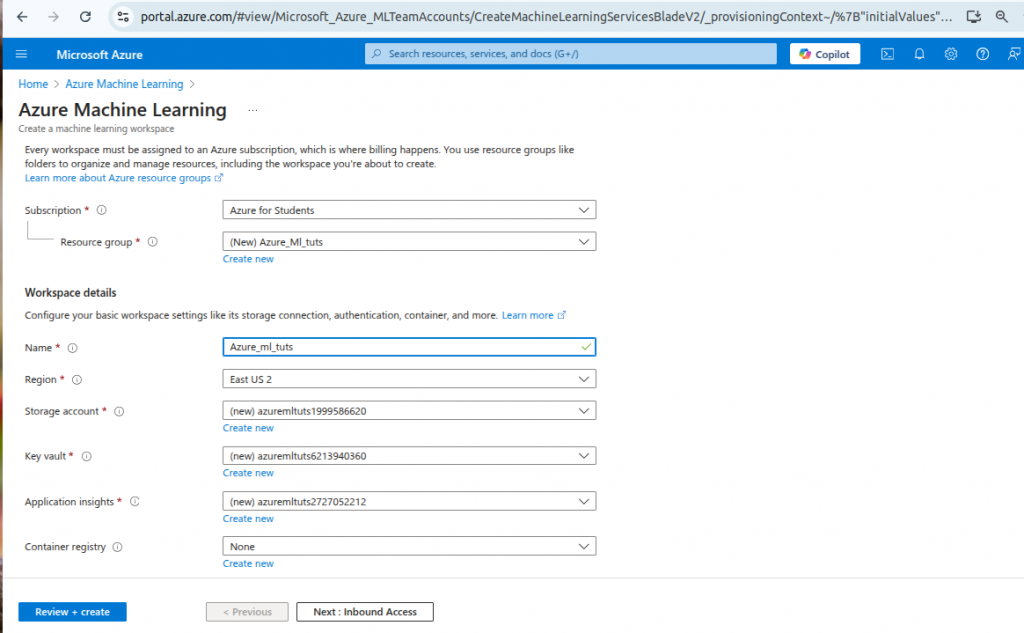
After filling the form: Click Review+Create
It might take some time to create.
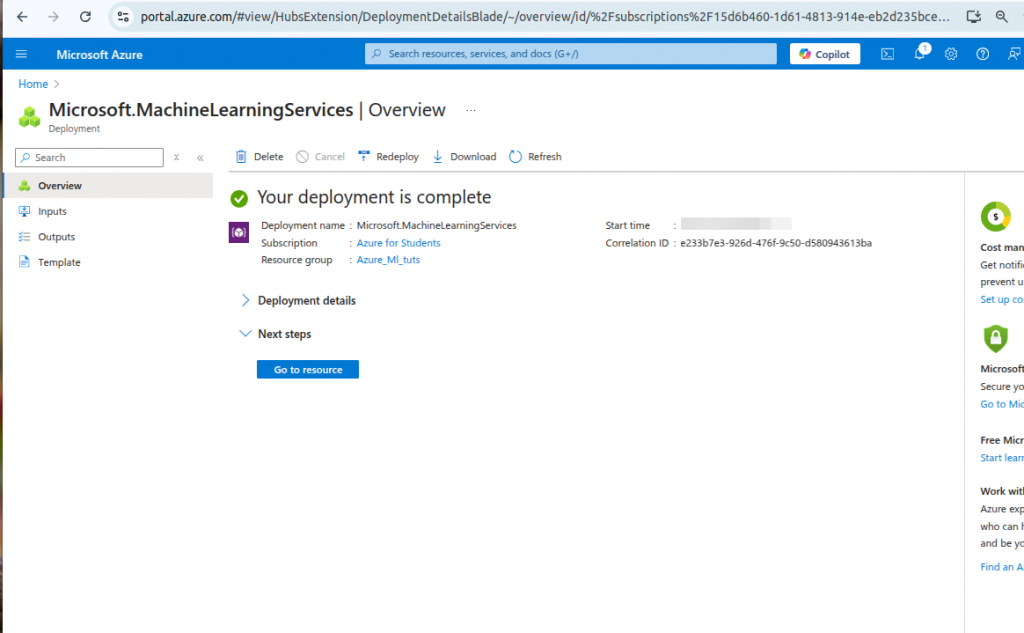
Click on Go to resource.
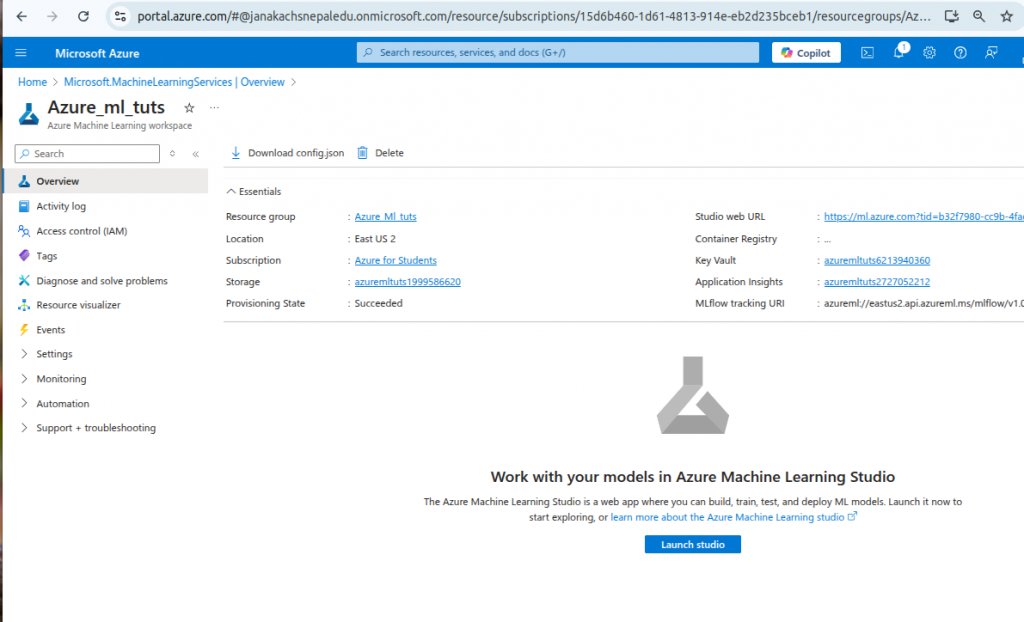
Launch Studio
After launching Look for compute instances
And Add a new one
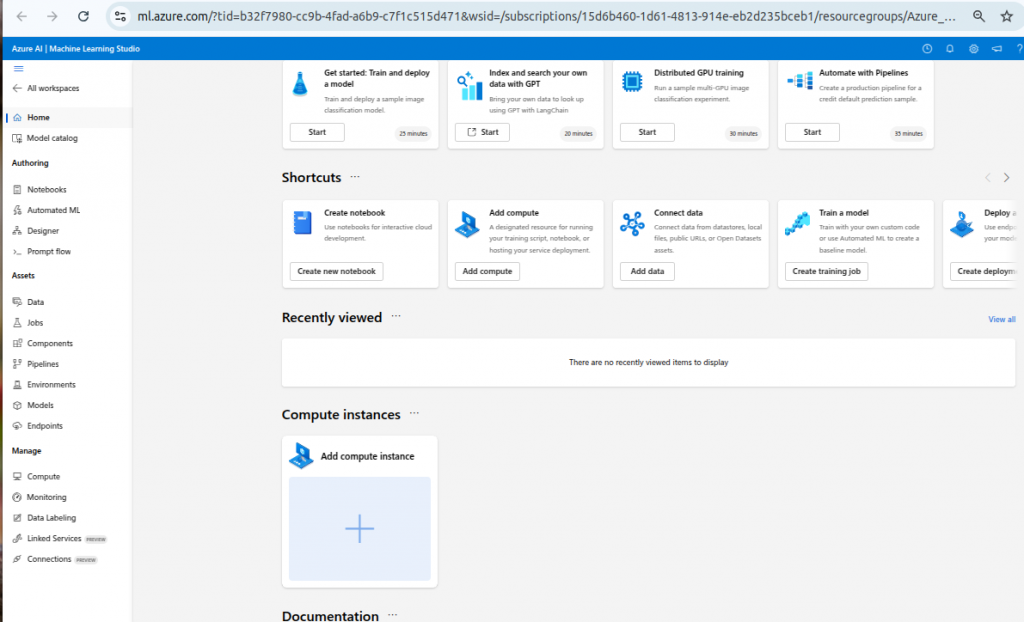
Fill the form
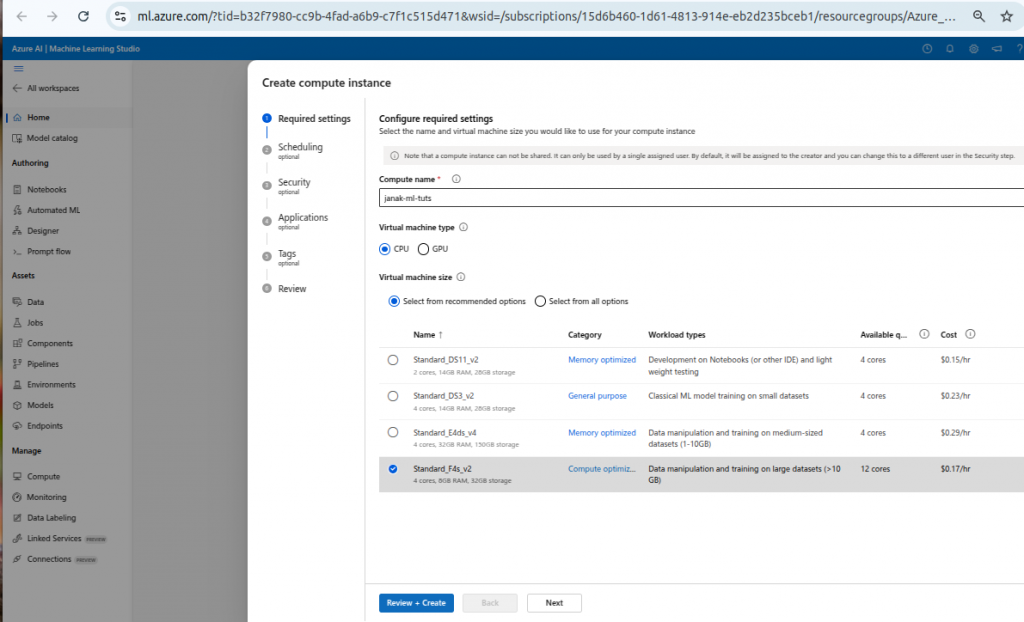
Review and create
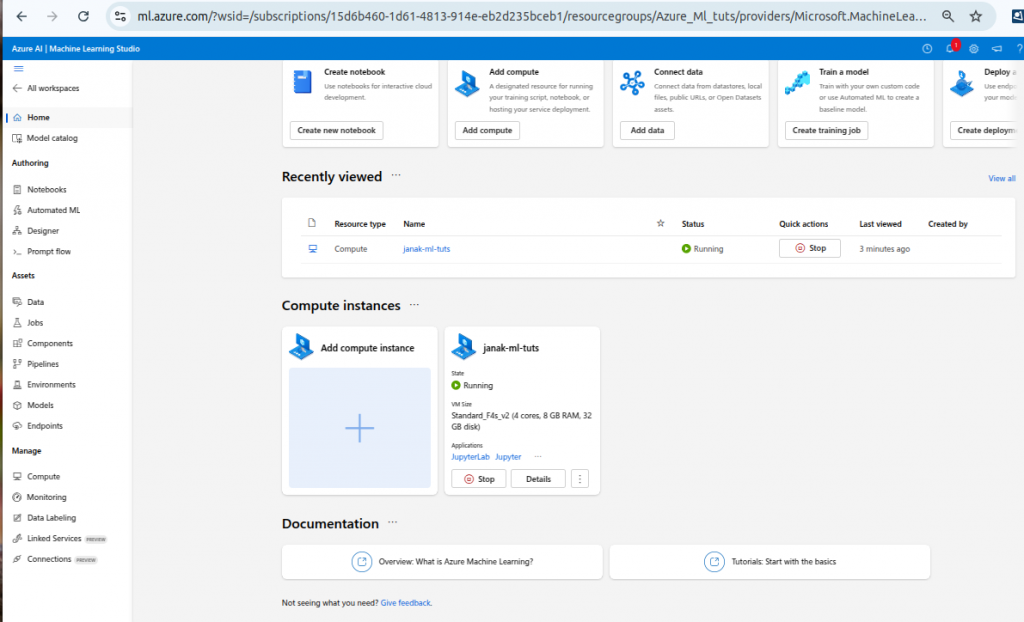
This might take few minutes
Training The Model
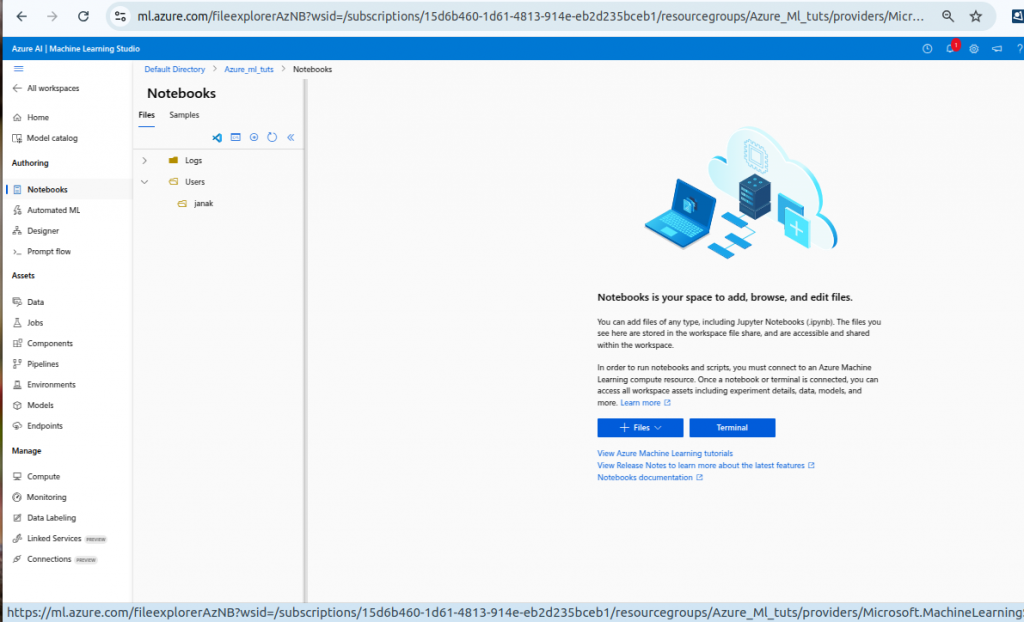
In you Machine Learning Studio homepage, on the left you see a section Authoring. Under the Authoring you will find Notebook. Click on it.
Click on Files to create a folder.
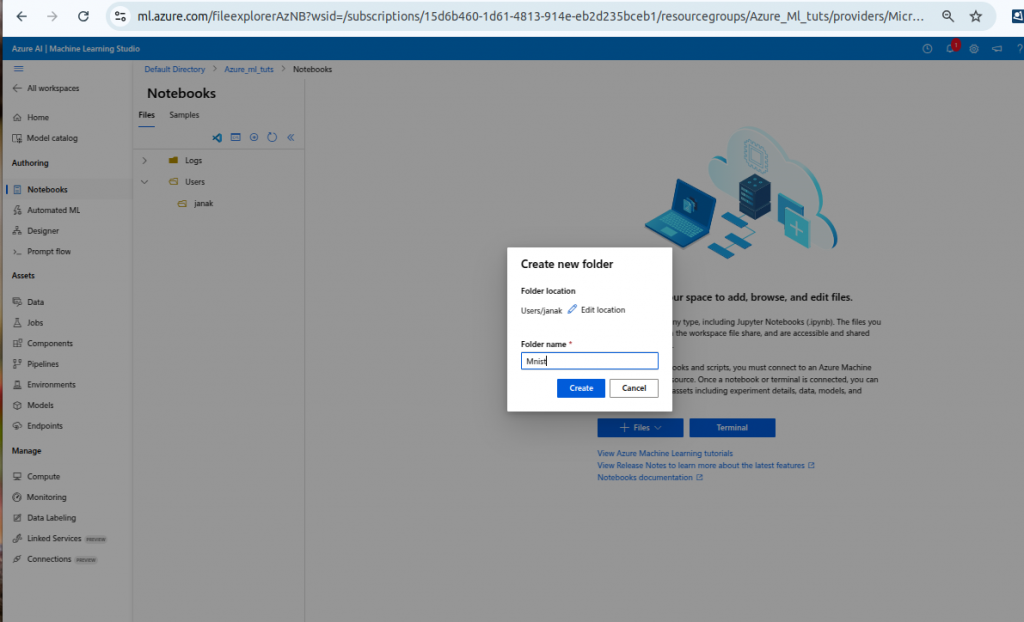
Create a file inside the current folder.
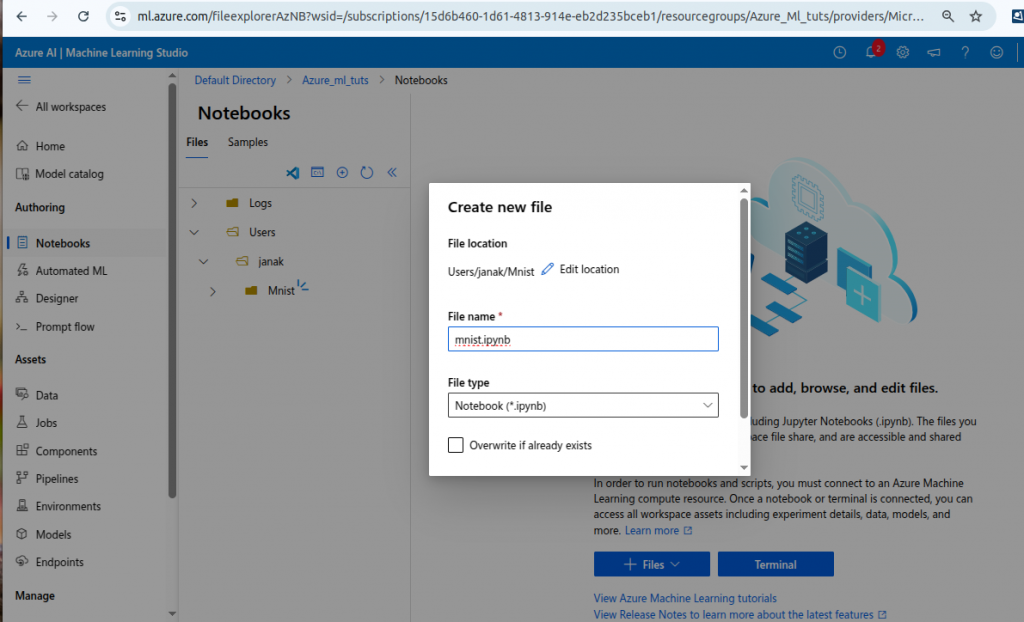
Now you can see your files and folders.
Click on the file.
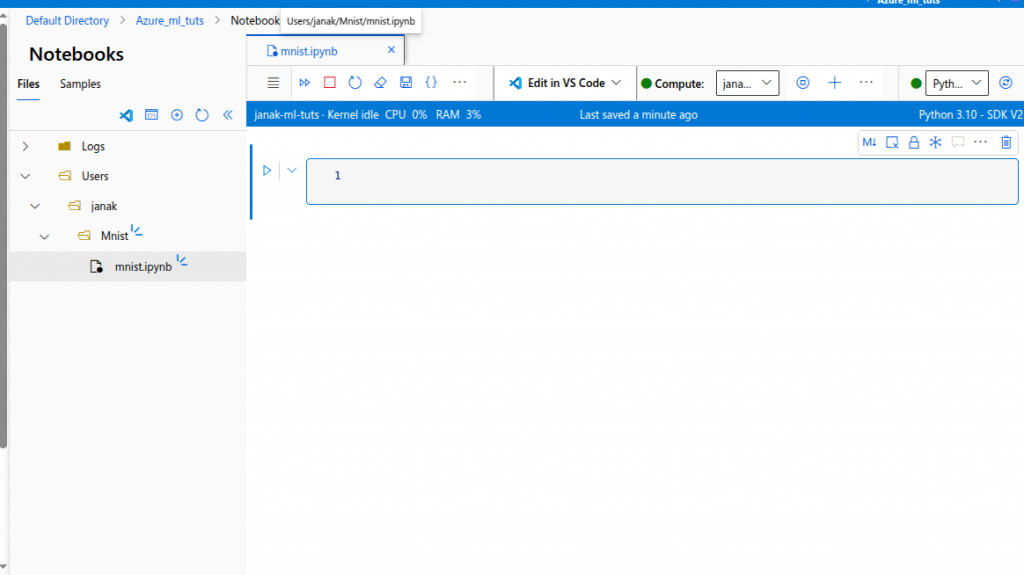
Choose a Compute: the one you have created before and select a python kernel.
Code to Train and Register model
Importing stuffs
from azureml.core import Workspace, Experiment, Run
from azureml.core.model import Model
from sklearn.datasets import fetch_openml
from sklearn.model_selection import train_test_split
from sklearn.preprocessing import StandardScaler
from sklearn.neural_network import MLPClassifier
from sklearn.metrics import accuracy_score
import joblib
import os- from azureml.core import Workspace
- Imports the Workspace class from Azure ML’s core module, which is used to create and manage an Azure Machine Learning workspace for organizing ML resources like experiments, models, and datasets.
- from azureml.core import Experiment
- Imports the Experiment class from Azure ML’s core module, which allows you to create and manage experiments to track and organize ML runs in your workspace.
- from azureml.core import Run
- Imports the Run class from Azure ML’s core module, which represents a single execution of an experiment and is used to log metrics, parameters, and artifacts during training.
- from azureml.core.model import Model
- Imports the Model class from Azure ML’s core module, which provides functionality to register, manage, and deploy machine learning models in Azure ML.
- from sklearn.datasets import fetch_openml
- Imports the fetch_openml function from scikit-learn, which is used to download datasets from the OpenML repository for use in machine learning tasks.
- from sklearn.model_selection import train_test_split
- Imports the train_test_split function from scikit-learn, which splits a dataset into training and testing sets for model evaluation.
- from sklearn.preprocessing import StandardScaler
- Imports the StandardScaler class from scikit-learn, which standardizes features by removing the mean and scaling to unit variance, often improving model performance.
- from sklearn.neural_network import MLPClassifier
- Imports the MLPClassifier class from scikit-learn, which implements a multi-layer perceptron (neural network) for classification tasks.
- from sklearn.metrics import accuracy_score
- Imports the accuracy_score function from scikit-learn, which calculates the accuracy of a model’s predictions by comparing predicted labels to true labels.
- import joblib
- Imports the joblib library, which provides tools for efficiently saving and loading Python objects, commonly used to serialize and deserialize trained machine learning models.
- import os
- Imports the os module from Python’s standard library, which provides functions for interacting with the operating system, such as file and directory management.
Fetch Data, Train model and Save model
# Load MNIST dataset
X, y = fetch_openml('mnist_784', version=1, return_X_y=True)
y = y.astype(int)  # Convert target to integer

# Split into train and test sets
X_train, X_test, y_train, y_test = train_test_split(X, y, test_size=0.2, random_state=42)

# Normalize data
scaler = StandardScaler()
X_train = scaler.fit_transform(X_train)
X_test = scaler.transform(X_test)

# Train MLP model
mlp = MLPClassifier(hidden_layer_sizes=(128, 64), activation='relu', solver='adam', max_iter=20, random_state=42)
mlp.fit(X_train, y_train)

# Evaluate model
y_pred = mlp.predict(X_test)
accuracy = accuracy_score(y_test, y_pred)
print(f"Test Accuracy: {accuracy:.4f}")

# Save model
model_path = "mnist_mlp_model.pkl"
joblib.dump(mlp, model_path)- ** # Load MNIST dataset and X, y = fetch_openml(‘mnist_784’, version=1, return_X_y=True)**
- Downloads the MNIST dataset (handwritten digits) from OpenML, returning features (X) and labels (y) as separate arrays.
- y = y.astype(int) # Convert target to integer
- Converts the target labels (y) to integer type to ensure compatibility with the model’s expected input format.
- ** # Split into train and test sets and X_train, X_test, y_train, y_test = train_test_split(X, y, test_size=0.2, random_state=42)**
- Splits the dataset into 80% training (X_train, y_train) and 20% testing (X_test, y_test) sets, with a fixed random seed for reproducibility.
- ** # Normalize data and scaler = StandardScaler()**
- Initializes a StandardScaler object to standardize the feature data by removing the mean and scaling to unit variance.
- X_train = scaler.fit_transform(X_train)
- Fits the scaler on the training data and transforms X_train to have zero mean and unit variance for better model performance.
- X_test = scaler.transform(X_test)
- Applies the same scaling transformation (based on training data) to the test set X_test to maintain consistency.
- ** # Train MLP model and mlp = MLPClassifier(hidden_layer_sizes=(128, 64), activation=’relu’, solver=’adam’, max_iter=20, random_state=42)**
- Initializes a multi-layer perceptron (MLP) classifier with two hidden layers (128 and 64 neurons), ReLU activation, Adam optimizer, 20 iterations, and a fixed random seed.
- mlp.fit(X_train, y_train)
- Trains the MLP classifier on the scaled training data (X_train) and corresponding labels (y_train).
- ** # Evaluate model and y_pred = mlp.predict(X_test)**
- Uses the trained MLP model to predict labels (y_pred) for the test set (X_test).
- accuracy = accuracy_score(y_test, y_pred)
- Calculates the accuracy of the model by comparing the predicted labels (y_pred) with the true test labels (y_test).
- print(f”Test Accuracy: {accuracy:.4f}”)
- Prints the model’s test accuracy, formatted to four decimal places.
- ** # Save model and model_path = “mnist_mlp_model.pkl”**
- Defines the file path (mnist_mlp_model.pkl) where the trained model will be saved.
- joblib.dump(mlp, model_path)
- Serializes and saves the trained MLP model to the specified file path using joblib for later us
Saving the model
# Azure ML Setup
ws = Workspace.from_config()
model = Model.register(workspace=ws,
                        model_path=model_path,
                        model_name="mnist-mlp",
                        tags={"accuracy": f"{accuracy:.4f}"},
                        description="MLP model for MNIST classification")

print(f"Model registered: {model.name} | Version: {model.version}")- ws = Workspace.from_config()
- Creates an Azure ML Workspace object by loading configuration details (like subscription ID, resource group, and workspace name) from a local config.json file.
- model = Model.register(workspace=ws, model_path=model_path, model_name=”mnist-mlp”, tags={“accuracy”: f”{accuracy:.4f}”}, description=”MLP model for MNIST classification”)
- Registers the trained model (saved at model_path) in the Azure ML workspace ws with the name “mnist-mlp”, tags it with the model’s accuracy, and adds a description for clarity.
- print(f”Model registered: {model.name} | Version: {model.version}”)
- Prints a confirmation message with the registered model’s name (mnist-mlp) and its version number assigned by Azure ML.
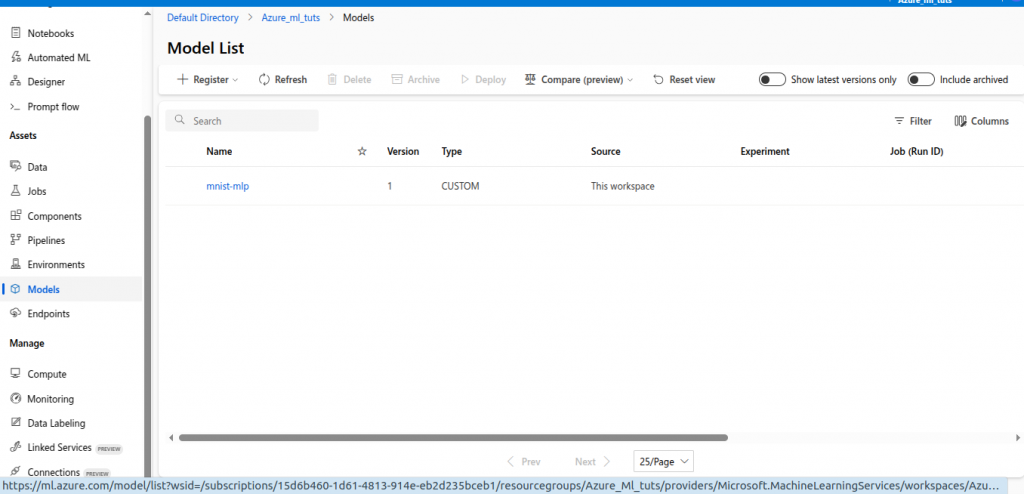
You can find the model in Assets>Model
Deploying The model
Go back to and create another file in the same folder.
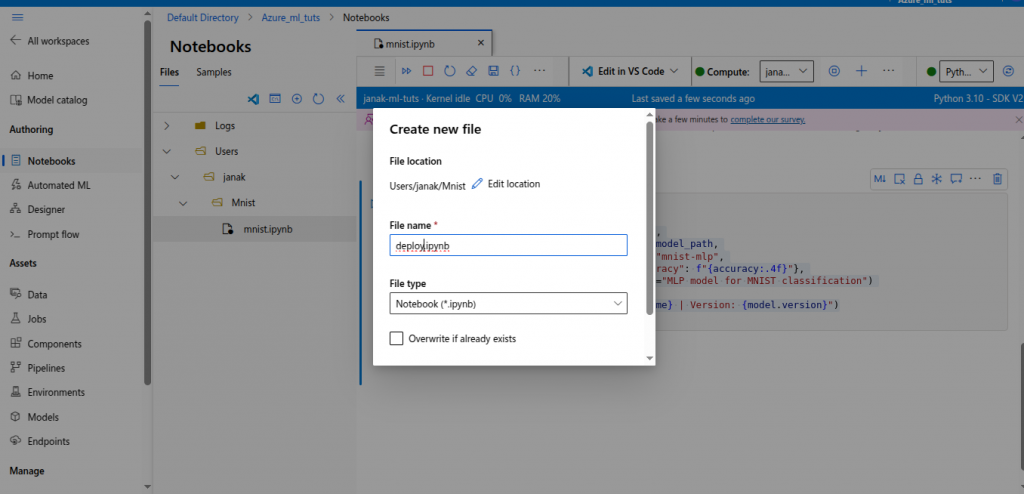
Install azureml-sdk
!pip install --upgrade azureml-sdk- !pip install –upgrade azureml-sdk
- Uses pip to install or upgrade the azureml-sdk package, which provides the Azure Machine Learning Python SDK for interacting with Azure ML services like workspaces, experiments, and model management.
Creation of score.py
score.py script, is typically used for deploying a model in Azure ML.
%%writefile score.py
import joblib
import json
import numpy as np
from azureml.core.model import Model

def init():
    global model
    model_path = Model.get_model_path("mnist-mlp")  # Load registered model
    model = joblib.load(model_path)

def run(raw_data):
    try:
        data = np.array(json.loads(raw_data)["data"])  # Parse input
        predictions = model.predict(data)  # Make predictions
        return {"predictions": predictions.tolist()}
    except Exception as e:
return {"error": str(e)}- %%writefile score.py
A Jupyter notebook magic command that writes the following code to a file named score.py for use in model deployment. - import joblib
Imports the joblib library to load the serialized machine learning model saved earlier. - import json
Imports the json module to parse the input data, which is expected to be in JSON format. - import numpy as np
Imports NumPy as np to handle numerical operations, such as converting input data into arrays for prediction. - from azureml.core.model import Model
Imports the Model class from Azure ML to retrieve the registered model’s file path during deployment. - def init():
Defines an init function that Azure ML calls once during deployment to initialize the model. - global model
Declares the model variable as global so it can be accessed in both init and run functions. - model_path = Model.get_model_path(“mnist-mlp”) # Load registered model
Retrieves the file path of the registered model named “mnist-mlp” from Azure ML’s model registry. - model = joblib.load(model_path)
Loads the trained model from the retrieved file path into memory using joblib for inference. - def run(raw_data):
Defines a run function that Azure ML calls for each inference request, taking raw_data as input. - try:
Starts a try-except block to handle potential errors during inference gracefully. - data = np.array(json.loads(raw_data)[“data”]) # Parse input
Parses the input raw_data (JSON string), extracts the “data” field, and converts it to a NumPy array for prediction. - predictions = model.predict(data) # Make predictions
Uses the loaded model to make predictions on the parsed input data. - return {“predictions”: predictions.tolist()}
Returns the model’s predictions as a dictionary with the key “predictions”, converting the NumPy array to a list for JSON serialization. - except Exception as e:
Catches any errors that occur during the run function’s execution. - return {“error”: str(e)}
Returns a dictionary with the key “error” and the error message as a string if an exception occurs.
Creation of environment.yml
environment.yml file, defines a Conda environment for deploying a model in Azure ML,.
%%writefile environment.yml
name: mnist-env
dependencies:
  - python=3.10
  - scikit-learn
  - joblib
  - pip
  - pip:
      - azure-ai-ml  # Required for SDK v2
      - azureml-defaults  # ✅ Required for deployment
      - azureml-inference-server-http  # ✅ Required for scoring
      - fastapi  # ✅ Required for API
- uvicorn # ✅ Required for API server- %%writefile environment.yml
- A Jupyter notebook magic command that writes the following YAML content to a file named environment.yml for defining the Conda environment.
- name: mnist-env
- Specifies the name of the Conda environment as mnist-env, which will be created when this file is used.
- dependencies:
- Begins the list of dependencies required for the environment, including Python packages and their versions.
- – python=3.10
- Specifies that the environment should use Python version 3.10 as the base interpreter.
- – scikit-learn
- Includes the scikit-learn library, which is needed since the model (MLPClassifier) was trained using scikit-learn.
- – joblib
- Includes the joblib library, which is required to load the serialized model in the scoring script.
- – pip
- Ensures that pip is installed in the Conda environment, allowing additional packages to be installed via pip.
- – pip:
- Begins a sublist of packages to be installed using pip (as opposed to Conda), typically for packages not available in Conda channels.
- – azure-ai-ml # Required for SDK v2
- Installs the azure-ai-ml package, which provides the Azure ML SDK v2 for interacting with Azure ML services (e.g., workspace, model management).
- – azureml-defaults
- Installs the azureml-defaults package, which includes default dependencies and configurations required for Azure ML model deployment.
- – azureml-inference-server-http
- Installs the azureml-inference-server-http package, which provides the HTTP server needed to handle inference requests in Azure ML endpoints.
- – fastapi
- Installs the fastapi package, a web framework required to create the API for the inference endpoint in Azure ML.
- – uvicorn
- Installs the uvicorn package, an ASGI server required to run the FastAPI application for the inference endpoint.
Creation of deploy.py
deploy.py script, is used to deploy a machine learning model as a web service in Azure ML.
%%writefile deploy.py
from azureml.core import Workspace, Model, Environment
from azureml.core.model import InferenceConfig
from azureml.core.webservice import AciWebservice, Webservice

# Load Azure ML Workspace
ws = Workspace.from_config()

# Load Registered Model
model = Model(ws, name="mnist-mlp")

# Create an Environment
env = Environment.from_conda_specification(name="mnist-env", file_path="environment.yml")

# Create Inference Config
inference_config = InferenceConfig(entry_script="score.py", environment=env)

# Deploy to ACI
deployment_config = AciWebservice.deploy_configuration(cpu_cores=1, memory_gb=1)

service = Model.deploy(workspace=ws,
                        name="mnist-serviceeee",
                        models=[model],
                        inference_config=inference_config,
                        deployment_config=deployment_config)

service.wait_for_deployment(show_output=True)

print(f"Service state: {service.state}")
print(f"Scoring URI: {service.scoring_uri}")- %%writefile deploy.py
- A Jupyter notebook magic command that writes the following code to a file named deploy.py for deploying the model.
- from azureml.core import Workspace, Model, Environment
- Imports Workspace, Model, and Environment classes from Azure ML to manage the workspace, model, and deployment environment.
- from azureml.core.model import InferenceConfig
- Imports the InferenceConfig class to configure the scoring script and environment for model inference.
- from azureml.core.webservice import AciWebservice, Webservice
- Imports AciWebservice and Webservice classes to deploy the model as a web service using Azure Container Instances (ACI) and manage the deployed service.
- # Load Azure ML Workspace and ws = Workspace.from_config()
- Loads the Azure ML workspace by reading configuration details (e.g., subscription ID, resource group) from a local config.json file.
- # Load Registered Model and model = Model(ws, name=”mnist-mlp”)
- Retrieves the registered model named “mnist-mlp” from the Azure ML workspace for deployment.
- # Create an Environment and env = Environment.from_conda_specification(name=”mnist-env”, file_path=”environment.yml”)
- Creates an Azure ML environment named “mnist-env” using the specifications (dependencies) defined in the environment.yml file.
- # Create Inference Config and inference_config = InferenceConfig(entry_script=”score.py”, environment=env)
- Defines the inference configuration, linking the scoring script (score.py) and the environment (env) for model inference.
- # Deploy to ACI and deployment_config = AciWebservice.deploy_configuration(cpu_cores=1, memory_gb=1)
- Configures the deployment to Azure Container Instances (ACI) with 1 CPU core and 1 GB of memory for the web service.
- service = Model.deploy(workspace=ws, name=”mnist-serviceeee”, models=[model], inference_config=inference_config, deployment_config=deployment_config)
- Deploys the model as a web service named “mnist-serviceeee” in the workspace ws, using the specified model, inference configuration, and deployment configuration.
- service.wait_for_deployment(show_output=True)
- Waits for the deployment to complete and prints logs to the console to monitor the deployment process.
- print(f”Service state: {service.state}”)
- Prints the state of the deployed web service (e.g., “Healthy” if successful, or “Failed” if there’s an issue).
- print(f”Scoring URI: {service.scoring_uri}”)
- Prints the scoring URI (endpoint URL) of the deployed web service, which can be used to send inference requests.
Running to deploy
Now, run the deploy.py
!python deploy.pyIt might take few years to deploy.
This script automates the deployment of the “mnist-mlp” model as a real-time web service using Azure Container Instances (ACI), which is suitable for lightweight deployments or testing.
The score.py script (from earlier) handles inference requests, and the environment.yml file ensures the correct dependencies are available in the deployed environment.
The deployed service’s scoring_uri can be used to send HTTP requests for predictions.
Check the deployment
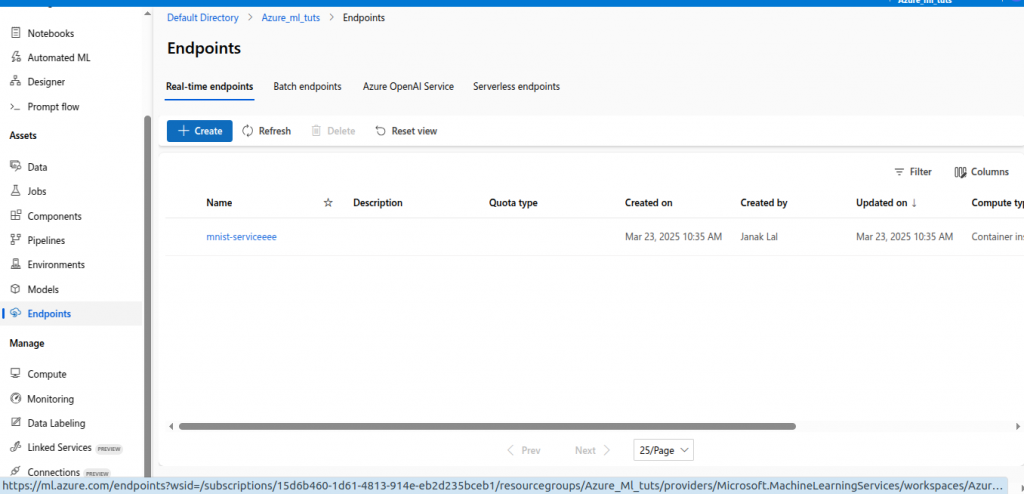
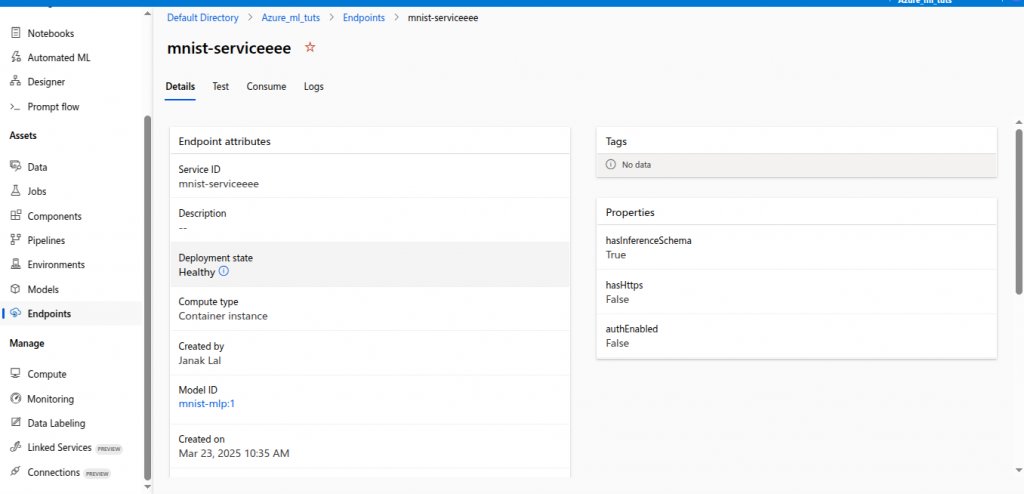
Click on Consume, find the link and copy the link. Alternatively you can use the code given.
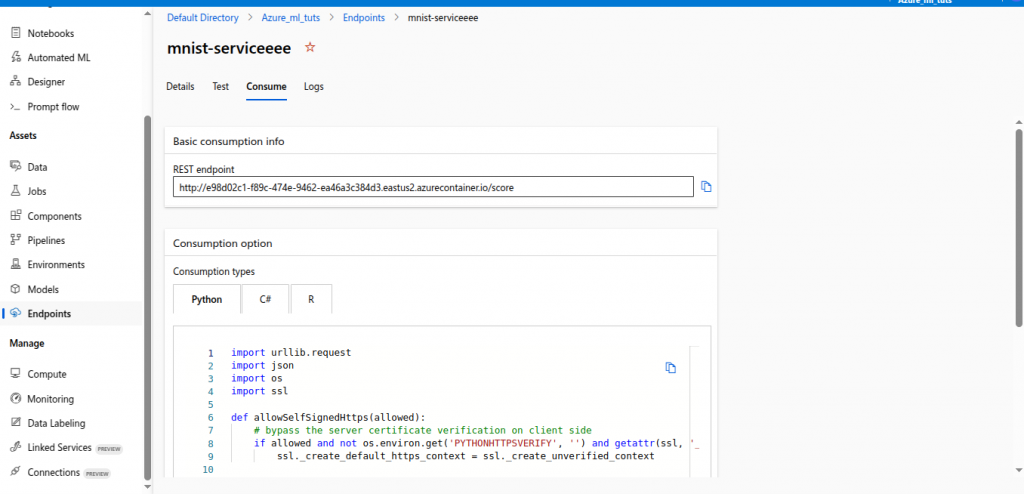
Testing the Deployment from my pc
Open a notebook in your pc. Hope your pc have python.
#Testing the deployed mnist model
import requests
import json
import numpy as np
import matplotlib.pyplot as plt
from sklearn.datasets import fetch_openml

# Load MNIST dataset
mnist = fetch_openml("mnist_784", version=1, as_frame=False)

# Select the first image and label
image = mnist.data[-5].reshape(28, 28)  # Reshape to 28x28
label = mnist.target[-5]  # Get the label

# Display the image
plt.imshow(image, cmap="gray")
plt.title(f"MNIST Digit: {label}")
plt.axis("off")
plt.show()

# Flatten the image and normalize pixel values (0-1)
image = image.reshape(1, 784) / 255.0

# Define the input data
input_data = {"data": image.tolist()}

# Scoring URI (Replace with your actual URI)
scoring_uri = "http://e98d02c1-f89c-474e-9462-ea46a3c384d3.eastus2.azurecontainer.io/score"

# Set headers
headers = {"Content-Type": "application/json"}

# Send POST request
response = requests.post(scoring_uri, data=json.dumps(input_data), headers=headers)

# Print response
print("Response:", response.json())
put your own link to endpoint in scorin_uri.
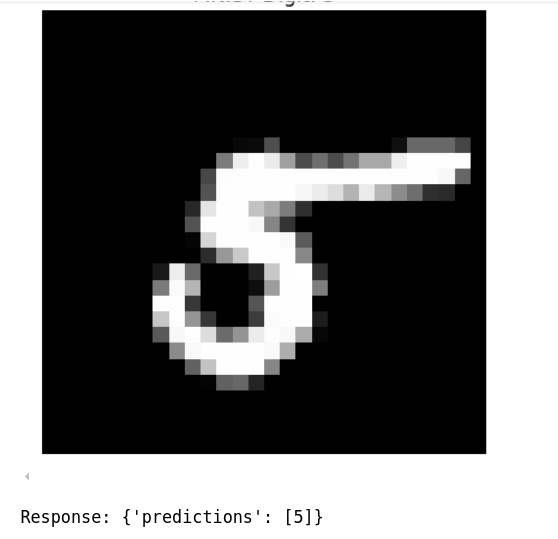
This code tests a deployed MNIST model by sending a prediction request to its Azure ML endpoint and visualizing the input image. It starts by loading the MNIST dataset using fetch_openml, selecting the fifth-to-last image and its label, and displaying the image with matplotlib. The image is then reshaped, normalized (pixel values scaled to 0-1), and formatted as JSON input. A POST request is sent to the model’s scoring URI (a placeholder URL in this case) with the input data, and the response containing the model’s prediction is printed. This script verifies that the deployed model can process input and return predictions correctly.
Your output might look something like this. You may need to install the necessary python libraries.
Kill it
The running compute instance and the endpoint might cost you. So better kill it when not in use.