
Django Image Processing Webapp Part II
In part I, we had only two options: Rotate and Transpose. In second part, we will add two drop down lists and other options so that the user can choose between many filters to process the image.
Table of Contents
- List of Filters
- Adding Drop Down in html
- Second Drop Down
- Adding Basic filters list
- Adding Spatial filters list
- Adding Frequency Filters list
- Git push
List of Filters
We have three types of filters.
- Basic
- Spatial Filters
- Frequency Filters
Within Basic we want user to choose between following options.
- Basic
- Bit Plane Slicing
- Power Transform
- Image Threshold
- Image Negative
- Histogram Equalization
For “Bit Plane Slicing”, “Power Transform” and “Image Threshold” we will ask the user for the extra input.
These options and the option for number input will be generated dynamically using javascript.
For the Spatial we will ask the user to choose between one of the following options.
- Spatial Filters
- Smooth Filter
- Sharp Filter
- Min Filter
- Max Filter
- Median Filter
- High Boost Filter
We will also ask the use to enter the size of kernel for these filters.
For Frequency filters we will give the following options to the user.
- Frequency Filters
- Low Pass Filter
- High Pass Filter
Adding Drop Down in html
To adding layers of drop down list and a place to input number, edit the templates/image_process.html as follows:
{% extends "base.html" %}
{% block content %}
{% load static %}


{% if object%}
<h1>Image uploaded</h1>
<img src="{{ object.image.url }}">
    {% if object.image_enhanced %}
    <img src="{{ object.image_enhanced.url }}">
    {% endif %}

    <form id="dropdown-form" method="post" url="">
        {% csrf_token %}
        <label for="first-dropdown">First Dropdown:</label>
    <select name="first-dropdown" id="first-dropdown">
      <option value="">Choose an option</option>
      <option value="1">Basic</option>
      <option value="2">Spatial</option>
      <option value="3">Frequency</option>

    </select>

    <!-- HTML code for the second dropdown menu -->
    <div id="second-dropdown-container"></div>


    <!--Input number -->
    <div id="number-input"></div>
    <button id="submit-button">Submit</button>
    </form>

{% endif %}
<script type="text/javascript" src="{% static 'js/script.js' %}"></script>
{% endblock content %}
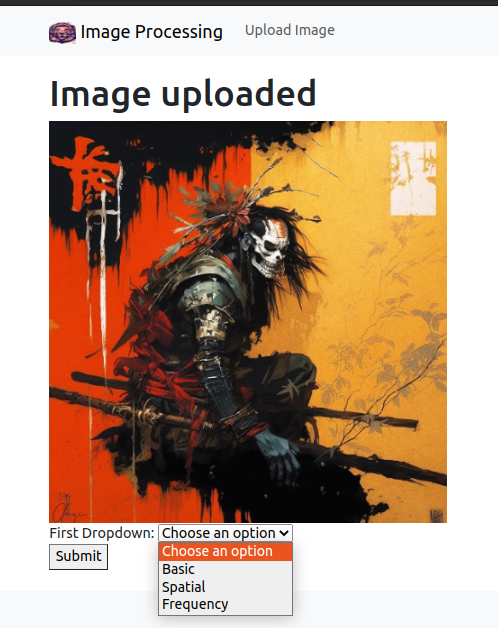
Here, we have options for two drop down menu and a number input. We have added three options in out “first-dropdown”. We will add options dynamically in second drop down. We will also add the number input only when needed. This addition of drop down menu and number input will be handled dynamically by ‘script.js’.
The drop down will look as follow for now.
Add the second drop down according to value of first drop down.
Create a image_project/static/js/static.js.
// Get references to the dropdown menus and containers
const firstDropdown = document.getElementById("first-dropdown");
const secondDropdownContainer = document.getElementById("second-dropdown-container");
const thirdDropdownContainer = document.getElementById("third-dropdown-container");
const numberInputContainer = document.getElementById("number-input")
const selectButton = document.getElementById("submit-button")


let firstValue = 1
let secondValue = ""
let thirdValue = ""

// Add event listener to the first dropdown menu
firstDropdown.addEventListener("change", () => {
    // Remove any existing options from the second and third dropdown menus
    secondDropdownContainer.innerHTML = "";


    // Get the selected value from the first dropdown menu
    const selectedValue = firstDropdown.value;

    if (selectedValue === "1") {
        console.log("Basic Selected")
    }
    else if (selectedValue === "2"){
        console.log("Spatial Filter Selected")
    }

    else if (selectedValue === "3"){
        console.log("Frequency filter selected")
    }
})
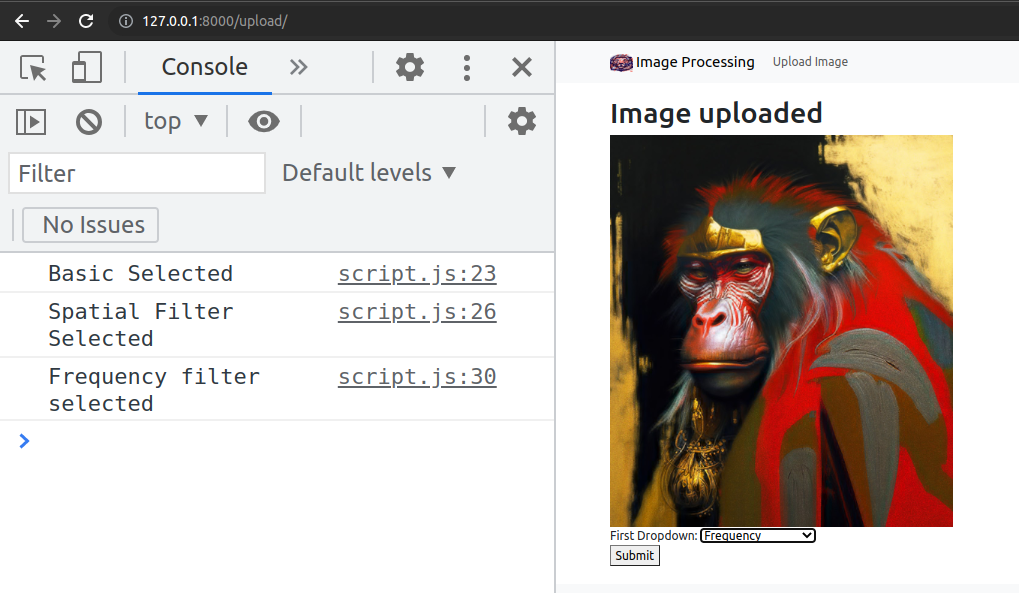
For now we just check which option is selected in first drop down menu and print name of that option in javascript console.
Edit the Image/views.py to do something according to selected options of first drop down.
from django.shortcuts import render
from django.http import HttpResponse
from .models import ImageEnhance
from .forms import ImageForm

# Create your views here.


# Create your views here.
def imageHome(request):

    try:
        images = ImageEnhance.objects.all()

        return render(request,'image_home.html',{'images':images})
    except:
        return HttpResponse("We do not have any images to show you")

def imageForm(request):
    if request.method == 'POST':
        form = ImageForm(request.POST,request.FILES)
        if form.is_valid():
            #save the model instance
            instance = form.save(commit=False)

            instance.save()

            return render(request,"image_process.html",{"form":form,'object':instance})
        else:
            latest_object = ImageEnhance.objects.latest('id')
            process = request.POST["first-dropdown"]

            if process == '1':
                print("************Basic Selected")
                return HttpResponse("Basic Selected")

            elif process == '2':
                print("************ Spatial Filter Selcted")
                return HttpResponse("Spatial Filter Selected")
            elif process == '3':
                print("************ Freuency Filter Selected")
                return HttpResponse("Frequency Filter Selected")


    else:
        form = ImageForm()

    return render(request,"image_form.html",{'form':form})
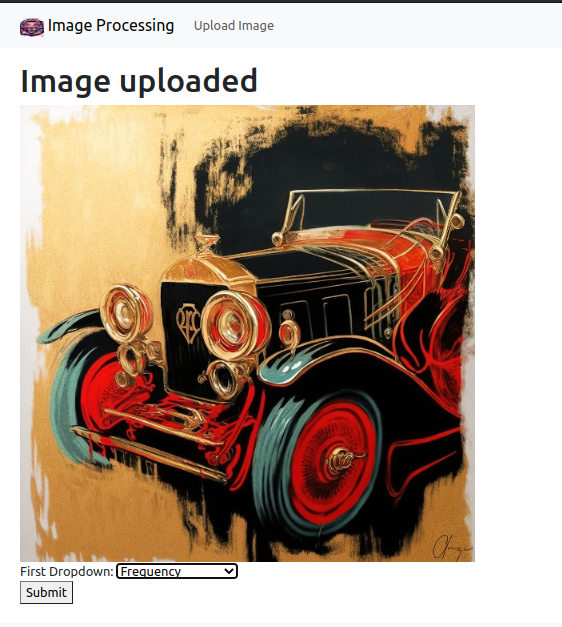
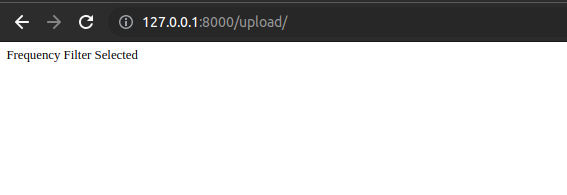
Now, we will be redirected to a message according to the different options selected.
Add Options in second level drop down menu for Basic filters.
Add the list of basic filters in script.js
const basicFilters = ["Select an option","Bit Plane Slicing",'Power Transform','Image Threshold','Image Negative','Histogram Equalization']
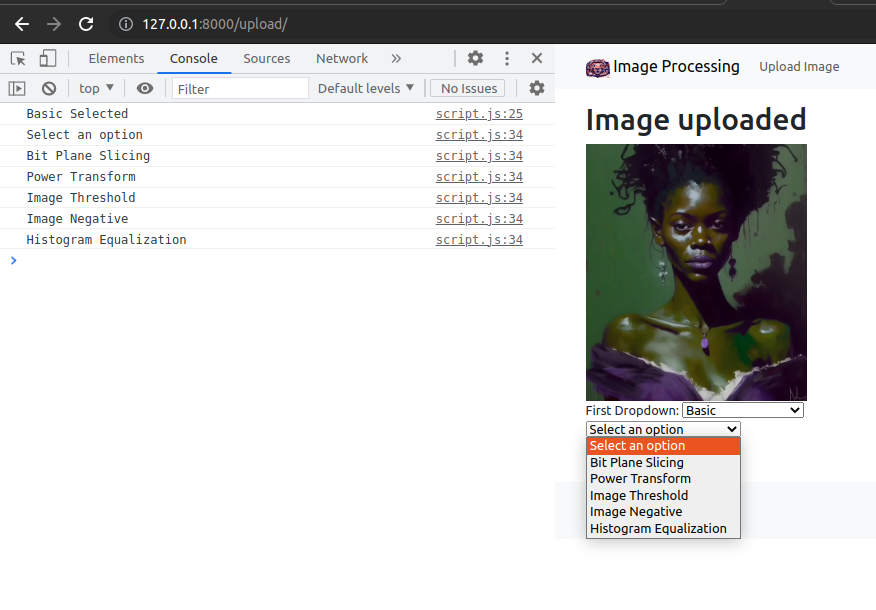
Now, loop through all the options in above array, to add them as the list of second drop down.
.............................................
if (selectedValue === "1") {
        console.log("Basic Selected")
        firstValue = 1
        const secondDropdown = document.createElement("select");
        secondDropdown.setAttribute("name","second-dropdown");

        var options = [];


        for (index = 0; index < basicFilters.length; index++) {
            console.log(basicFilters[index]);
            options[index] = document.createElement("option");
            options[index].value = "1a";
            options[index].textContent = basicFilters[index];
            secondDropdown.appendChild(options[index]);

        }

        secondDropdownContainer.appendChild(secondDropdown);

    }

.................................................................
We will also add a range slider for few filters.
Adding more to script.py
.....................................................................
if (selectedValue === "1") {
        console.log("Basic Selected")
        firstValue = 1
        const secondDropdown = document.createElement("select");
        secondDropdown.setAttribute("name","second-dropdown");

        var options = [];


        for (index = 0; index < basicFilters.length; index++) {
            console.log(basicFilters[index]);
            options[index] = document.createElement("option");
            options[index].value = "1"+String.fromCharCode(65+index);
            console.log("1"+String.fromCharCode(65+index));
            options[index].textContent = basicFilters[index];
            secondDropdown.appendChild(options[index]);

        }


        secondDropdownContainer.appendChild(secondDropdown);

        secondDropdown.addEventListener("change",() => {
            secondValue = secondDropdown.value

            if(secondValue === "1B"){
                console.log(basicFilters[1])

                //following line of code is to remove any other div set by other options
                while(numberInputContainer.hasChildNodes()){
                    numberInputContainer.removeChild(numberInputContainer.children[0]);

                  }

                  //the range of numbers that we want user to enter in case of bitplane slicing is 1-8
                  //we will add the number slider (range 0-8)

                  var numInput = document.createElement("INPUT");
                    numInput.setAttribute("type", "range");
                    numInput.setAttribute("name","num-Input");
                    numInput.setAttribute("min","0");
                    numInput.setAttribute("max","8");
                    numInput.setAttribute("value","5");
                    numInput.setAttribute("step","1")

                    numInput.setAttribute("oninput","this.value")

                    var showValue = document.createElement("output");

                    numberInputContainer.appendChild(numInput)
                    numberInputContainer.appendChild(showValue);
                    showValue.innerText = numInput.value;
                    numInput.setAttribute("oninput","this.nextElementSibling.innerText = this.value")

                    numberValue = numInput.value


            }

            else if(secondValue === "1C"){
                console.log(basicFilters[2]);


                //following line of code is to remove any other div set by other options

                  while(numberInputContainer.hasChildNodes()){
                    numberInputContainer.removeChild(numberInputContainer.children[0]);

                  }
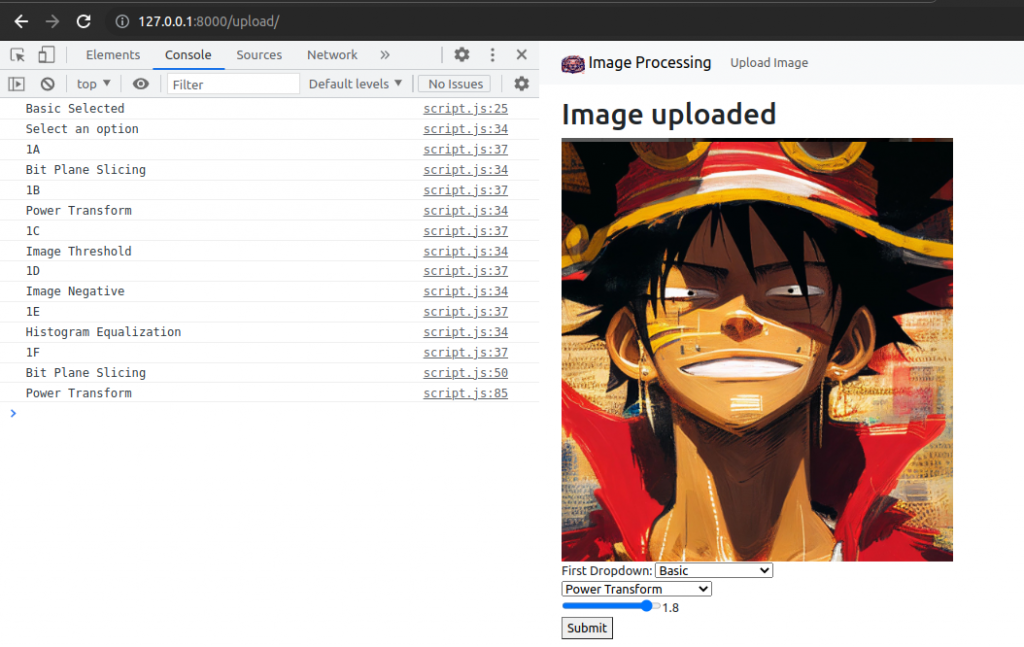
                  //the range of numbers that we want user to enter in case of power trasnform is 0-2 with the step size of 0.1
                  //we will add the number slider (range 0-8)

                  var numInput = document.createElement("INPUT");
                    numInput.setAttribute("type", "range");
                    numInput.setAttribute("name","num-Input");
                    numInput.setAttribute("min","0");
                    numInput.setAttribute("max","2");
                    numInput.setAttribute("value","1.1");
                    numInput.setAttribute("step","0.1")

                    numInput.setAttribute("oninput","this.value")

                    var showValue = document.createElement("output");

                    numberInputContainer.appendChild(numInput)
                    numberInputContainer.appendChild(showValue);
                    showValue.innerText = numInput.value;
                    numInput.setAttribute("oninput","this.nextElementSibling.innerText = this.value")

                    numberValue = numInput.value

            }

            else if(secondValue === "1D"){
                console.log(basicFilters[3]);

                //following line of code is to remove any other div set by other options

                while(numberInputContainer.hasChildNodes()){
                    numberInputContainer.removeChild(numberInputContainer.children[0]);

                  }
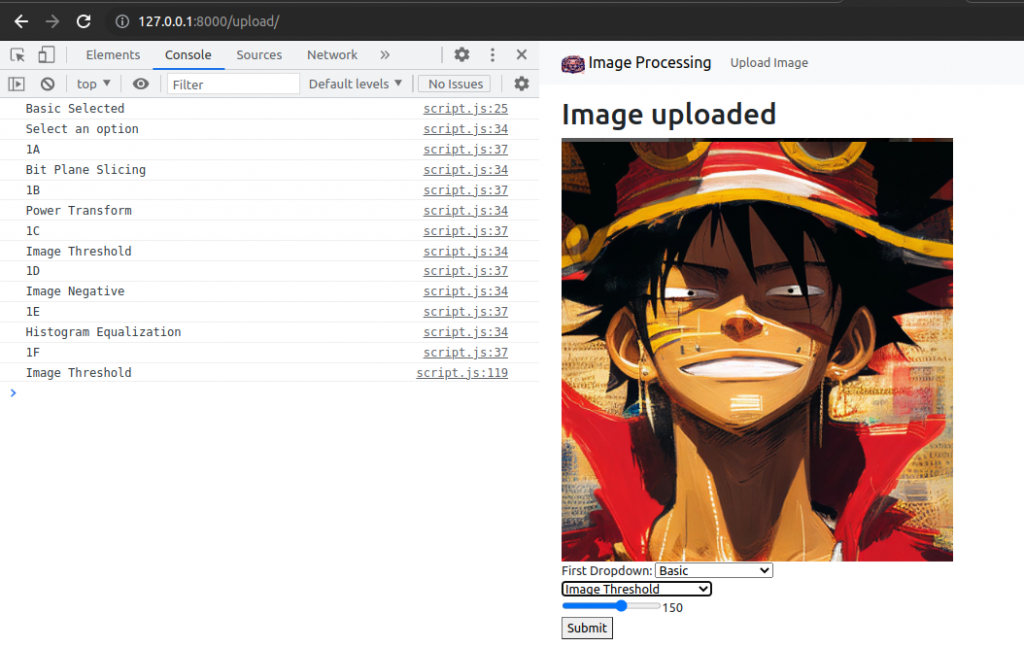
                  //the range of numbers that we want user to enter in case of Threshold is 10-240 with the step size of 1
                  //we will add the number slider (range 0-8)

                  var numInput = document.createElement("INPUT");
                    numInput.setAttribute("type", "range");
                    numInput.setAttribute("name","num-Input");
                    numInput.setAttribute("min","10");
                    numInput.setAttribute("max","240");
                    numInput.setAttribute("value","150");
                    numInput.setAttribute("step","1")

                    numInput.setAttribute("oninput","this.value")

                    var showValue = document.createElement("output");

                    numberInputContainer.appendChild(numInput)
                    numberInputContainer.appendChild(showValue);
                    showValue.innerText = numInput.value;
                    numInput.setAttribute("oninput","this.nextElementSibling.innerText = this.value")

                    numberValue = numInput.value

            }

            else if(secondValue === "1E"){
                console.log(basicFilters[4]);

                //following line of code is to remove any other div set by other options

                while(numberInputContainer.hasChildNodes()){
                    numberInputContainer.removeChild(numberInputContainer.children[0]);

                  }

                //We are not asking user to enter any number in case of Negative Image


            }

            else if(secondValue === "1F"){
                console.log(basicFilters[5]);
                //following line of code is to remove any other div set by other options

                while(numberInputContainer.hasChildNodes()){
                    numberInputContainer.removeChild(numberInputContainer.children[0]);

                  }

                //We are not asking user to enter any number in case of Histogram Equlization

            }

            else if(secondValue === '1A'){

                //following line of code is to remove any other div set by other options

                while(numberInputContainer.hasChildNodes()){
                    numberInputContainer.removeChild(numberInputContainer.children[0]);

                  }

            }


        })


    }

..........................................................................
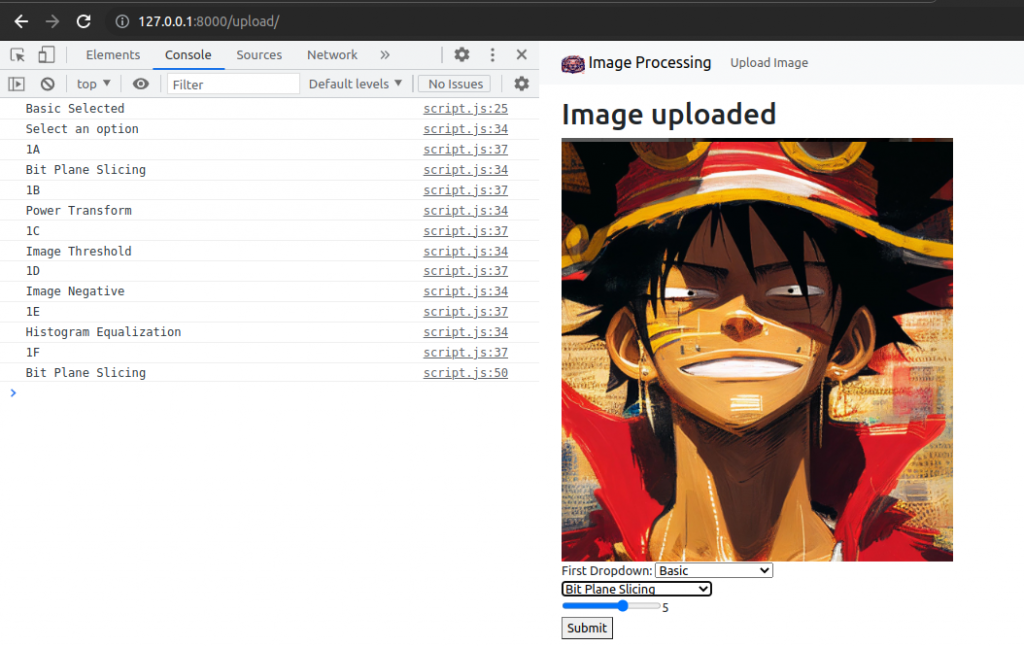
Rang Slider for bit plane slicing
Range Slider for Power Transform
Range Slider for Threshold
Add Options in second level drop down menu for Spatial filters.
Add the list of spatial filters in script.js
.............................................................
const spatialFilters = ["Select an option","Smooth Filter","Sharp Filter","Min Filter","Max Filter","Median Filter","High Boost Filter"]
.............................................................
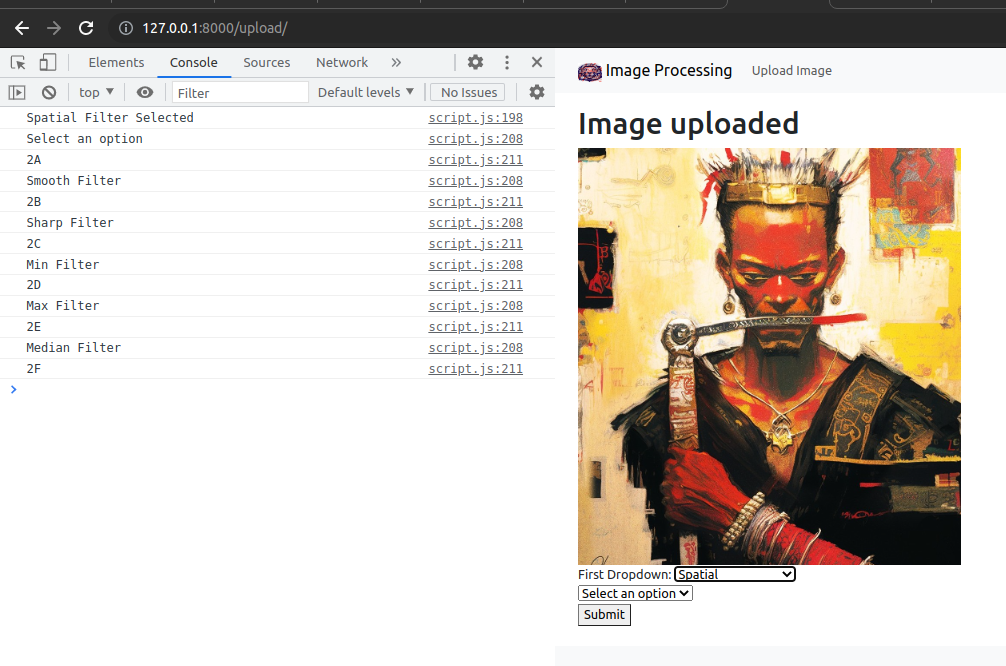
Following code will all the options in second drop down for Spatial filters.
........................................................
else if (selectedValue === "2"){
        console.log("Spatial Filter Selected")

        firstValue = 2
        const secondDropdown = document.createElement("select");
        secondDropdown.setAttribute("name","second-dropdown");

        var options = [];


        for (index = 0; index < spatialFilters.length; index++) {
            console.log(spatialFilters[index]);
            options[index] = document.createElement("option");
            options[index].value = "2"+String.fromCharCode(65+index);
            console.log("2"+String.fromCharCode(65+index));
            options[index].textContent = spatialFilters[index];
            secondDropdown.appendChild(options[index]);

        }


        secondDropdownContainer.appendChild(secondDropdown);
    }
......................................................................
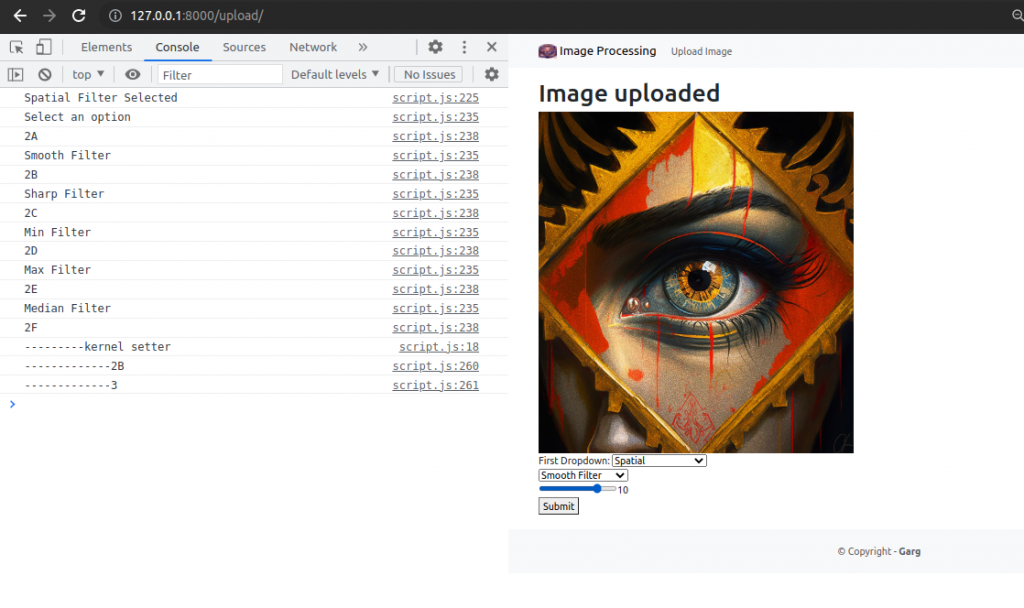
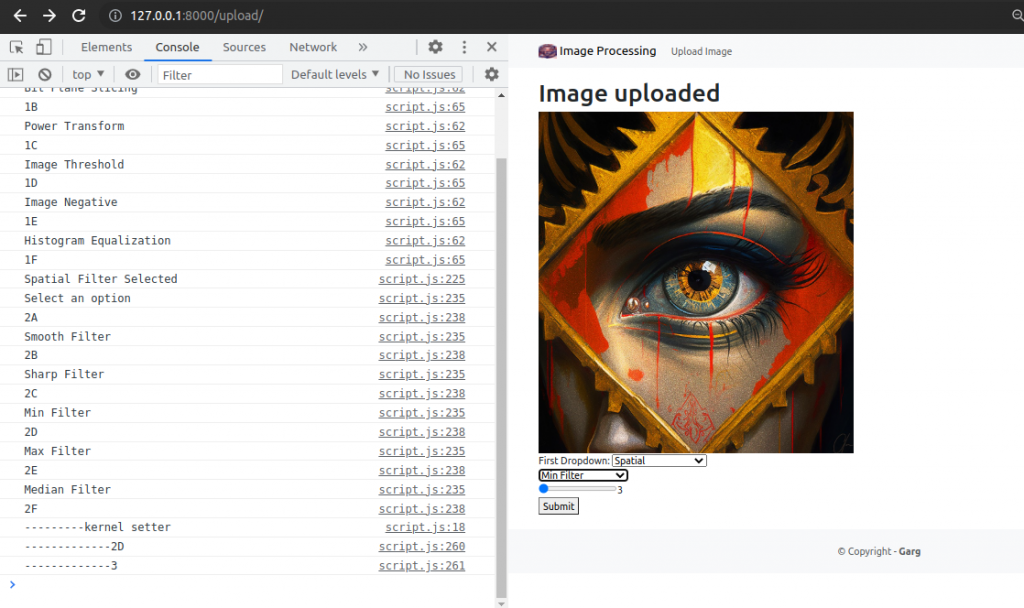
We will add range slider for user to input the kernel size
...................................................................

function kernelSetter() {
    console.log("---------kernel setter")
    var numInput = document.createElement("INPUT");
                numInput.setAttribute("type", "range");
                numInput.setAttribute("name","num-Input");
                numInput.setAttribute("min","3");
                numInput.setAttribute("max","12");
                numInput.setAttribute("value","3");
                numInput.setAttribute("step","1")

                numInput.setAttribute("oninput","this.value")

                var showValue = document.createElement("output");

                numberInputContainer.appendChild(numInput)
                numberInputContainer.appendChild(showValue);
                showValue.innerText = numInput.value;
                numInput.setAttribute("oninput","this.nextElementSibling.innerText = this.value")

                numberValue = numInput.value

                return numberValue

  }
....................................................................
secondDropdown.addEventListener("change",() => {
            secondValue = secondDropdown.value
            if(secondValue){
                console.log(spatialFilters[1])

                //following line of code is to remove any other div set by other options
                while(numberInputContainer.hasChildNodes()){
                    numberInputContainer.removeChild(numberInputContainer.children[0]);

                  }

                  //the range of numbers that we want user to enter in case of bitplane slicing is 1-8
                  //we will add the number slider (range 0-8)
                  numberValue = kernelSetter()
                  console.log("-------------"+secondValue)
                  console.log("-------------"+numberValue)


            }


        })
......................................................
Range slider for various options
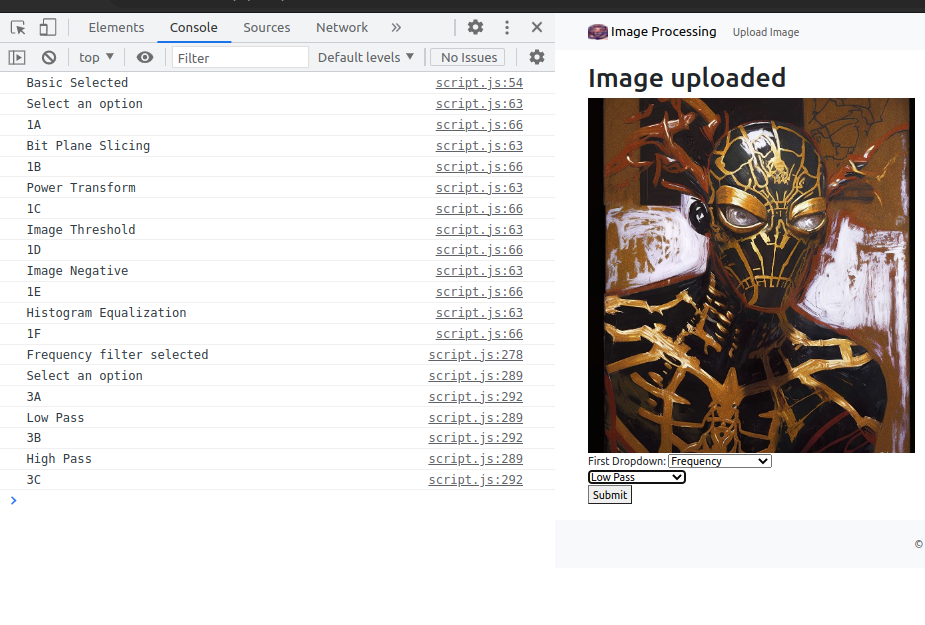
Add Options in second level drop down menu for Frequency filters.
.............................................................
const frequencyFilters = ["Select an option","Low Pass","High Pass"]
.............................................................
.............................................................
else if (selectedValue === "3"){
console.log("Frequency filter selected")
firstValue = 3
const secondDropdown = document.createElement("select");
secondDropdown.setAttribute("name","second-dropdown");
var options = [];
for (index = 0; index < frequencyFilters.length; index++) {
console.log(frequencyFilters[index]);
options[index] = document.createElement("option");
options[index].value = "3"+String.fromCharCode(65+index);
console.log("3"+String.fromCharCode(65+index));
options[index].textContent = frequencyFilters[index];
secondDropdown.appendChild(options[index]);
}
secondDropdownContainer.appendChild(secondDropdown);
}
...............................................................When Frequency is selected in first drop down
Git Push
#Terminal
git add .
git commit -m "Filters and other options added dynamically"
git push
So we are done with creating dynamic options for users to apply various filters using JavaScript.
In Part III, we will handle these inputs and process our images accordingly.