
Django E-learning Platform V
In this fifth part of Django E-Learning Platform we will learn how to use the Django cache framework and use the Memcached and Redis cache backends for our project.
Table of Contents
- Installing Memcached
- Installing the Memcached Python Binding
- Adding Memcached to our project
- Using the low-level cache API
- Checking cache requests with Django Debug Toolbar
- Caching Based on Dynamic Data
- Caching template fragments
- Caching Views
- Using the per-site cache
- Using Redis cache backend
Installing Memcached
#Terminal
sudo apt-get install memcached
Installing the Memcached Python binding
After installing Memcached, we have to install a Memcached Python binding. We will install pymemcache,.
#terminal
pip install pymemcache
Adding Memcached to our project
Let us configure the cache for our project. Edit the settings.py file of the educa project and add the following code to it.
CACHES = {
    'default': {
        'BACKEND': 'django.core.cache.backends.locmem.LocMemCache',
        'LOCATION': '127.0.0.1:11211',  # Replace with your Memcached server's address
    }
}
Using the low-level cache API
The low-level cache API allows us to store objects in the cache with any granularity. It is located in django.core.cache.
#terminal
python manage.py shell
Inside shell
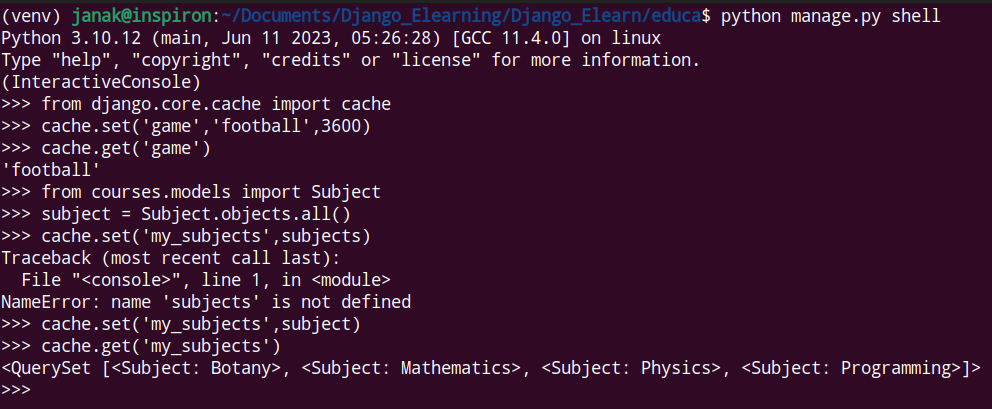
We are going to cache some queries in our views. Edit the views.py file of the courses application and add the following line of codes.
from django.core.cache import cache
....................................................
class CourseListView(TemplateResponseMixin,View):
    model = Course
    template_name = 'courses/course/list.html'
    def get(self,request,subject=None):
        subjects = cache.get('all_subjects')
        if not subjects:
            subjects = Subject.objects.annotate(
                total_courses = Count('courses')
            )
            cache.set('all_subjects',subjects)

        courses = Course.objects.annotate(
            total_modules = Count('modules')
        )

        if subject:
            subject = get_object_or_404(Subject,slug=subject)
            courses = courses.filter(subject=subject)

        return self.render_to_response({'subjects':subjects,
                                        'subject':subject,
                                        'courses':courses})
Checking cache requests with Django Debug Toolbar
Install Django Debug Toolbar with the following command.
#terminal
pip install django-debug-toolbar
Add it to INSTALLED_APPS and MIDDLEWARE inside the settings.py
INSTALLED_APPS = [
    'students',
    'courses',
    'django.contrib.admin',
    'django.contrib.auth',
    'django.contrib.contenttypes',
    'django.contrib.sessions',
    'django.contrib.messages',
    'django.contrib.staticfiles',
    'debug_toolbar',
    'embed_video',
]

MIDDLEWARE = [
    'debug_toolbar.middleware.DebugToolbarMiddleware',
    'django.middleware.security.SecurityMiddleware',
    'django.contrib.sessions.middleware.SessionMiddleware',
    'django.middleware.common.CommonMiddleware',
    'django.middleware.csrf.CsrfViewMiddleware',
    'django.contrib.auth.middleware.AuthenticationMiddleware',
    'django.contrib.messages.middleware.MessageMiddleware',
    'django.middleware.clickjacking.XFrameOptionsMiddleware',
]
Also add the following lines at the end of the settings.py file.
INTERNAL_IPS = [
    '127.0.0.1',
]
Django Debug Toolbar will only display if our IP address matches an entry in the INTERNAL_IPS setting.
Now, we need to add following lines to urls.py.
urlpatterns = [
    path('accounts/login/',auth_views.LoginView.as_view(),name="login"),
    path('accounts/logout/',auth_views.LogoutView.as_view(),name="logout"),
    path('admin/', admin.site.urls),
    path('course/',include('courses.urls')),
    path("",CourseListView.as_view(),name='course_list'),
    path("students/",include('students.urls')),
    path('__debug__/',include('debug_toolbar.urls')),
]
Run the server. Visit http://127.0.0.1:8000/
Django Toobar is at right side. We can expand it.
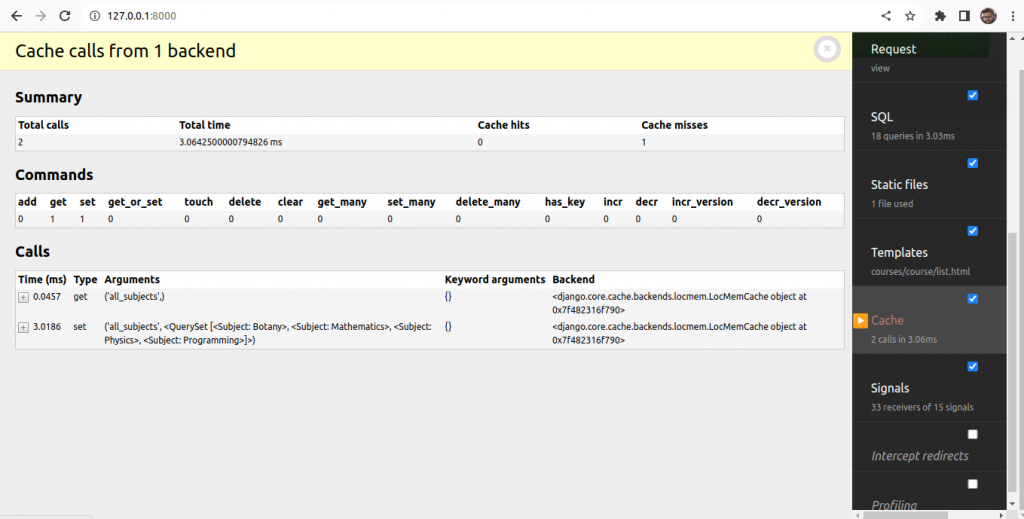
Caching Based on Dynamic Data
Edit the CourseListView of courses/view.py as follows.
class CourseListView(TemplateResponseMixin,View):
    model = Course
    template_name = 'courses/course/list.html'
    def get(self,request,subject=None):
        subjects = cache.get('all_subjects')
        if not subjects:
            subjects = Subject.objects.annotate(
                total_courses = Count('courses')
            )
            cache.set('all_subjects',subjects)

        all_courses = Course.objects.annotate(
            total_modules = Count('modules')
        )

        if subject:
            subject = get_object_or_404(Subject,slug=subject)
            key = f'subject_{subject.id}_courses'
            courses = cache.get(key)
            if not courses:
                courses = all_courses.filter(subject=subject)
                cache.set(key,courses)

        else:
            courses = cache.get('all_courses')
            if not courses:
                courses = all_courses
                cache.set('all_courses',courses)

        return self.render_to_response({'subjects':subjects,
                                        'subject':subject,
                                        'courses':courses})
In this case, we also cache both all courses and courses filtered by the subject. We use all_courses cache key for storing all courses if no subject is given. If there is a subject, we build the key dynamically with f’subject_{subject.id}_courses’.
Caching template fragments
Caching template fragments is a higher-level approach. We need to load the cache template tags in our template using {% load cache%}. Then, we will be able to use the {% cache %} template tag to cache specific template fragments. We will usually use the template tag as follows.
{% cache 300 fragment_name %}
........................
{% endcache%}
The {% cache %} template tag has two required arguments: the timeout in seconds and a name for the fragment. If we need to cache content depending on dynamic data, we can do so by passing additional arguments to the {% cache %} template tag to uniquely identify the fragment.
Edit the /students/course/detail.html of the students application.
{% extends 'base.html' %}
{% load cache %}

{% block title %}
    {{object.title}}
{% endblock %}

{% block content %}
    <h1>
        {{module.title}}
    </h1>
    <div class="contents">
        <h3>Modules</h3>
        <ul id="modules">
            {% for m in object.modules.all %}
                <li data-id = "{{m.id}}" {% if m == module %} class="selected" {% endif %}>
                    <a href="{% url 'student_course_detail_module' object.id m.id %}">
                        <span>
                            Module <span class="order">{{ m.order|add:1 }}</span>
                        </span>
                        <br>
                        {{m.title}}
                    </a>
                </li>
            {% empty %}
                <li>No modules yet.</li>

            {% endfor %}
        </ul>
    </div>

    <div class="module">
        {% cache 600 module_contents module %}
        {% for content in module.contents.all %}

          <h2>{{content.item.title}}</h2>
          {{content.item.render}}

        {% endfor %}
        {% endcache %}
    </div>
{% endblock content %}
We cache this template fragment using the name module_contents and pass the current Module object to it. Thus, we uniquely identify the fragment.
Run server
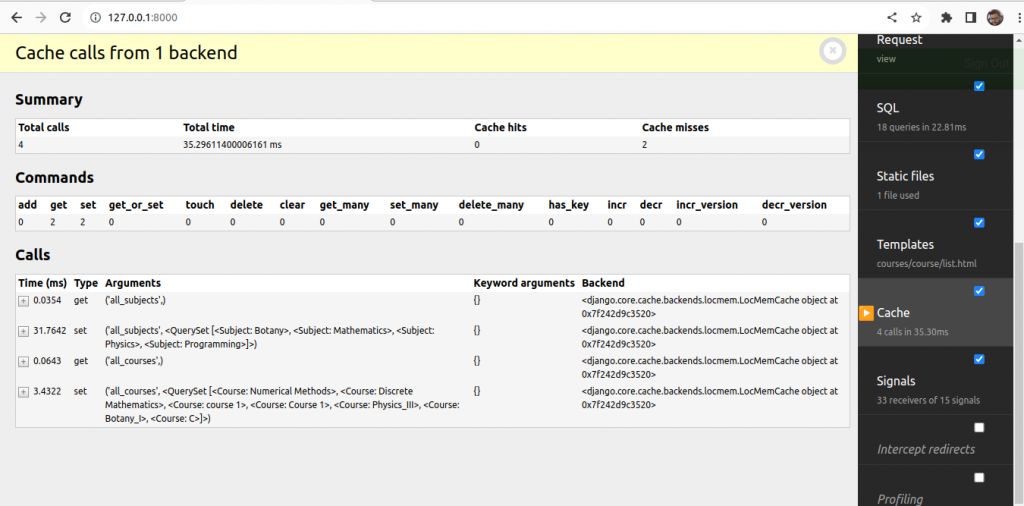
Select some subject and then check the Cache
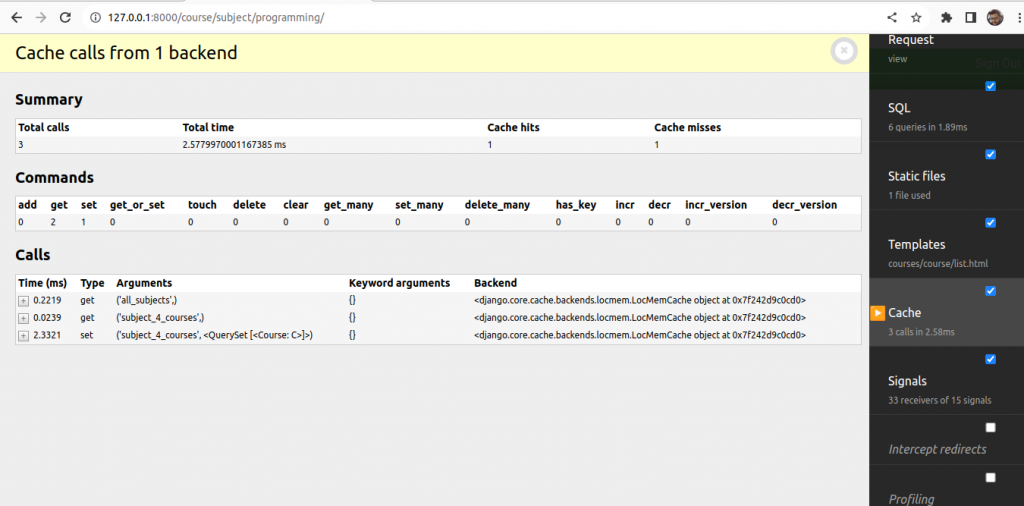
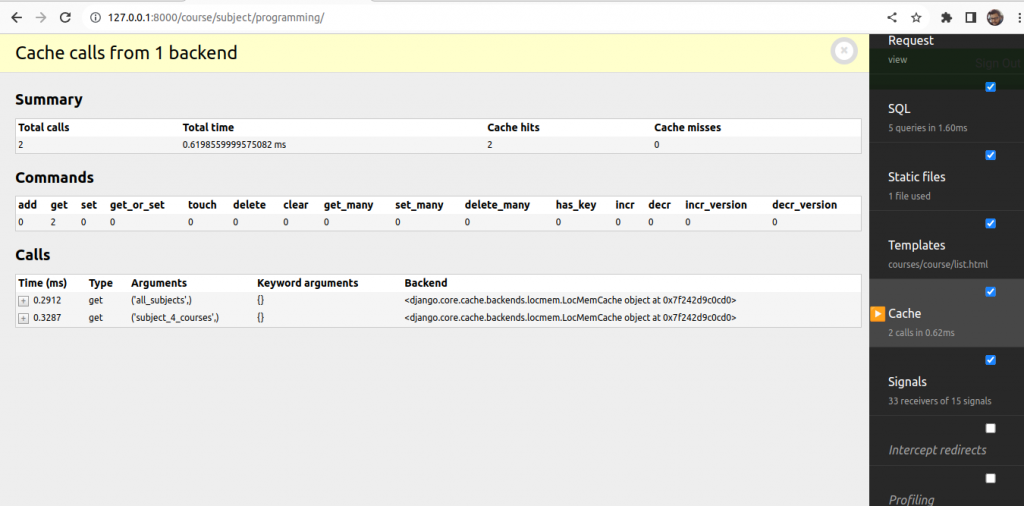
Now, select another subject and check cache.
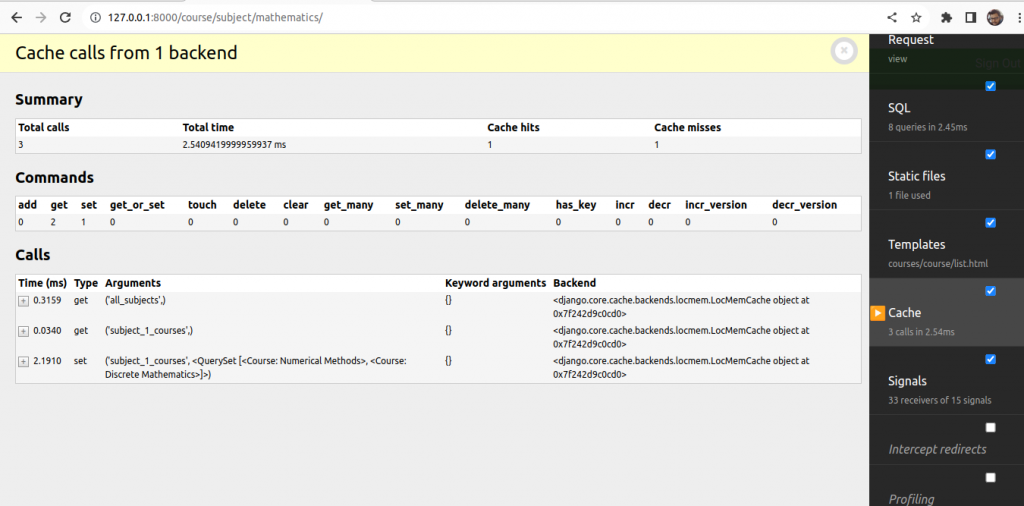
Now, visit the first subject again and check Cache hits and Cache misses.
Go to module of some course for first time.
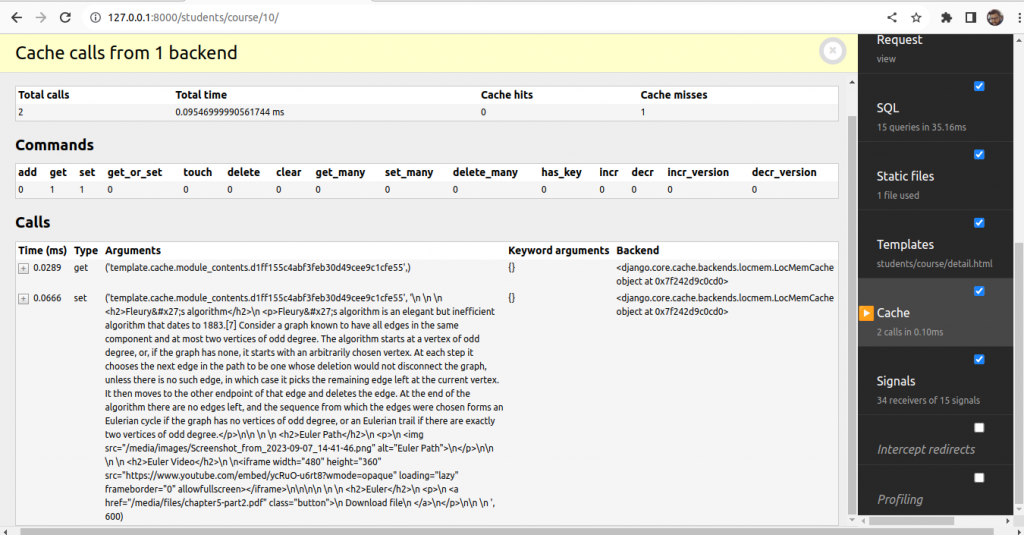
Go to some other module.
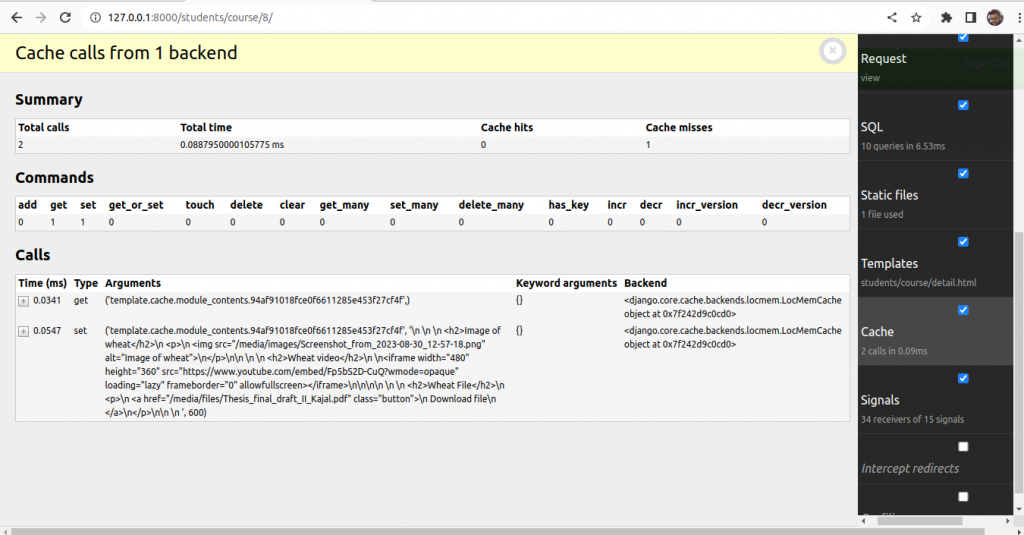
Now, go again to the first module you visited before.
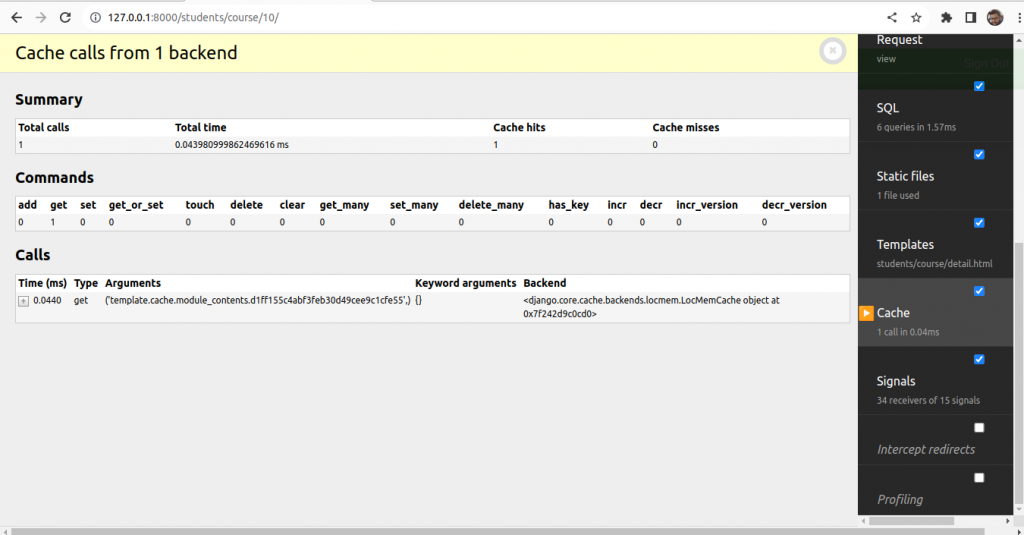
Now, check for hits and misses.
Caching Views
We can cache the output of individual views using the cache_page decorator located at django.views.decorator.cache. The decorator requires a timeout argument in seconds.
Edit the urls.py file of the students application and add the following line of codes.
from django.urls import path
from django.views.decorators.cache import cache_page

from . import views

urlpatterns = [
    path('register/',views.StudentRegistrationView.as_view(),
         name='student_registration'),
    path('enroll-course/',views.StudentEnrollCourseView.as_view(),
         name='student_enroll_course'),

    path('courses/',views.StudentCourseListView.as_view(),
         name='student_course_list'),

    path('course/<pk>/',
         cache_page(60*15)(views.StudentCourseDetailView.as_view()),
         name='student_course_detail'),

    path('course/<pk>/<module_id>/',
         cache_page(60*15)(views.StudentCourseDetailView.as_view()),
         name='student_course_detail_module'),
]
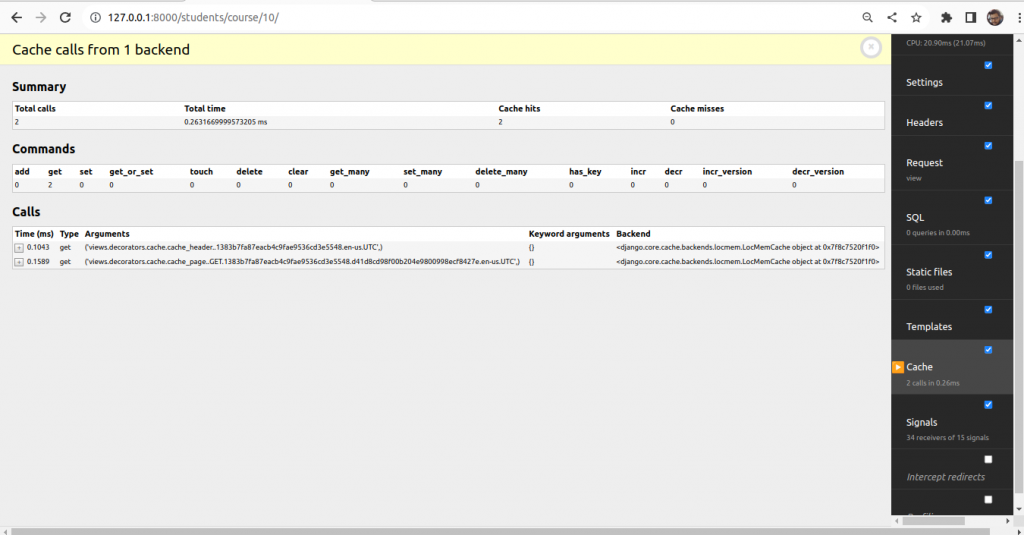
Now, the complete content returned by the StudentCourseDetailView is cached for 15 minutes.
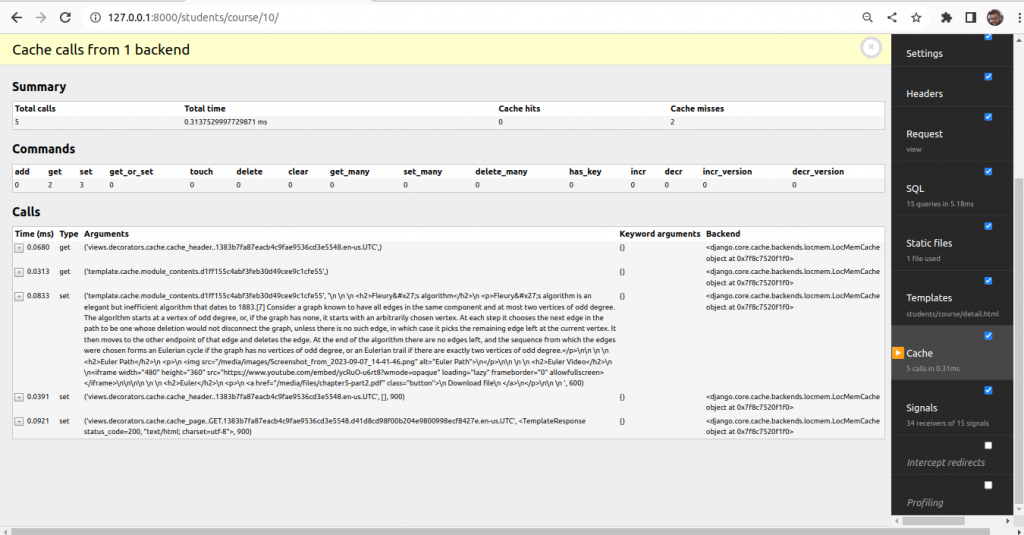
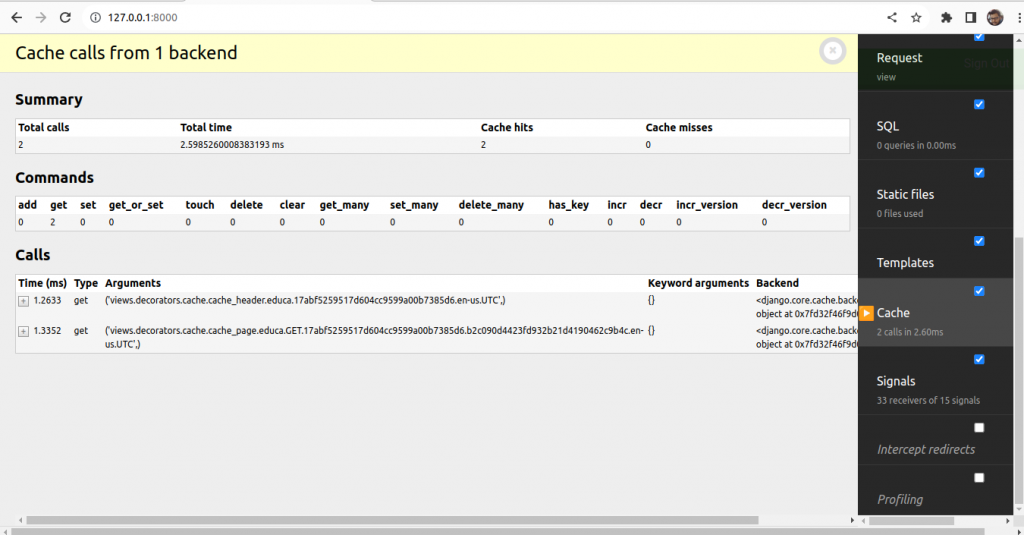
Refresh the page and check the hits and misses.
Using the per-site cache
To cache the entire site edit the settings.py file as follows:
MIDDLEWARE = [
    'debug_toolbar.middleware.DebugToolbarMiddleware',
    'django.middleware.security.SecurityMiddleware',
    'django.contrib.sessions.middleware.SessionMiddleware',
    'django.middleware.cache.UpdateCacheMiddleware',
    'django.middleware.common.CommonMiddleware',
    'django.middleware.cache.FetchFromCacheMiddleware',
    'django.middleware.csrf.CsrfViewMiddleware',
    'django.contrib.auth.middleware.AuthenticationMiddleware',
    'django.contrib.messages.middleware.MessageMiddleware',
    'django.middleware.clickjacking.XFrameOptionsMiddleware',
]
.............................................
CACHE_MIDDLEWARE_ALIAS = 'default'
CACHE_MIDDLEWARE_SECONDS = 60*15 #15 minutes
CACHE_MIDDLEWARE_KEY_PREFIX = 'educa'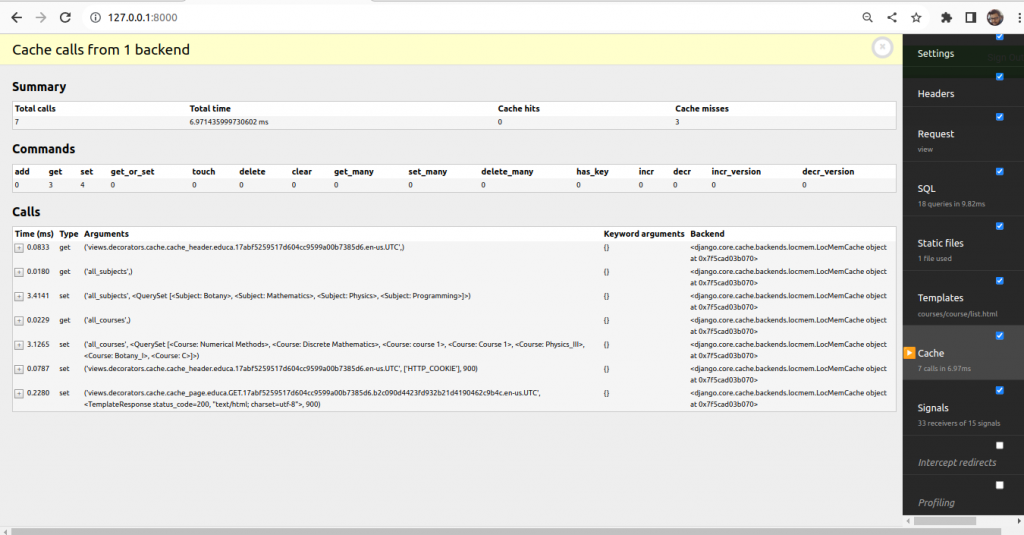
Using Redis cache backend
Install redis with following command
#terminal
sudo apt-get install redis-server
pip install redis
Edit settings.py file and modify CACHE setting.
CACHES = {
    'default': {
        'BACKEND': 'django.core.cache.backends.redis.RedisCache',
        'LOCATION': 'redis://127.0.0.1:6379',
    }
}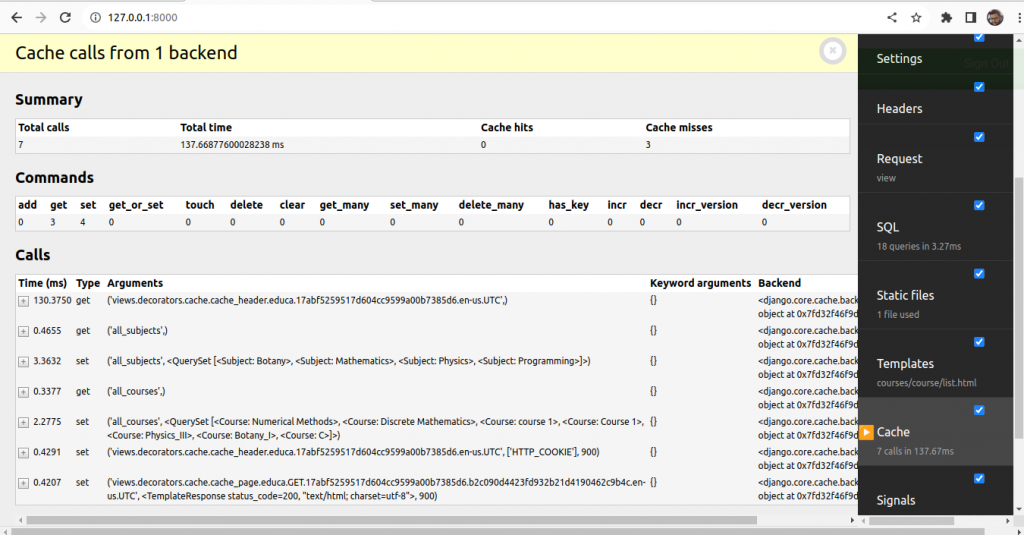
Refresh the page
Use Redis when you need advanced data structures, message queuing, real-time analytics, or a versatile caching solution. It’s also a good choice for applications that require data persistence and replication.
Use Memcached when you need a simple and straightforward caching solution for key-value data without complex data structures or when raw speed and simplicity are your top priorities.