
Django E-learning Platform II
Part II: CRUD for Course, Module and Contents.
In this second part of Django E-learning Platform we will create a Content Management System. We are going to acquire the knowledge of constructing the capability for instructors to generate courses and oversee the materials in a flexible and effective way.
After completion of this part, we will be able to create new Courses. With that courses we will be able to add several modules and within each module we will be able to contents. We will also be able to edit and delete Course its modules and contents of modules.
Table of Contents
- Creating a CMS
- Creating Class Based Views
- Using mixins for class-based views
- Working with group and permissions
- Restricting access to class-based views
- Templates
- Managing Course and their contents
- Adding content to Course module
- Deleting Content
- Managing Modules and their content
- Output
Creating a CMS
The CMS will allow instructors to create courses and manage their content. We need to provide the following functionality.
- List courses created by the instructor
- Create, edit and delete courses
- Add modules to a course and reorder them
- Add different types of content to each module
- Reorder course modules and content
Creating class-based views
We are going to build views to create, edit and delete courses.
Edit the views.py file of the courses application and add the following code.
from typing import Any
from django.db.models.query import QuerySet
from django.shortcuts import render

from django.views.generic.list import ListView

from .models import Course
# Create your views here.
class ManageCourseListView(ListView):
    model = Course
    template_name = "courses/manage/course/list.html"

    def get_queryset(self):
        qs = super().get_queryset()
        return qs.filter(owner=self.request.user)
Using mixins for class-based views
Mixins are a special kind of multiple inheritance for a class. We can use them to provide common discrete functionality that, when added to other mixins, allows us to define the behavior of a class.
There are two main situations to use mixins:
- We want to provide multiple optional features for a class
- We want to use a particular feature in several classes
Again edit views.py
from typing import Any
from django.db.models.query import QuerySet
from django.shortcuts import render

from django.views.generic.list import ListView
from django.views.generic.edit import CreateView,UpdateView,DeleteView
from django.urls import reverse_lazy

from .models import Course
# Create your views here.

class OwnerMixin:
    def get_queryset(self):
        qs = super().get_queryset()
        return qs.filter(owner=self.request.user)

class OwnerEditMixin:
    def form_valid(self,form):
        form.instance.owner = self.request.user
        return super().form_valid(form)

class OwnerCourseMixin(OwnerMixin):
    model = Course
    fields = ['subject','title','slug','overview']
    success_url = reverse_lazy('manage_course_list')

class OwnerCourseEditMixin(OwnerCourseMixin,OwnerEditMixin):
    template_name = 'courses/manage/course/form.html'


class ManageCourseListView(OwnerCourseMixin,ListView):
    # model = Course
    template_name = "courses/manage/course/list.html"

    # def get_queryset(self):
    #     qs = super().get_queryset()
    #     return qs.filter(owner=self.request.user)

class CourseCreateView(OwnerCourseEditMixin,CreateView):
    pass

class CourseUpdateView(OwnerCourseEditMixin,UpdateView):
    pass

class CourseDeleteView(OwnerCourseMixin,DeleteView):
    template_name = 'courses/manage/course/delete.html'
In this code, we created the OwnerMixin and OwnerEditMixin mixins. We will use these mixins together with the ListView, CreateView, UpdateView and DeleteView views provided by Django. OwnerMixin implements the get_queryset() method, which is used by the views to get the base QuerySet. Our mixin will override this method to filter objects by the owner attribute to retrieve objects that belong to the current user (request.user).
OwnerEditMixin implements the form_valid() method, which is used by views that use Django’s ModelFormMixin mixin, that is, views with forms or model forms such as CreateView and UpdateView. form_valid() is executed when the submitted form is valid.
The default behaviour for this method is saving the instance (for model forms) and redirecting the user to success_url. We override this method to automatically set the current user in the owner attribute of the object being saved. By doing so, we set the owner for an object automatically when it is saved.
Our OwnerMixin class can be used for views that interact with any model that contains an owner attribute.
We also define an OwnerCourseMixin class that inherits OwnerMixin and provides the following attributes for child views.
- model: The model used for QuerySets; it is used by all views.
- fields: The fields of the model to build the model form of the CreateView and UpdateView views.
- success_url: Used by CreateView, UpdateView and DeleteView to redirect the user after the form is successfully submitted or the object is deleted. We use a URL with the name manage_course_list, which we are going to create later.
We define an OwnerCourseEditMixin mixin with the following attribute:
- template_name: The template we will use for the CreateView and UpdateView views.
Finally, we create the following views that subclass OwnerCourseMixin:
- ManageCourseListView: Lists the courses created by the user. It inherits from OwnerCourseMixin and ListView. It defines a specific template_name attribute for a template to list courses.
- CourseCreateView: Uses a model form to create a new Course object. It uses the fields defined in OwnerCourseMixin to build a model form and also subclasses CreateView. It uses the template defined in OwnerCourseEditMixin.
- CourseDeleteView: Inherits from OwnerCourseMixin and the generic DeleteView. It defines a specific template_name attribute for a template to confirm the course deletion.
Working with groups and permissions
Currently, any user can access the views to manage courses. We want to restrict these views so that only instructors have permission to create and manage courses.
Django’s authentication framework includes a permission system that allows us to assign permissions to users and groups. We are going to create a group for instructor users and assign permissions to create, update, and delete courses.
Run the development server using the following command:
python manage.py runserverOpen http://127.0.0.1:8000/admin/auth/group/add/ in browser to create a new Group object.
Add the name Instructors and choose all permissions of the courses application, except those of the Subject model, as follows.
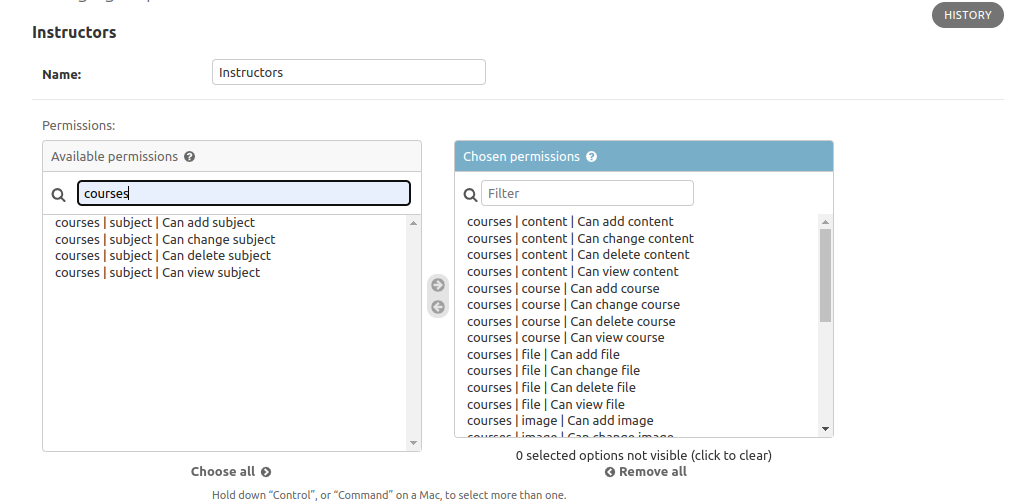
Add the name Instructors and choose all permissions of courses application, except those of the Subject model as above.
Open http://127.0.0.1.8000/admin/auth/user/add/ and create a new user. Edit the user and add it to the Instructor group, as follows.
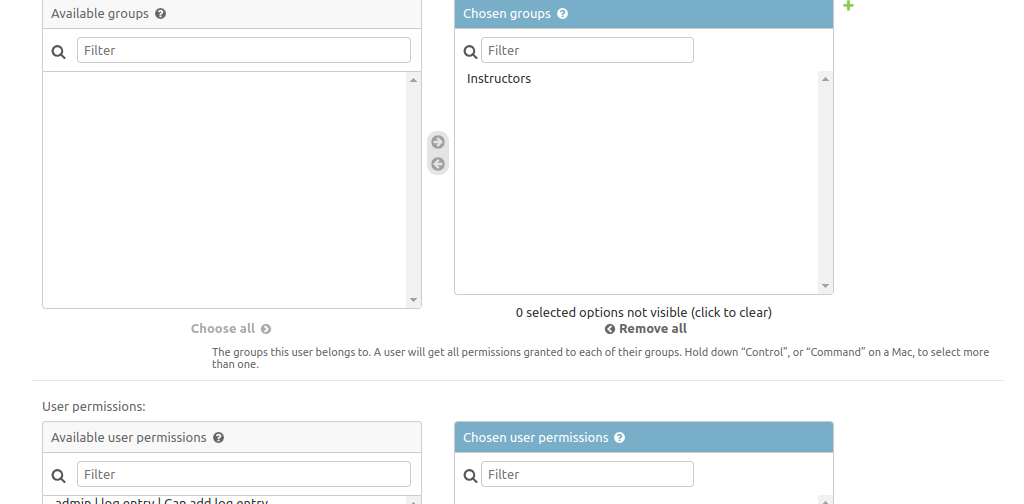
Users inherit the permissions of the groups they belong to, but we can also add individual permissions to single user using the administration site. Users that have is_superuser set True have all permissions automatically.
Restricting access to class-based views
We are going to restrict access to the views so that only users with the appropriate permissions can add, change or delete Course objects. We are going to use the following two mixins provided by django.contrib.auth to limit access to views.
- LoginRequiredMixin: Replicates the log_in required decorator’s functionality.
- PermissionRequiredMixin: Grants access to the view to users with a specific permission.
Again edit the view.py file.
from typing import Any
from django.db.models.query import QuerySet
from django.shortcuts import render

from django.views.generic.list import ListView
from django.views.generic.edit import CreateView,UpdateView,DeleteView
from django.urls import reverse_lazy

from django.contrib.auth.mixins import (LoginRequiredMixin,
                                        PermissionRequiredMixin)

from .models import Course
# Create your views here.

class OwnerMixin:
    def get_queryset(self):
        qs = super().get_queryset()
        return qs.filter(owner=self.request.user)

class OwnerEditMixin:
    def form_valid(self,form):
        form.instance.owner = self.request.user
        return super().form_valid(form)

class OwnerCourseMixin(OwnerMixin,LoginRequiredMixin,PermissionRequiredMixin):
    model = Course
    fields = ['subject','title','slug','overview']
    success_url = reverse_lazy('manage_course_list')

class OwnerCourseEditMixin(OwnerCourseMixin,OwnerEditMixin):
    template_name = 'courses/manage/course/form.html'


class ManageCourseListView(OwnerCourseMixin,ListView):
    # model = Course
    template_name = "courses/manage/course/list.html"
    permission_required = 'courses.view_course'

    # def get_queryset(self):
    #     qs = super().get_queryset()
    #     return qs.filter(owner=self.request.user)

class CourseCreateView(OwnerCourseEditMixin,CreateView):
    permission_required = 'courses.add_course'

class CourseUpdateView(OwnerCourseEditMixin,UpdateView):
    permission_required = 'courses.change_course'


class CourseDeleteView(OwnerCourseMixin,DeleteView):

    template_name = 'courses/mange/course/delete.html'
    permission_required = 'courses.delete_course'
PermissionRequiredMixin checks that the user accessing the view has the permission specified in the permission_required attribute. Our views are now only accessible to users with the proper permissions.
Urls for above views
Create a new file inside the courses application directory and name it urls.py. Add the following code to it.
from django.urls import path
from . import views

urlpatterns = [
    path("mine/",views.ManageCourseListView.as_view(),
         name='manage_course_list'),
    path("create/",views.CourseCreateView.as_view(),
         name='course_create'),
    path("<pk>/edit/",views.CourseUpdateView.as_view(),
         name='course_edit'),
    path('<pk>/delete/',views.CourseDeleteView.as_view(),
         name='course_delete'),
]
These are the URL patterns for the list, create, edit and delete course views. The pk parameters refers to the primary key field.
Now, edit the urls.py of the educa project and include the URL patterns of the courses application.
from django.contrib import admin
from django.urls import path,include
from django.conf import settings
from django.conf.urls.static import static
from django.contrib.auth import views as auth_views


urlpatterns = [
    path('accounts/login/',auth_views.LoginView.as_view(),name="login"),
    path('accounts/logout/',auth_views.LogoutView.as_view(),name="logout"),
    path('admin/', admin.site.urls),
    path('course/',include('courses.urls')),
]

if settings.DEBUG:
    urlpatterns += static(settings.MEDIA_URL,
                          document_root=settings.MEDIA_ROOT)
The Templates
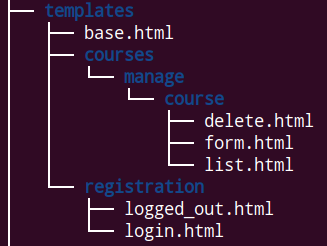
Create the following folders and files in courses.
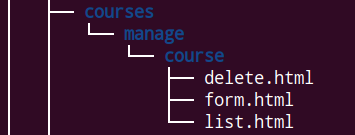
Our templates should look like this.
Add the following codes to list.html
{% extends 'base.html' %}
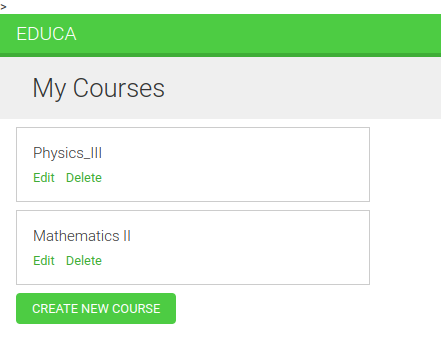
{% block title %} My Courses {% endblock %}
{% block content %}
<h1>
My Courses
</h1>
<div class="module">
{% for course in object_list %}
<div class="course-info">
<h3>
{{course.title}}
</h3>
<p>
<a href="{% url "course_edit" course.id %}">Edit</a>
<a href="{% url 'course_delete' course.id %}">Delete</a>
</p>
</div>
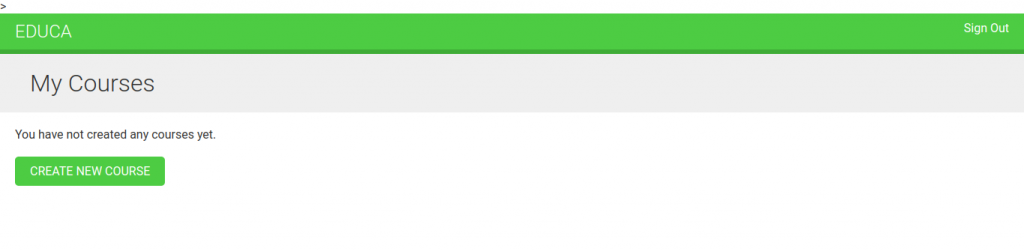
{% empty %}
<p>
You have not created any courses yet.
</p>
{% endfor %}
<p>
<a href="{% url 'course_create' %}" class="button">
Create new course
</a>
</p>
</div>
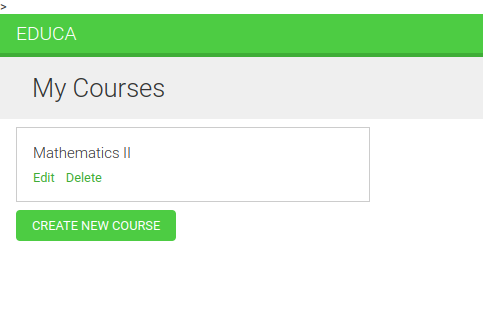
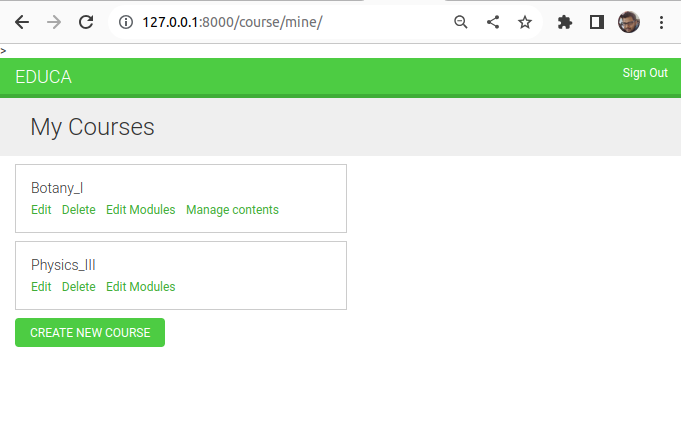
{% endblock %}Login with the new user created above.
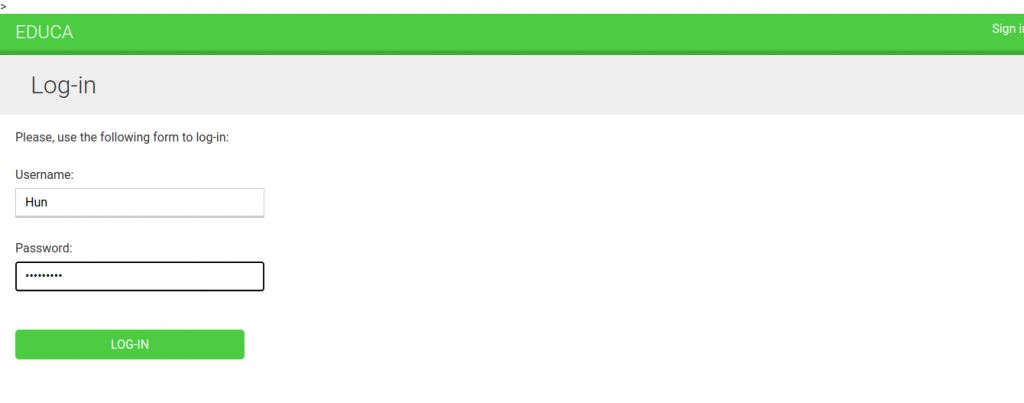
After login visit http://127.0.0.1:8000/course/mine
Now, add the following lines of codes to form.html
{% extends 'base.html' %}
{% block title %}
{% if object %}
Edit Course "{{object.title}}"
{% else %}
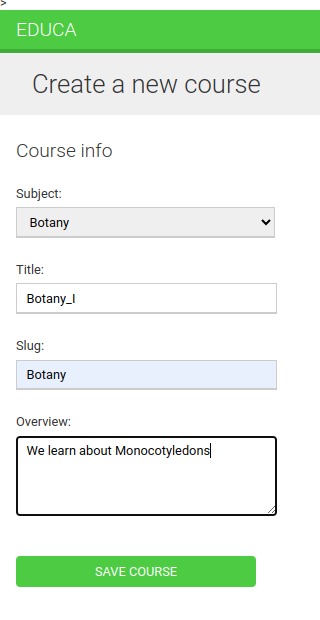
Create a new course
{% endif %}
{% endblock %}
{% block content %}
<h1>
{% if object %}
Edit Course "{{object.title}}"
{% else %}
Create a new course
{% endif %}
</h1>
<div class="module">
<h2>Course info</h2>
<form method="post">
{{form.as_p}}
{% csrf_token %}
<p><input type="submit" value="Save Course">
</p>
</form>
</div>
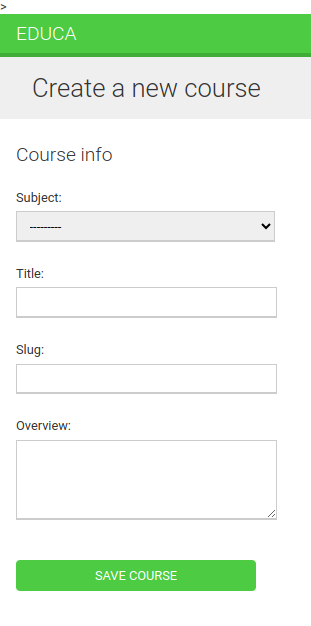
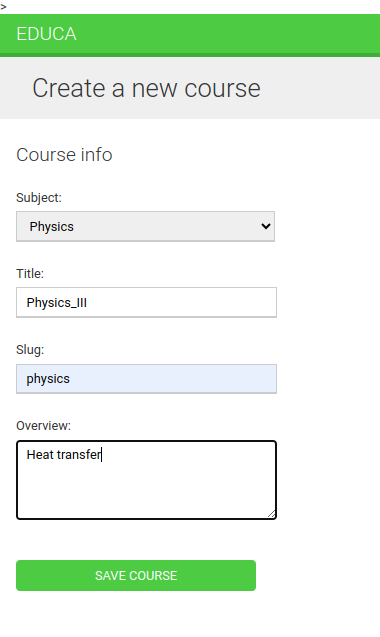
{% endblock %}The form.html template is used for both the CourseCreateView and CourseUpdateView views. In this template, we check whether an object variable is in the context. If object exists in the context, we know that we are updating an existing course and we use it in the page title. Otherwise, we are creating a new Course object.
After clicking on Create New Course button.
Create and save course.
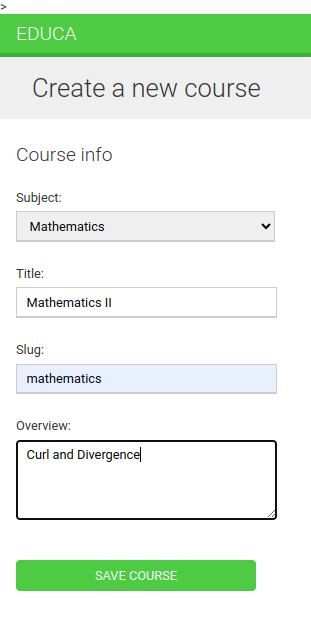
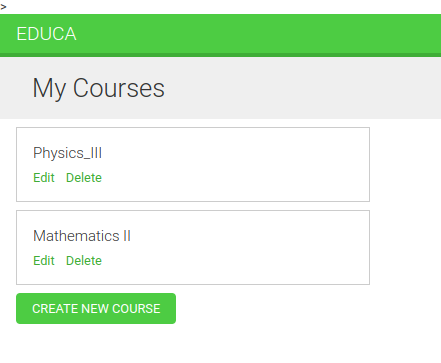
Create one more course.
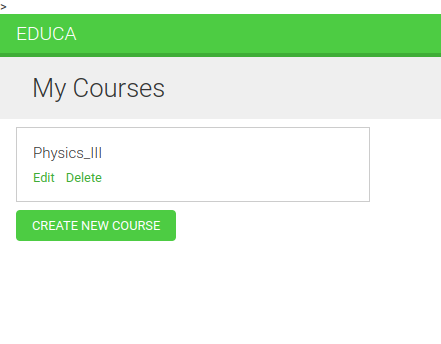
Now, we have two courses in our list of courses.
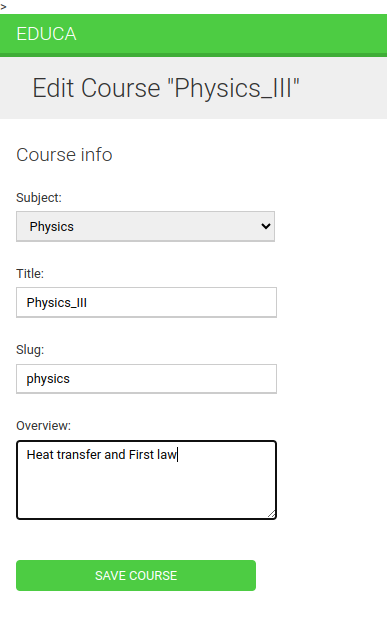
Edit one of the courses.
Now add following codes to delete.html
{% extends "base.html" %}
{% block title %}
Delet Course
{% endblock %}
{% block content%}
<h1>
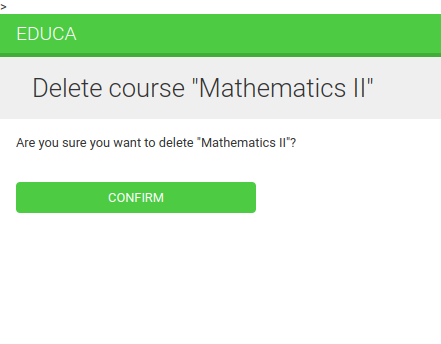
Delete course "{{object.title}}"
</h1>
<div class="module">
<form accept="" method="post">
{% csrf_token %}
<p>
Are you sure you want to delete "{{object}}"?
</p>
<input type="submit" value="Confirm">
</form>
</div>
{% endblock %}Try deleting one of the courses.
Managing Course modules and their contents
We are going to build a system to mange course modules and their contents. We need to build forms that can be used for managing multiple modules per course and different types of content for each module. Both modules and their contents will have to follow a specific order and we should be able to reorder them using the CMS.
Using formsets for course modules
Django comes with an abstraction layer to work with multiple forms on the same page. These groups of forms are known as formsets. Formsets manage multiple instances of a certain Form or ModelForm. All forms are submitted at once and the formset takes care of the initial number of forms to display, limiting the maximum number of forms that can be submitted and validating all the forms.
Formsets include an is_valid() method to validate all forms at once. We can also provide initial data for the forms and specify how many additional empty forms to display.
Since a course is divided into a variable number of modules, it makes sense to use formsets to manage them. Create a forms.py file in the courses application directory and add the following code to it.
from django import forms
from django.forms.models import inlineformset_factory
from .models import Course, Module

ModuleFormSet = inlineformset_factory(Course,
                                      Module,
                                      fields=['title','description'],
                                      extra=2,
                                      can_delete=True)
This is the ModuleFormSet formset. We built it using the inlineformatset_factory() function provided by Django. Inline formsets are a small abstraction on top of formsets that simplify working with related objects. This function allows us to build a model formset dynamically for the Module objects related to a Course object.
We used the following parameters to build the formset.
- fields: The fields that will be included in each form of the formset.
- extra: Allows us to set the number of empty extra forms to display in the formset.
- can_delete: If you set this to True, Django will include a Boolean field for each form that will be rendered as a checkbox input. It allows us to mark the objects that we want to delete.
Edit the views.py file and add the following code to it.
......................................

from django.shortcuts import redirect,get_object_or_404
from django.views.generic.base import TemplateResponseMixin, View


......................................
from .forms import ModuleFormSet

# Create your views here.

...............................................

class CourseModuleUpdateView(TemplateResponseMixin,View):
    template_name = "courses/manage/module/formset.html"
    Course = None

    def get_formset(self,data=None):
        return ModuleFormSet(instance=self.course,
                             data=data)


    def dispatch(self,request,pk):
        self.course = get_object_or_404(Course,id=pk,owner=request.user)
        return super().dispatch(request,pk)

    def get(self,request,*args,**kwargs):
        formset = self.get_formset()
        return self.render_to_response({'course':self.course,
                                        'formset':formset})

    def post(self,request,*args,**kwargs):
        formset = self.get_formset(data=request.POST)
        if formset.is_valid():
            formset.save()
            return redirect('manage_course_list')
        return self.render_to_response({'course':self.course,'fromset':formset})
The CourseModuleUpdateView view handles the formset and add, update and delete modules for a specific course. This view inherits from the following mixins and views.
- TemplateResponseMixin: This mixin takes charge of rendering templates and returning an HTTP response. It requires a template_name attribute that indicates the template to be rendered and provides the render_to_response() method to pass it a context and render the template.
- View: The basic class-based view provided by Django.
In this view, we implemented the following methods.
- get_formset(): We define this method to avoid repeating the code to build the formset. We create a ModuleFormSetobject for the given Course object with optional data.
- dispatch(): This method is provided by the View class. It takes an HTTP request and its parameters and attempts to delegate to lowercase method that matched the HTTP method used. A GET request is delegated to the get() method and a POST request to post(), respectively. In this method, we use the get_object_or_404() shortcut function to get the Course object for the given id parameter that belongs to the current user. We include this code in the dispatch() method because we need to retrieve the course for both GET and POST requests. We save it into the course attribute of the view to make it accessible to other methods.
- get(): Executed for GET requests. We build an empty ModuleFormSet formset and render it to the template together with the current Course object using the render_to_response() method provided by TemplateResponseMixin.
- post(): Executed for POST requests.
- In this method, we perform the following actions:
- We build a ModuleFormSet instance using the submitted data.
- We execute the is_valid() method of the formset to validate all of its forms.
- If the formset is valid, we save it by calling the save() method. At this point, any changes made, such as adding, updating or marking modules for deletion, are applied to the database. Then, we redirect users to the manage_course_list URL. If the formset is not valid, we render the template to display any errors instead.
Edit urls.py file of the courses application and add the following code.
from django.urls import path
from . import views

urlpatterns = [
    path("mine/",views.ManageCourseListView.as_view(),
         name='manage_course_list'),
    path("create/",views.CourseCreateView.as_view(),
         name='course_create'),
    path("<pk>/edit/",views.CourseUpdateView.as_view(),
         name='course_edit'),
    path('<pk>/delete/',views.CourseDeleteView.as_view(),
         name='course_delete'),
     path('<pk>/module/',views.CourseModuleUpdateView.as_view(),name='course_module_update'),
]
Create a new directory inside the courses/manage/ template directory and name it module. Create a courses/manage/module/formset.html template and add the following code to it.
{% extends "base.html" %}

{% block title %}
    Edit "{{course.title}}"

{% endblock %}

{% block content %}
<h1>Edit "{{course.title}}"</h1>
<div class="module">
    <h2>Course modules</h2>
    <form method="post">
        {{formset}}
        {{formset.management_form}}
        {% csrf_token %}
        <input type="submit" value="Save modules">

    </form>
</div>

{% endblock %}
In this template, we create a <form> HTML element in which we include formset. We also include the management form for the formset with the variable {{formset.management_form}}. The management form includes hidden fields to control the initial, total, minimum and maximum number of forms.
Edit the list.html and add the following code.
.....................................................................

            <p>
                <a href="{% url "course_edit" course.id %}">Edit</a>
                <a href="{% url 'course_delete' course.id %}">Delete</a>
                <a href="{% url 'course_module_update' course.id %}">Edit Modules</a>
            </p>
       ..............................................................
Open http://127.0.0.1:8000/course/mine/ in browser.
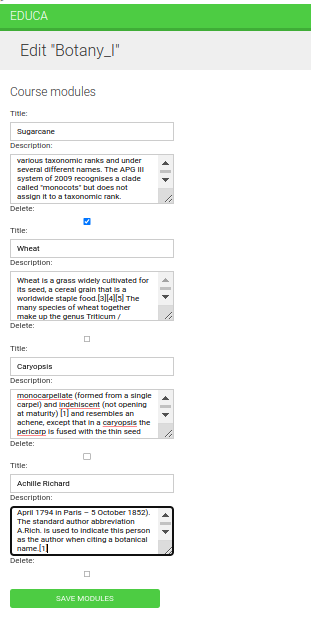
Create a course and click the Edit modules link for it. We see the formset as follows.
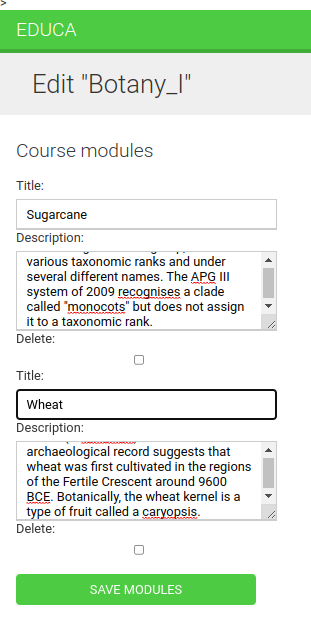
The formset includes a form for each Module object contained in the course. After these, two empty extra forms are displayed because we set extra=2 for ModuleFormSet. When we save the formset, Django will include another two extra fields to add new modules.
Adding content to course modules
We need a way to add content to course modules. We have four different types of content: text, video, image and file. We are going to take a generic approach and create a view that handles creating or updating the objects of any content model.
Edit the views.py file of the courses application and add the following code to it.
................................................................
from django.forms.models import modelform_factory
from django.apps import apps

from .models import Course,Module,Content
from .forms import ModuleFormSet

# Create your views here.
................................................................
class ContentCreateUpdateView(TemplateResponseMixin,View):
    module = None
    model = None
    obj = None

    template_name = "courses/manage/content/form.html"

    def get_model(self,model_name):
        if model_name in ['text','video','image','file']:
            return apps.get_model(app_label='courses',
                                  model_name=model_name)
        return None

    def get_form(self,model,*args,**kwargs):
        Form = modelform_factory(model,exclude=['owner','order','created','updated'])
        return Form(*args,**kwargs)

    def dispatch(self,request,module_id,model_name,id=None):
        self.module = get_object_or_404(Module,id=module_id,course_owner=request.user)
        self.model = self.get_model(model_name)
        if id:
            self.obj = get_object_or_404(self.model,id=id,owner=request.user)

        return super().dispatch(request,module_id,model_name,id)
This is the first part of CotentCreateUpdateView. It will allow us to create and update different model’s contents. This view defines the following methods:
- get_model(): Here, you check that the given model name is one of the four content models: Text, Video, Image or File. Then, we use Django’s apps module to obtain the actual class for the given model name. If the given model name is one of the valid one, we return none.
- get_form(): We build a dynamic form using the modelform_factory() function of the form’s framework. Since we are going to build a form for the Text, Video, Image and File models we use the exclude parameter to specify the common fields to exclude from the form and let all other attributes be included automatically. By doing so, we do not have to know which fields to include depending on the model.
- dispatch(): It receives the following URL parameters and stores the corresponding module, model and content object as class attributes.
- model_id: The ID for the module that the content is/will be associated with.
- model_name: The model name of the content to create/update.
- id: The ID of the object that is being updated. It’s None to create new objects.
Add the following get() and post() methods to ContentCreateUpdateView:
...................................................
    def get(self,request,module_id,model_name,id=None):
        form = self.get_form(self.model,instance=self.obj)
        return self.render_to_response({'form':form,'object':self.obj})

    def post(self,request,module_id,model_name,id=None):
        form = self.get_form(self.model,instance=self.obj,data=request.POST,files=request.FILES)
        if form.is_valid():
            obj = form.save(commit=False)
            obj.owner = request.user
            obj.save()
            if not id:
                Content.objects.create(module=self.module,item=obj)

            return redirect('module_content_list',self.module.id)
        return self.render_to_response({'form':form,'object':self.obj})
These methods are as follows:
- get(): Executed when a GET request is received. We build the model form for the Text, Video, Image or File instance that is being updated. Otherwise, you pass no instance to create a new object, since self.obj is None if no ID is provided.
- post(): Executed when a POST request is received. We build the model form, passing submitted data and files to it. Then, we validate it. If the form is valid, we create a new object and assign request.user as its owner before saving it to the database. We check for the id parameter.If no ID is provided, we know the user is creating a new object instead of updating an existing one. If this is a new object, we create a Content object for the given module and associate the new content with it.
Add the following line of code to urls.py.
.......................................................
path('module/<int:module_id>/content/<model_name>/create/',
          views.ContentCreateUpdateView.as_view(),
          name='module_content_create'),
     path('module/<int:module_id>/content/<model_name>/<id>/',
          views.ContentCreateUpdateView.as_view(),
          name='module_content_update')
]
The url patterns are as follows:
- module_content_create: To create new_text, video, image or file objects and add them to a module. It includes the module_id and model_name parameters. The first one allows linking the new content object to the given module. The latter specifies the content model to build the form for.
- module_content_update: To update an existing text, video, image or file object. It includes the model_id and model_name parameters and an id parameter to identify the content that is being updated.
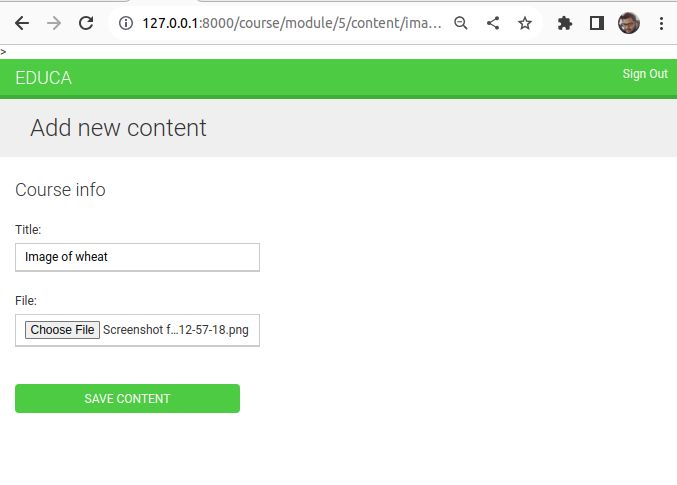
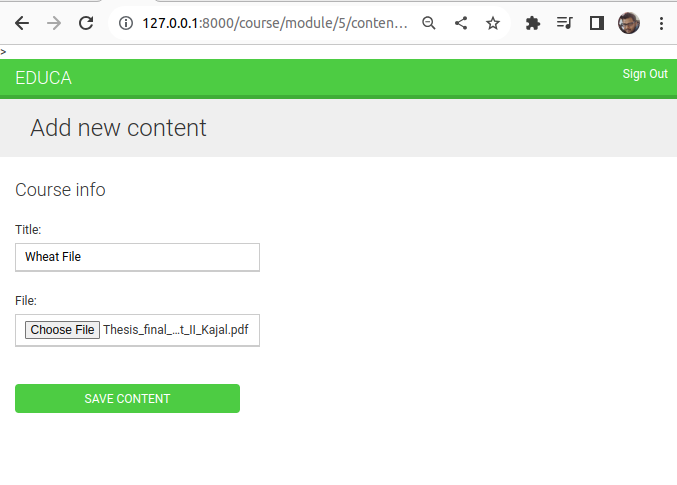
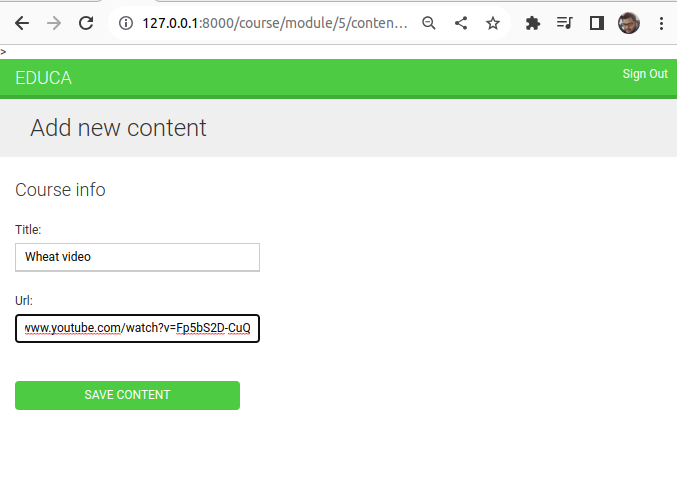
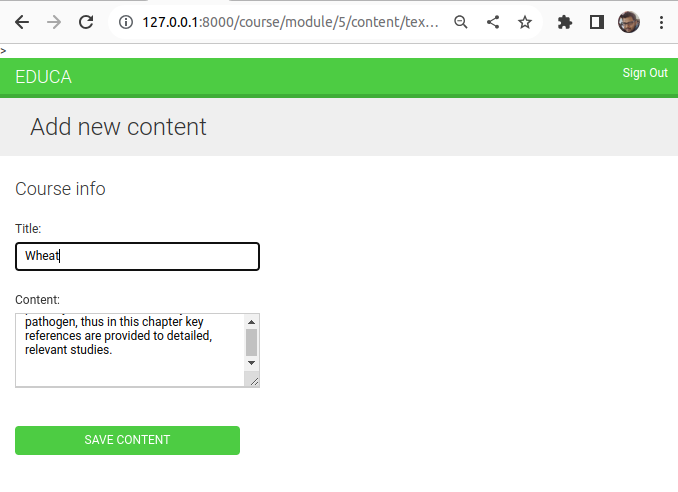
Create a new directory inside the courses/manage/ template directory and name it content. Create the template courses/manage/content/form.html and add the following code to it.
{% extends 'base.html'%}
{% block title%}
    {% if object %}
        Edit content "{{object.title}}"
    {% else %}
        Add new content
    {% end if %}
{% endblock %}

{% block content %}

    <h1>
        {% if object %}
            Edit content "{{object.title}}"
        {% else %}
            Add new content
        {% endif %}
    </h1>
            <div class="module">
                <h2>Course info</h2>
                <form action="" method="post" enctype="multipart/form-data">
                    {{form.as_p}}
                    {% csrf_token %}
                    <p>
                        <input type="submit" value="Save content">
                    </p>
                </form>
            </div>

{% endblock %}
Deleting Content
Add the following class to the views.py file.
class ContentDeleteView(View):
    def post(self,request,id):
        content = get_object_or_404(Content,id=id,module_course_owner=request.user)
        module = content.module
        content.item.delete()
        content.delete()
        return redirect('module_content_list',module.id)
Now, add following code to urls.py.
...................................................
     path('content/<int:id>/delete/',views.ContentDeleteView.as_view(),
          name='module_content_delete'),
..................................................
Managing Modules and their contents
Again add the following class to views.py.
class ModuleContentListView(TemplateResponseMixin,View):
    template_name = "courses/manage/module/content_list.html"

    def get(self,request,module_id):
        module = get_object_or_404(Module,id=module_id,course__owner=request.user)
        return self.render_to_response({'module':module})
Add following line of codes to urls.py.
path('module/<int:module_id>/',views.ModuleContentListView.as_view(),name='module_content_list'),Create templates/courses/manage/module/content_list.html.
{% extends "base.html" %}
{% block title %}
Module {{ module.order|add:1}}: {{ module.title}}
{% endblock %}
{% block content %}
{% with course = module.course %}
<h1>Course "{{course.title}}"</h1>
<div class="contents">
<h3>Modules</h3>
<ul id="modules">
{% for m in course.modules.all %}
<li data-id="{{m.id}}" {% if m == module %}
class="selected" {% endif%}>
<a href="{% url 'module_content_list' m.id %}">
<span>
Module <span class="order">
{{ m.order|add:1}}
</span>
<br>
{{m.title}}
</a>
</li>
{% empty %}
<li>
No modules yet.
</li>
{% endfor %}
</ul>
<p>
<a href="{% url 'course_module_update' course.id %}">
Edit Modules
</a>
</p>
</div>
<div class="module">
<h2>Module {{module.order|add:1}} : {{module.title}}</h2>
<h3>Module Contents</h3>
<div id="module-contents">
{% for content in module.contents.all %}
<div data-id={{ content.id }}>
{% with item=content.item %}
<p>{{item}}</p>
<a href="#">Edit</a>
<form action="{% url 'module_content_delete' content.id %}" method="post">
<input type="submit" value="Delete">
{% csrf_token %}
</form>
{% endwith %}
</div>
{% empty %}
<p>This module has no contents yet.</p>
{% endfor %}
</div>
<h3>
Add new content:
</h3>
<ul class="content-types">
<li>
<a href="{% url 'module_content_create' module.id 'text' %}">
Text
</a>
</li>
<li>
<a href="{% url 'module_content_create' module.id 'image' %}">
Image
</a>
</li>
<li>
<a href="{% url 'module_content_create' module.id 'video' %}">
Video
</a>
</li>
<li>
<a href="{% url 'module_content_create' module.id 'file' %}">
File
</a>
</li>
</ul>
</div>
{% endwith %}
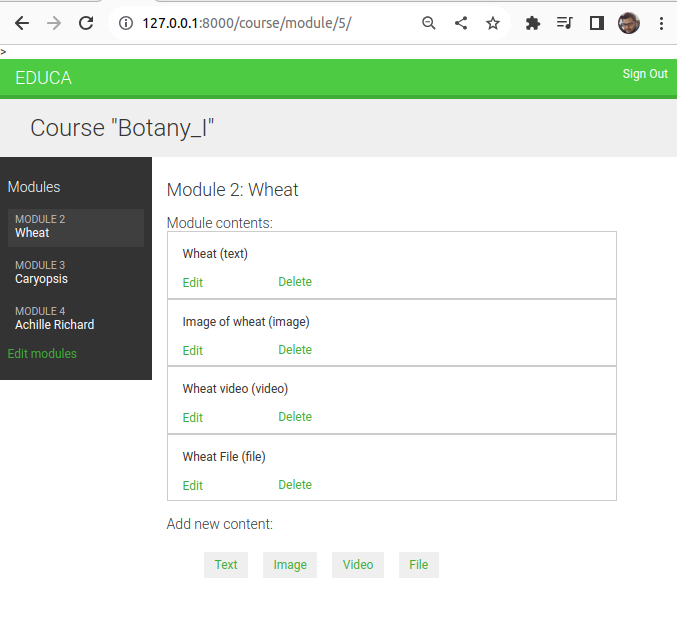
{% endblock %}This is the template that displays all modules for a course and the contents of the selected module. We iterate over the modules to display them in a sidebar. We iterate over a module’s contents and access content.item to get the related Text, Video, Image or File. We also included links to create new text, video, image or file content.
We want to know which type of object each of the item objects is: Text, Video, Image or File. We need the model name to build the URL to edit the object. Besides this, we could display each item in the template differently based on the type of content it is. We can get the model name for an object from the model’s Meta class by accessing the object’s _meta attribute. But Django does not allow accessing variables or attributes starting with an underscore in templates to prevent retrieving private attributes or calling private methods.
To solve this, we write a custom template filter.
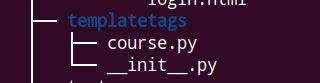
Create templatetags folder inside courses application and create __init__.py and course.py inside it.
Add following lines of codes in course.py
from django import template
register = template.Library()

@register.filter
def model_name(obj):
    try:
        return obj._meta.model_name
    except AttributeError:
        return None
This is the model_name template filter. We can apply it in templates as object|model_name to get the model name for an object.
Edit content_list.html as follow.
{% extends "base.html" %}
{% load course %}


........................................................
            <h3>Module Contents</h3>
            <div id="module-contents">
                {% for content in module.contents.all %}
                    <div data-id={{ content.id }}>
                        {% with item=content.item %}
                            <p>{{item}}({{item|model_name}})</p>
                            <a href="{% url 'module_content_update' module.id item|model_name item.id %}">Edit</a>

........................................................
Edit list.html as follow.
....................................................
            <p>
                <a href="{% url "course_edit" course.id %}">Edit</a>
                <a href="{% url 'course_delete' course.id %}">Delete</a>
                <a href="{% url 'course_module_update' course.id %}">Edit Modules</a>
                {% if course.modules.count > 0 %}
                    <a href="{% url 'module_content_list' course.modules.first.id %}">
                        Manage contents
                    </a>

                {% endif }
            </p>
        </div>

.......................................................
Run the server and visit: http://127.0.0.1:8000/course/mine
Click manage contents.
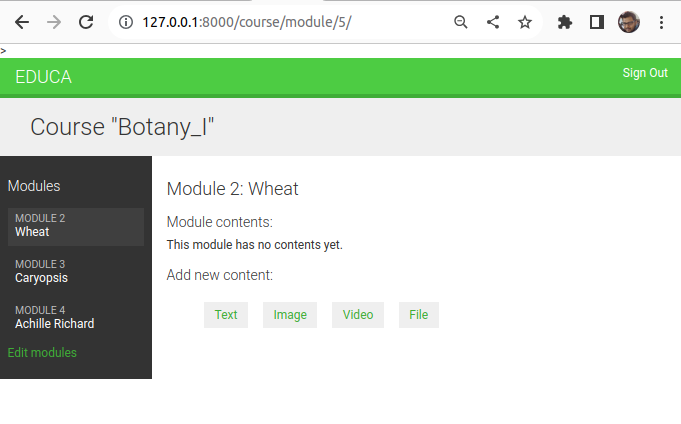
Click on Text to add text content, click on Image to add Image content and c
After loading all contents.
Try editing and deleting contents and adding more contents.