A Poetry API with Django
We will learn to build API with Django.
Install Django
#terminal
mkdir Poetry_API
cd Poetry_API
pip3 install django~=4.1.0
Create Project
#terminal
django-admin startproject django_project
cd django_project
#run
python manage.py runserverCustom User Model
Create a new app called accounts
#terminal
python manage.py startapp accounts
Edit django_project/settings.py to add it to our INSTALLED_APPS configuration so Django knows it exists.
.........................................
# Application definition

INSTALLED_APPS = [
    'django.contrib.admin',
    'django.contrib.auth',
    'django.contrib.contenttypes',
    'django.contrib.sessions',
    'django.contrib.messages',
    'django.contrib.staticfiles',
    #local apps
    'accounts',
]
...................................
Within accounts/models.py define a custom user model called CustomUser by extending AbstractUser and adding a single field, name, for now.
from django.contrib.auth.models import AbstractUser
from django.db import models

# Create your models here.
class CustomUser(AbstractUser):
    name = models.CharField(null=True,blank=True,max_length=100)
The last step is to update the AUTH_USER_MODEL configuration in django_project/settings.py, which is implicitly set to auth.User, over to accounts.CustomUser. This can be added at the bottom of the file.
AUTH_USER_MODEL = "accounts.CustomUser"Now we can run makemigrations for our model changes, migrate to initialize the database, and createsuperuser to create a superuser account so we can view the admin.
#terminal
python manage.py makemigrations
python manage.py migrate
python manage.py createsuperuser
#Now run the server
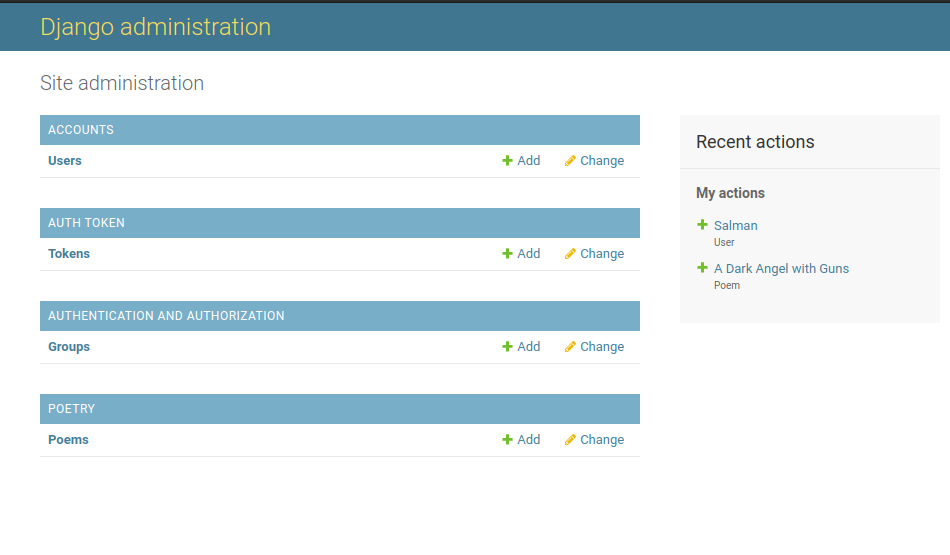
python manage.py runserverVisit http://127.0.0.1:8000/admin/
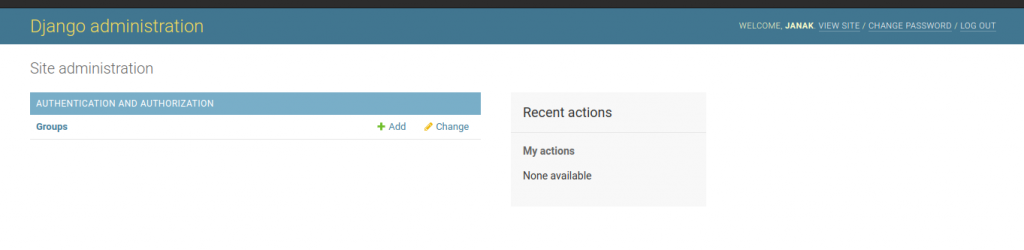
We can only see Group section. We do not have Users as we normally would with the default User model. We have to customize accounts/admin.py to display our new custom user model create a new file called accounts/forms.py that sets CustomUser to be used when creating or changing users.
Create accounts/forms.py and fill it as follows.
from django.contrib.auth.forms import UserCreationForm, UserChangeForm

from .models import CustomUser

class CustomUserCreationForm(UserCreationForm):
    class Meta(UserCreationForm):
        model =CustomUser
        fields = UserCreationForm.Meta.fields + ("name",)


class CustomUserChangeForm(UserChangeForm):
    class Meta:
        model = CustomUser
        fields = UserChangeForm.Meta.fields
At the top we import UserCreationForm and UserChangeForm which are used for creating or updating a user. We will also import our CustomUser model so that it can be integrated into new CustomUserCreationForm and CustomUserChangeForm classes.
Update accounts/admin.py to properly display the new custom user.
from django.contrib import admin
from django.contrib.auth.admin import UserAdmin

from .forms import CustomUserCreationForm, CustomUserChangeForm
from .models import CustomUser

# Register your models here.
class CustomUserAdmin(UserAdmin):
    add_form = CustomUserCreationForm
    form = CustomUserChangeForm
    model = CustomUser
    list_display = [
        "email",
        "username",
        "name",
        "is_staff",
    ]
    fieldsets = UserAdmin.fieldsets + ((None,{"fields":("name",)}),)
    add_fieldsets = UserAdmin.add_fieldsets + ((None,{"fields":("name",)}),)

admin.site.register(CustomUser,CustomUserAdmin)
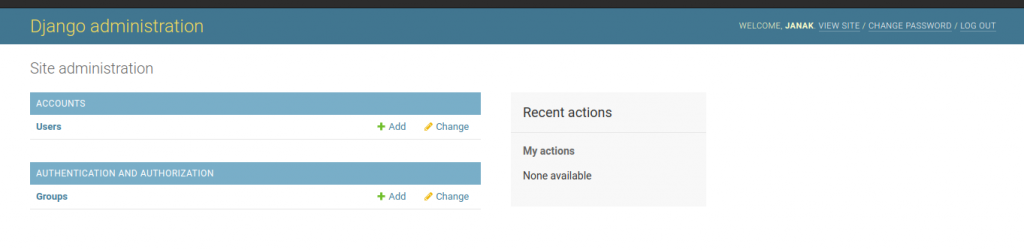
Visit http://127.0.0.1:8000/admin/ again.
Poetry App
python manage.py startapp postsTo add Poetry app to our INSTALLED_APP edit django_project/settings.py as follow.
....................
# Application definition

INSTALLED_APPS = [
    'django.contrib.admin',
    'django.contrib.auth',
    'django.contrib.contenttypes',
    'django.contrib.sessions',
    'django.contrib.messages',
    'django.contrib.staticfiles',
    #local apps
    'accounts',
    'Poetry',
]
.............................
Post Model
Our blog Poem database model will have following fields: author, title, abstract, body, created_at, image and updated_at. We will also import Django’s settings so we can refer to AUTH_USER_MODEL in our author field. Finally we will add a __str__ method as a general best practice.
from django.conf import settings
from django.db import models

# Create your models here.
class Poem(models.Model):
    title = models.CharField(max_length=50)
    image = models.ImageField(upload_to='Poetry/image')
    abstract = models.TextField(max_length=50)
    body = models.TextField()
    author = models.ForeignKey(settings.AUTH_USER_MODEL,on_delete=models.CASCADE)
    created_at = models.DateTimeField(auto_now_add=True)
    updated_at = models.DateTimeField(auto_now_add=True)

    def __str__(self):
        return self.title
Install pillow
#Terminal
pip3 install pillow
Add following codes to django_project/settings.py
import os
...............................


TIME_ZONE = "Asia/Kathmandu"

MEDIA_ROOT = os.path.join(BASE_DIR,'media')
MEDIA_URL = '/media/'

..............................
Make migrations and migrate
#Terminal
python manage.py makemigrations Poetry
python manage.py migrate
To view our data in Django’s admin app update Poetry/admin.py as follows.
from django.contrib import admin
from .models import Poem

# Register your models here.
admin.site.register(Poem)
Tests
Import get_user_model() to refer to our User along with TestCase and the Post model. Then create a class PoemTests with set up data and a single test for now, test_poem_model, that checks the fileds on the Poem model alogn with its __str__ method.
from django.contrib.auth import get_user_model
from django.test import TestCase

from .models import Poem

# Create your tests here.
class PoemTest(TestCase):
    @classmethod
    def setUpTestData(cls):
        cls.user = get_user_model().objects.create_user(
            username = "testuser",
            email = "abc@abc.com",
            password = "secret",
        )

        cls.poem = Poem.objects.create(
            author = cls.user,
            title = "title",
            abstract = 'abstract',
            body = 'body',
        )

    def test_poem_model(self):
        self.assertEqual(self.poem.author.username,"testuser")
        self.assertEqual(self.poem.title,"title")
        self.assertEqual(self.poem.body,"body")
        self.assertEqual(self.poem.abstract,"abstract")
        self.assertEqual(str(self.post),"title")
Django REST Framework
Django REST framework transforms our database models into a RESTful API. There are three main steps in this process:
- serializers.py file to transform the data into JSON
- views.py file to apply logic to each API endpoint
- urls.py file for the URL routes
Install Django REST framework.
#Terminal
pip3 install djangorestframework~=3.14.0
Edit django_project/settings.py to our INSTALLED_APPS.
.....................
# Application definition

INSTALLED_APPS = [
    'django.contrib.admin',
    'django.contrib.auth',
    'django.contrib.contenttypes',
    'django.contrib.sessions',
    'django.contrib.messages',
    'django.contrib.staticfiles',
    #3rd Party apps
    'rest_framework',
    #local apps
    'accounts',
    'Poetry',
]
......................................

REST_FRAMEWWORK = {
    "DEFAULT_PERMISSION_CLASSES": [
    "rest_framework.permissions.AllowAny",
    ],
}

.........................................
Serializers
Create Poetry/serializers.py file . The serializer file transforms data into JSON and also specify which fields to include or exclude.
from rest_framework import serializers
from .models import Poem

class PoemSerializer(serializers.ModelSerializer):
    class Meta:
        fields = (
            "id",
            "author",
            "title",
            "abstract",
            "body",
            "image",
            "created_at",
            "updated_at",
        )
        model = Poem
We imported Django REST Framework’s serilalizers class and our models. Then we created a PostSerializer class and added a Meta class where we specified which fields to include and explicitly set the model, Poem, to use.
Views
With ListCreateAPIView all available poems will be available as read-write endpoint. Using RetriveUpdateDestroyAPIView our individual poem will be available to be read, update and delete.
Update the Poetry/views.py as follows:
from rest_framework import generics

from .models import Poem
from .serializers import PoemSerializer

# Create your views here.
class PoemList(generics.ListCreateAPIView):
    queryset = Poem.objects.all()
    serializer_class = PoemSerializer

class PoemDetail(generics.RetrieveUpdateDestroyAPIView):
    queryset = Poem.objects.all()
    serializer_class = PoemSerializer
URLs
Update django_project/urls.py as follows:
from django.contrib import admin
from django.urls import path, include

urlpatterns = [
    path('admin/', admin.site.urls),
    path('api/v1/',include("Poetry.urls")),
]
Now create Poetry/urls.py and fill it with following code.
from django.urls import path
from .views import PoemList, PoemDetail
urlpatterns = [
path("<int:pk>/",PoemDetail.as_view(),name="poem_detail"),
path("",PoemList.as_view(),name="poem_list"),
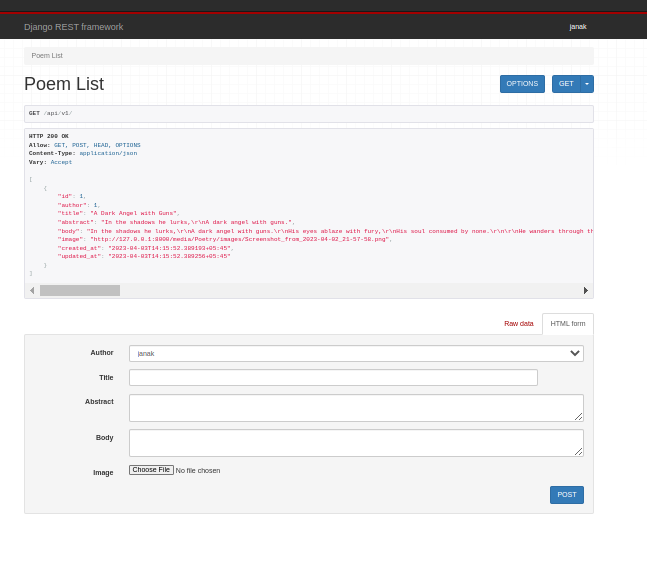
]Run the server, and visit http://127.0.0.1:8000/api/v1/
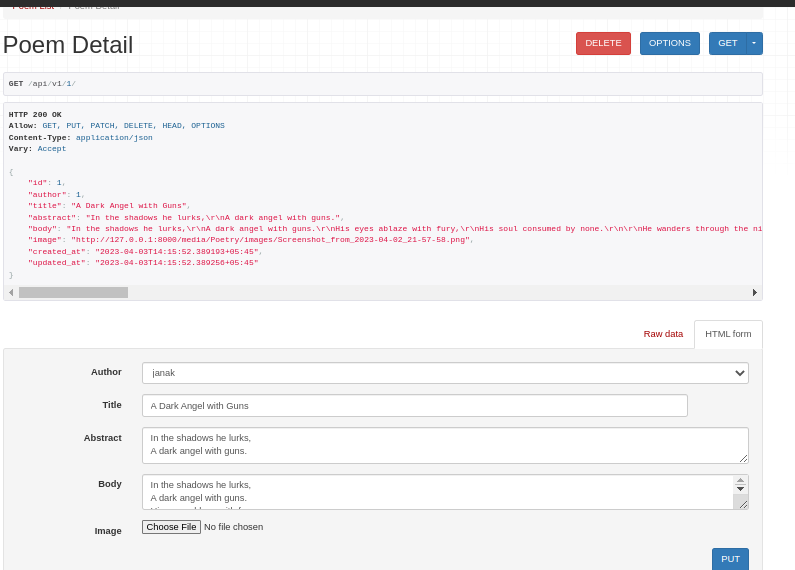
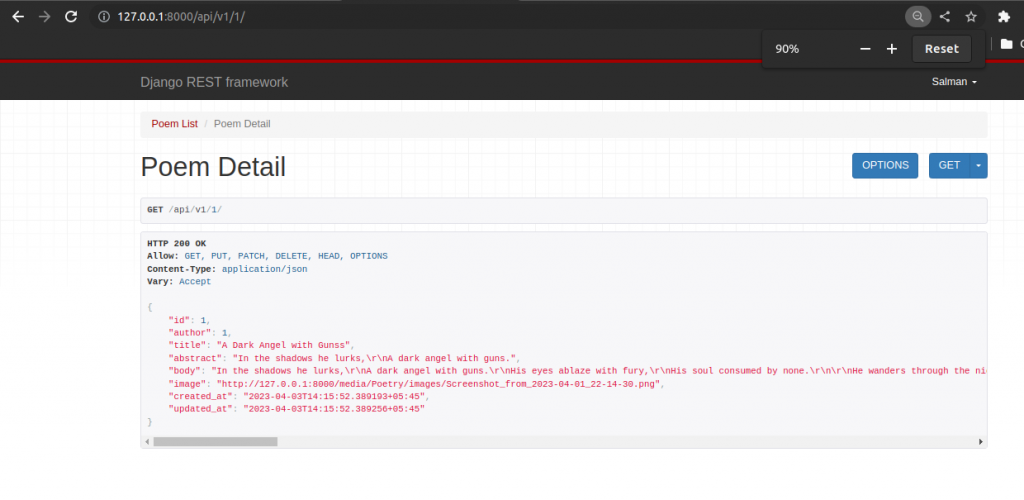
Visit http://127.0.0.1:8000/api/v1/1
Permissions
Django REST Framework has several out-of-box permissions settings that we can use to secure our API. These can be applied at a project-level, a view-level or at any individual model level.
Project level permissions.
There are four built-in project-level permissions settings we can use:
- Allowany
- IsAuthenticated
- IsAdminUser
- IsAuthenticatedOrReadOnly
We will use IsAuthenticatedOrReadOnly for our project level setting.
Edit django_project/settings.py as follows:
..................................................
REST_FRAMEWWORK = {
    "DEFAULT_PERMISSION_CLASSES": [
    "rest_framework.permissions.IsAuthenticatedOrReadOnly",
    ],
}

..........................................
Add Log In and Log Out
.............................................
from django.contrib import admin
from django.urls import path, include

urlpatterns = [
    path('admin/', admin.site.urls),
    path('api/v1/',include("Poetry.urls")),
    path('api-auth/',include("rest_framework.urls")),
]
........................................................
View-Level Permissions
Permissions can be added at the view-level too for more granular control. Update PostDetail view so that only admin users can view it.
In Poetry/views.py file import permissions from Django REST framework and then add a permission_class field to PostDetail that sets it to IsAdminUser.
from rest_framework import generics, permissions

from .models import Poem
from .serializers import PoemSerializer

# Create your views here.
class PoemList(generics.ListCreateAPIView):
    queryset = Poem.objects.all()
    serializer_class = PoemSerializer

class PoemDetail(generics.RetrieveUpdateDestroyAPIView):
    permission_classes = (permissions.IsAdminUser,)
    queryset = Poem.objects.all()
    serializer_class = PoemSerializer
Custom Permissions
For our first custom permission we want to restrict access so that only the author of a blog post can edit or delete it. The admin superuser will have access to do everything but a regular user can only update/delete their own content.
For a custom permission class we can overwrite methods of BasePermission class.
Create Poetry/permissions.py file and add the following codes.
from rest_framework import permissions

class IsAuthorOrReadOnly(permissions.BasePermission):
    def has_permission(self,request,view):
        #Authenticated users only can see list view
        if request.user.is_authenticated:
            return True
        return False

    def has_object_permission(self, request, view, obj):
        #Read permisssions are allowed to any request so we will always
        #allow GET,HEAD, or OPTIONS requests
        if request.method in permissions.SAFE_METHODS:
            return True

        #Write permissions are only allowed to the author of the post
        return obj.author == request.user
We import permissions at the top and then create a custom class IsAuthorOrReadOnly which extends BasePermission. The first method, has_permission, requires that a user be logged in or authenticated in order to have access.
The second method, has_object_permission, allows read-only requests but limits write permissions to only the author of the blog post. We access author field via obj.author and the current user with request.user.
Import IsAuthorOrReadOnly from our own Poetry/permissions.py and edit Poetry/views.py as follows:
from rest_framework import generics

from .permissions import IsAuthorOrReadOnly
from .models import Poem
from .serializers import PoemSerializer

# Create your views here.
class PoemList(generics.ListCreateAPIView):
    permission_classes = (IsAuthorOrReadOnly)
    queryset = Poem.objects.all()
    serializer_class = PoemSerializer

class PoemDetail(generics.RetrieveUpdateDestroyAPIView):
    permission_classes = (IsAuthorOrReadOnly,)
    queryset = Poem.objects.all()
    serializer_class = PoemSerializer
Run the server:
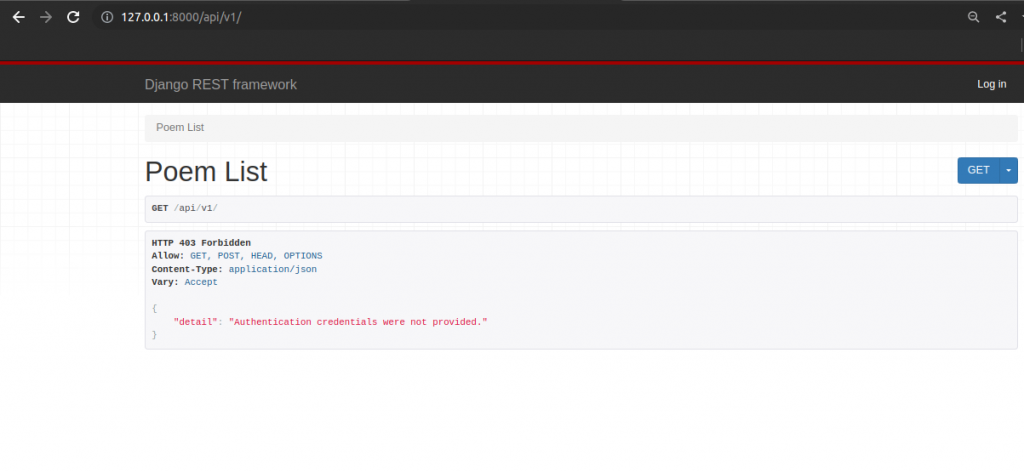
Try to access Poem List and Poem Detail without Login

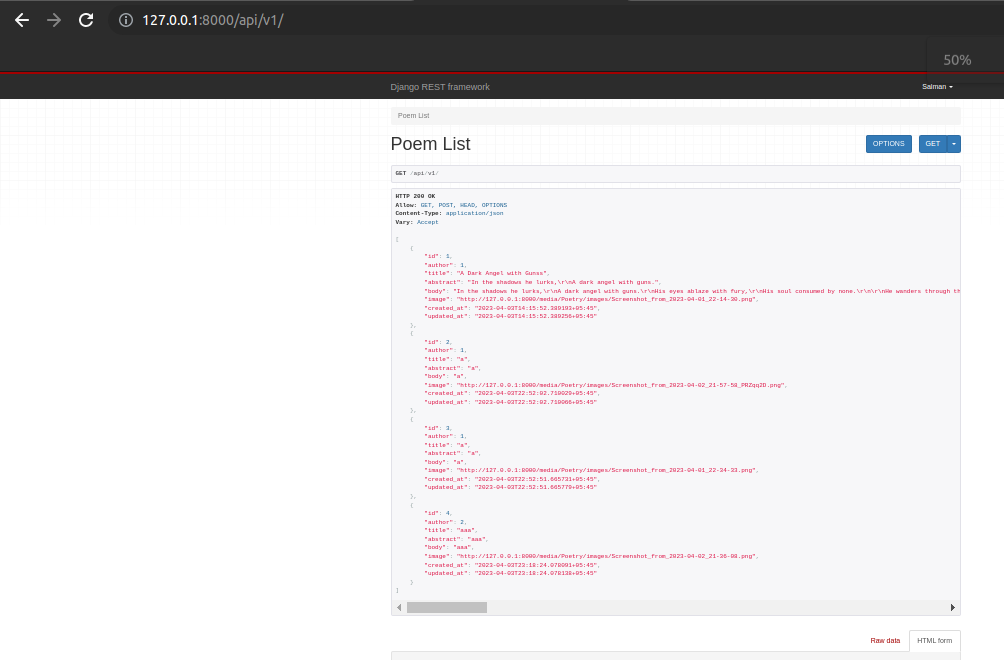
Try to access Poem List and Poem Detail with Login
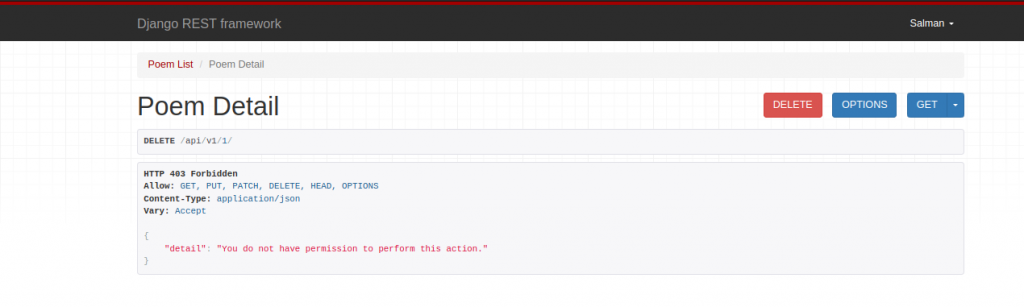
Try to Delete or Edit Poem written by other author
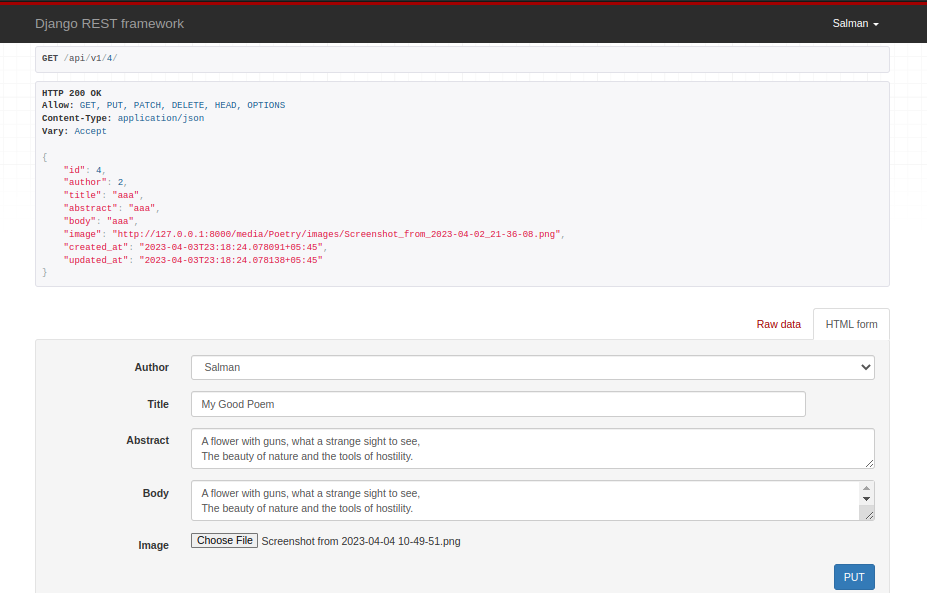
Trying to Edit Author’s own poem
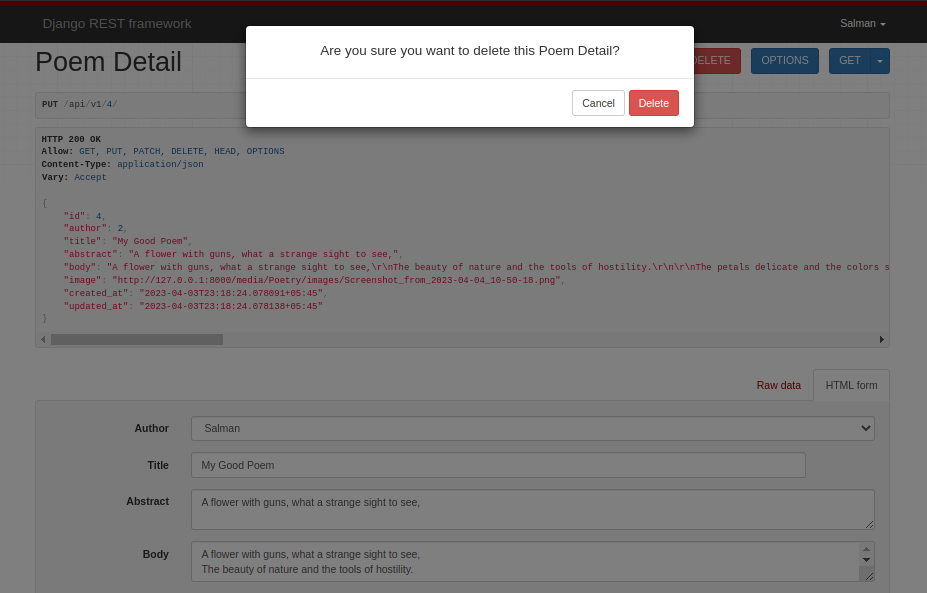
Trying to Delete Author’s own poem
User Authentication
Now, we will implement authentication which is the process by which a user can register for a new account, log in with it and log out.
Basic Authentication
The most common form of HTTP authentication is known as “Basic Authentication”. When a client makes and HTTP request, it is forced to send an approved authentication credential before access is granted.
The complete request/response flow looks like this:
- Client makes an HTTP request
- Server responds with an HTTP response containing a 401 (Unauthorized) status code and www-Authenticate HTTP header with details on how to authorize.
- Client sends credentials back via Authorization HTTP header.
- Server checks credentials and responds with either 200 OK or 403 Forbidded status code.
Session Authentication
The basic flow:
- A user enters their log in credentials (typically username/password)
- The server verifies the credentials are correct and generates a session object that is then stored in the database.
- The server sends the client a session ID-not the session objects itself-which is stored as a cookie on a browser
- On all future requests the session ID is included as an HTTP header and if verified by the database, the request proceeds.
- Once a user logs out of an application, the session ID is destroyed by both the client and server.
- If the user later logs in again, a new session ID is generated and stored as a cookie on the client.
Token Authentication
Token-based authentication is stateless: once a client sends the initial user credentials to the server, a unique token is generated and then stored by the client as either a cookie or in local storage. This token is then passed in the header of each incoming HTTP request and the server uses it to verify the a user is authenticated. The server itself does not keep a record of the user, just whether a token is valid or not.
To implement token authentication edit django_project/settings.py as follows.
...............................
# Application definition

INSTALLED_APPS = [
    'django.contrib.admin',
    'django.contrib.auth',
    'django.contrib.contenttypes',
    'django.contrib.sessions',
    'django.contrib.messages',
    'django.contrib.staticfiles',
    #3rd Party apps
    'rest_framework',
    "rest_framework.authtoken",
    #local apps
    'accounts',
    'Poetry',
]
.................................
REST_FRAMEWWORK = {
    "DEFAULT_PERMISSION_CLASSES": [
    "rest_framework.permissions.IsAuthenticatedOrReadOnly",
    ],
    "DEFAULT_AUTHENTICATION_CLASSES":[
    "rest_framework.authentication.SessionAuthentication",
    "rest_framework.authentication.TokenAuthentication",
    ]
}
...................................
Migrate and run
#Terminal
python manage.py migrate
python manage.py runserver
Go to http://127.0.0.1:8000/admin/ log in as admin. We can see new section called named “Token”.
Currently there are no tokens. The tokens are only generated after there is an API call for a user to log in.
Endpoints
We need to create endpoints so users can log in and log out. We will use dj-rest-auth in combination with django-allauth to simplify things.
dj-rest-auth
Install dj-rest-auth. This will help us to add log in, log out and password reset API endpoints.
#Terminal
pip3 install dj-rest-auth==3.0.0
Add this to our installed APP list by editing django_project/settings.py
............................
I# Application definition

INSTALLED_APPS = [
    'django.contrib.admin',
    'django.contrib.auth',
    'django.contrib.contenttypes',
    'django.contrib.sessions',
    'django.contrib.messages',
    'django.contrib.staticfiles',

    #3rd Party apps
    'rest_framework',
    "rest_framework.authtoken",
    "allauth",
    "allauth.account",
    "allauth.socialaccount",
    "dj_rest_auth",
    "dj_rest_auth.registration"

    #local apps
    'accounts',
    'Poetry',
]
....................
Update our django_project/urls.py file with dj_rest_auth package. We will set the URL routes to api/v1/dj-rest-auth.
from django.contrib import admin
from django.urls import path, include

urlpatterns = [
    path('admin/', admin.site.urls),
    path('api/v1/',include("Poetry.urls")),
    path('api-auth/',include("rest_framework.urls")),
    path("api/v1/1/dj-rest-auth/",include("dj_rest_auth.urls")),
]
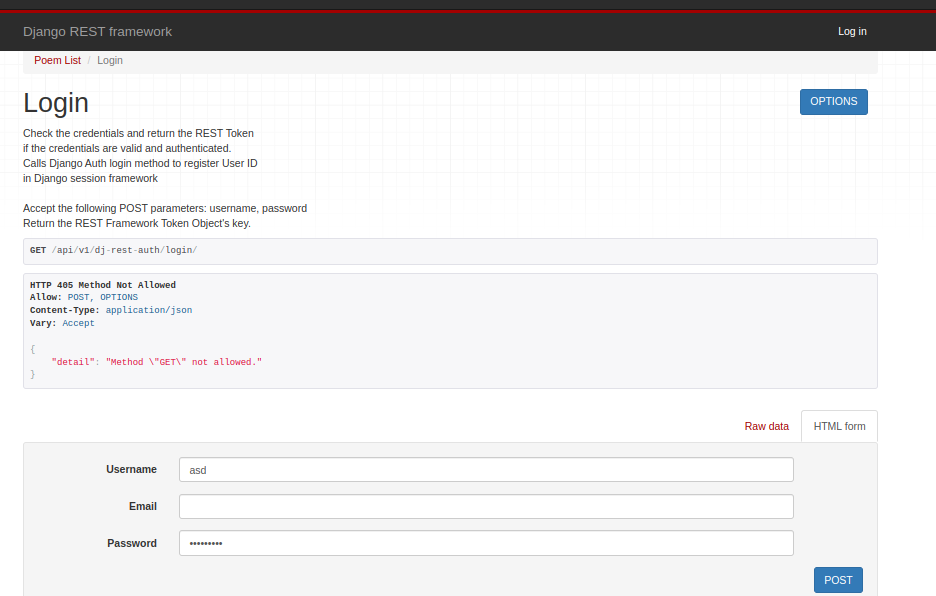
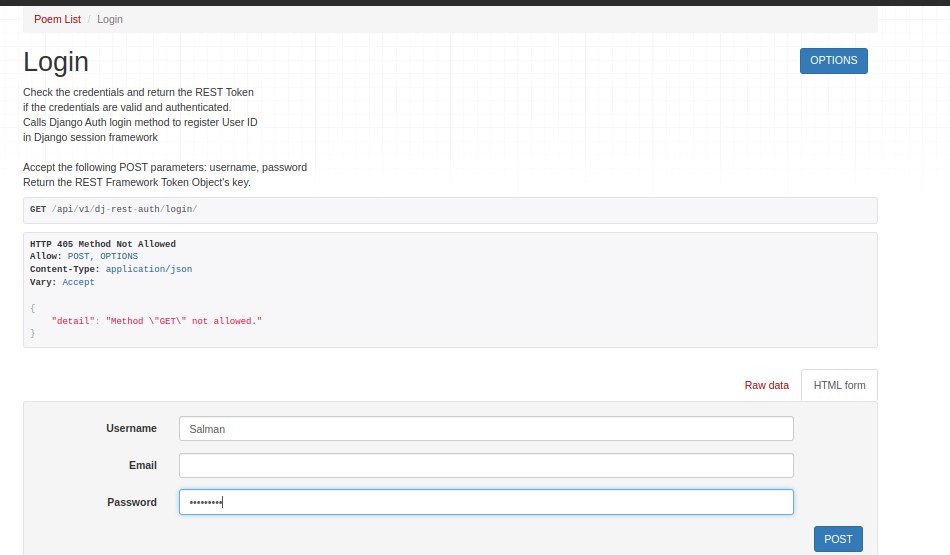
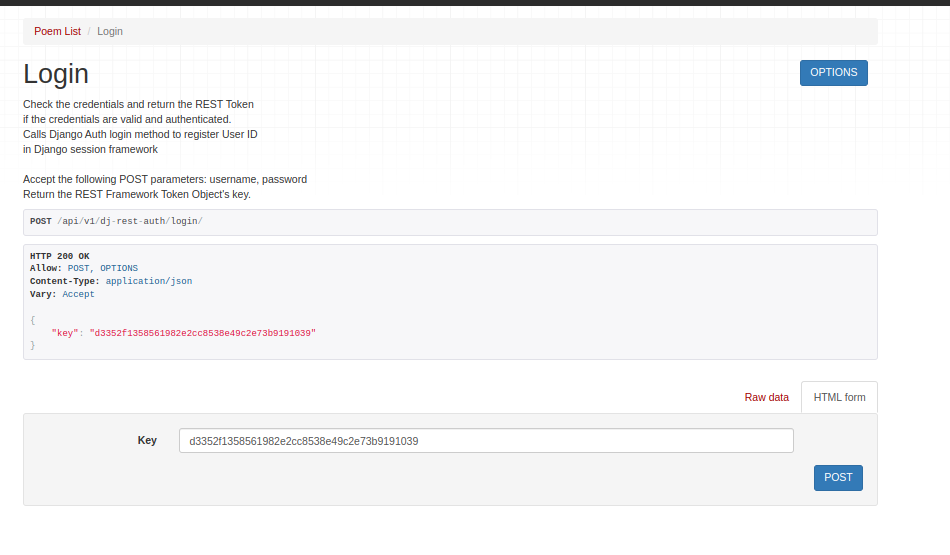
Run the server and visit http://127.0.0.1:8000/api/v1/dj-rest-auth/login/
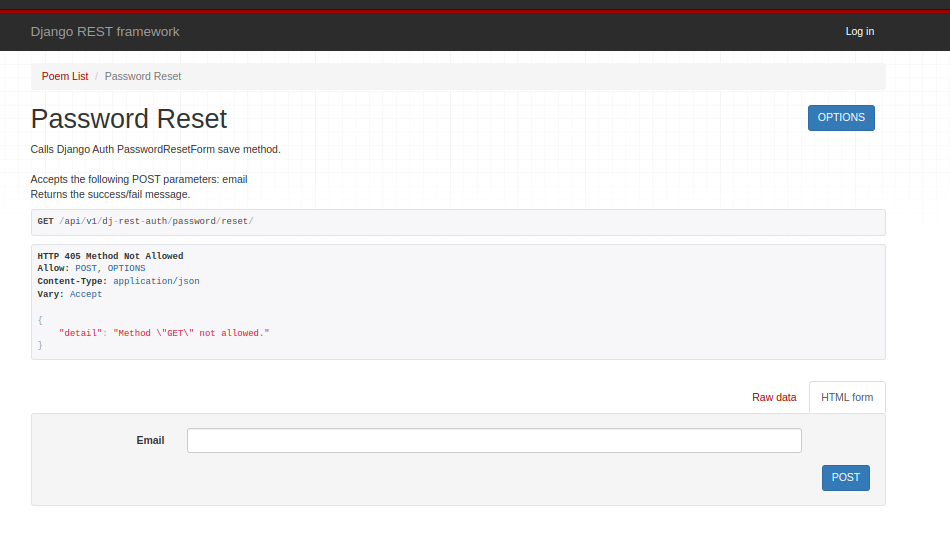
To reset password visit : http://127.0.0.1:8000/api/v1/dj-rest-auth/password/reset/
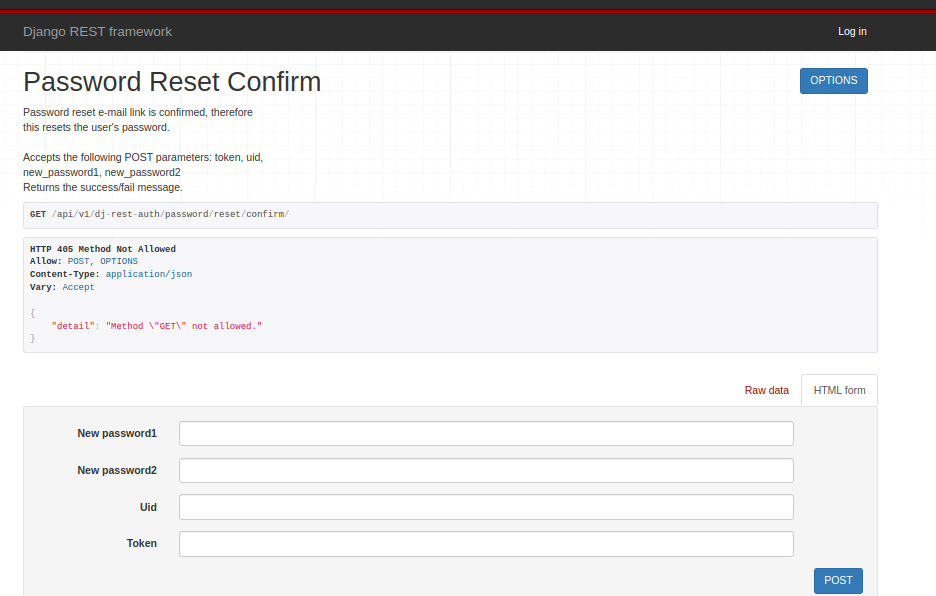
Visit http://127.0.0.1:8000/api/v1/dj-rest-auth/password/reset/confirm/ for password reset confirmation.
User Registration
The third-party package django-allauth will help us with the user registration.
#Terminal
pip3 install django-allauth~=0.54.0
Add it to installed app.
 #Application definition

INSTALLED_APPS = [
    'django.contrib.admin',
    'django.contrib.auth',
    'django.contrib.contenttypes',
    'django.contrib.sessions',
    'django.contrib.messages',
    'django.contrib.staticfiles',

    #3rd Party apps
    'rest_framework',
    "rest_framework.authtoken",
    "allauth",
    "allauth.account",
    "allauth.socialaccount",
    "dj_rest_auth",

    #local apps
    'accounts',
    'Poetry',
]
django-allauth needs to be added to the TEMPLATES configuration after existing context processors as well as setting the EMAIL_BACKEND to console and adding a SITE_ID of 1.
Edit django_project/settings.py as follow:
TEMPLATES = [
    {
        'BACKEND': 'django.template.backends.django.DjangoTemplates',
        'DIRS': [],
        'APP_DIRS': True,
        'OPTIONS': {
            'context_processors': [
                'django.template.context_processors.debug',
                'django.template.context_processors.request',
                'django.contrib.auth.context_processors.auth',
                'django.contrib.messages.context_processors.messages',
                "django.template.context_processors.request",
            ],
        },
    },
]


EMAIL_BACKEND = "django.core.mail.backends.console.EmailBackent"
SITE_ID = 1
The email back-end config is needed since by default an email will be sent when a new user is registered, asking them to confirm their account. Rather than also set up an email server, we will output the emails to the console with the console.EmailBackend setting.
SITE_ID is part of built-in Django “sites” framework, which is a way to host multiple websites form the same Django Project. We only have one site we are working on here but django-allauth uses the sites framework, so we must specify a default setting.
#Terminal
python manage.py migrate
Edit django_project/urls.py to add new path.
from django.contrib import admin
from django.urls import path, include

urlpatterns = [
    path('admin/', admin.site.urls),
    path('api/v1/',include("Poetry.urls")),
    path('api-auth/',include("rest_framework.urls")),
    path("api/v1/dj-rest-auth/",include("dj_rest_auth.urls")),
    path("api/v1/dj-rest-auth/registration/",include("dj_rest_auth.registration.urls")),
]
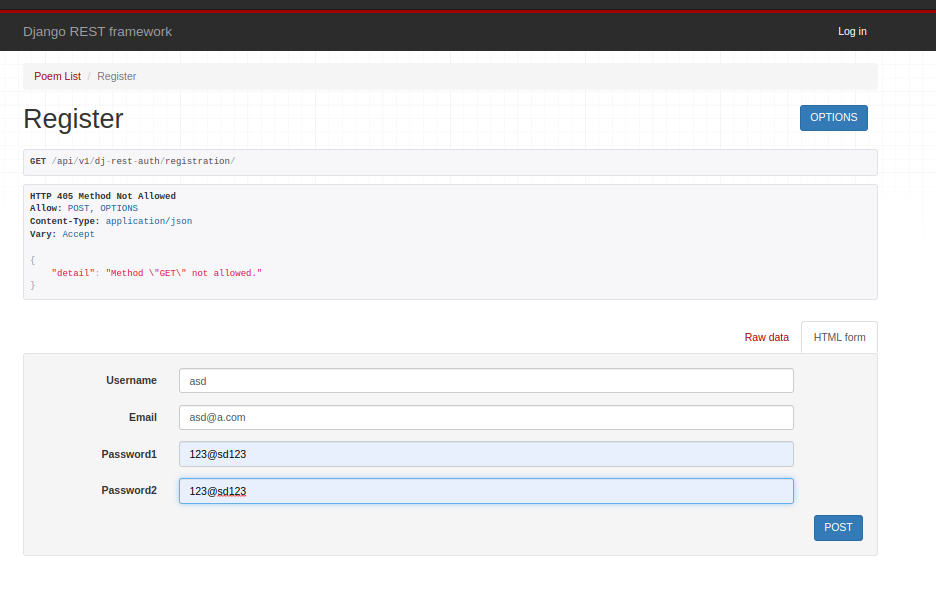
Run the server and visit
http://127.0.0.1:8000/api/v1/dj-rest-auth/registration.
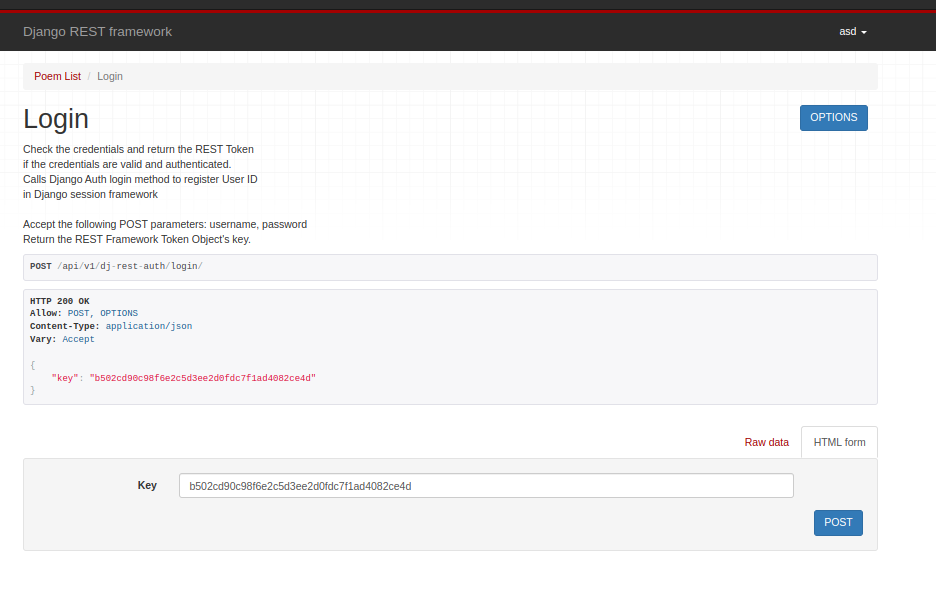
Now, login http://127.0.0.1:8000/api/v1/dj-rest-auth/login/