A Library API with Django
We will create a simple web application where the user can see the information about books homepage.
Later we will create API with Django for this for the same purpose.
- Install Django
- Books App
- Models
- Superuser
- Views
- Urls
- Templates
- Django Rest Framework
- API app
- Serializers
- Views for Api
- Urls for Api
- Tests for Api
Install Django
#inside ubuntu terminal
cd Books_API
mkdir Books_API
pip3 install django~=4.1.0
Start Project
#inside ubuntu terminal
django-admin startproject django_project
cd django_project
Files inside Project
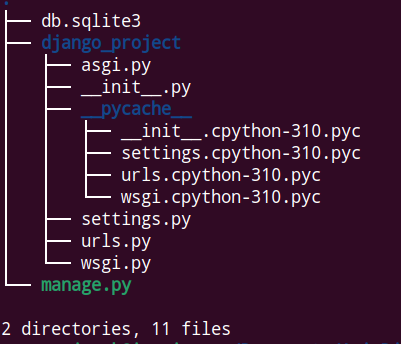
- db.sqlite3 : Database
- asgi.py: Allows for optional Asynchronous Server Gateway Interface to be run
- settings.py : Controls our Django project’s overall settings
- urls.py: Tells Django which pages to build in response to a browser or URL request
- wsgi.py: stands for Web Server Gateway Interface which helps Django serve our eventual web pages.
- manage.py: Is used to execute various Django commands such as running the local web server or creating a new app.
- __init__.py: It indicates that the files in the folder are part of a Python package. Without this file, we cannot import files from another directory.
- __pycache__: This folder contains bytecode-compiled and optimized bytecode-compiled versions of our program’s files .
#migrate and run
python manage.py migrate
python manage.py runserver
Books App
#terminal
python manage.py startapp Books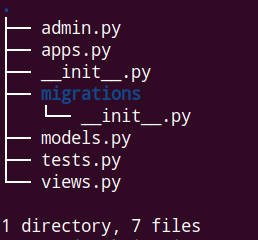
- admin.py is a configuration file for the built-in Django Admin app
- app.py is a configuration file for the app itself
- migrations/ is a directory that stores migrations files for the database changes
- models.py is where we define our database models
- tests.py is for our app-specific tests
- views.py is where we handle the request/response logic for our web app
Add our newly installed app to the INSTALLED_APS configuration in the django_project/settings.py.
# Application definition

INSTALLED_APPS = [
    'django.contrib.admin',
    'django.contrib.auth',
    'django.contrib.contenttypes',
    'django.contrib.sessions',
    'django.contrib.messages',
    'django.contrib.staticfiles',
    #My own
    "Books",
]
Models
from django.db import models

# Create your models here.
class Book(models.Model):
    title = models.CharField(max_length=250)
    author = models.CharField(max_length=100)
    isbn = models.CharField(max_length=13)


    def __str__(self):
        return self.title
This is a basic Django model where models is imported from Django and a new class, called Book, extends it. There are three fields: title, author and isbn. The __str__ method so that the title of a book will display in readable format in the admin. We need to create a migration file as we created a new database model.
#Terminal
python manage.py makemigrations Books
After creating a migrations file we need to migrate so that the migrations is applied to the existing database.
#Terminal
python manage.py migrate
Now register this new model to admin so that we can add books when logged in through admin. Edit Books/admin.py as follows.
from django.contrib import admin
from .models import Book

# Register your models here.
admin.site.register(Book)
Create Superuser
#terminal
python manage.py createsuperuser
#terminal
python manage.py runserverVisit http://127.0.0.1:8000/admin/ and login.
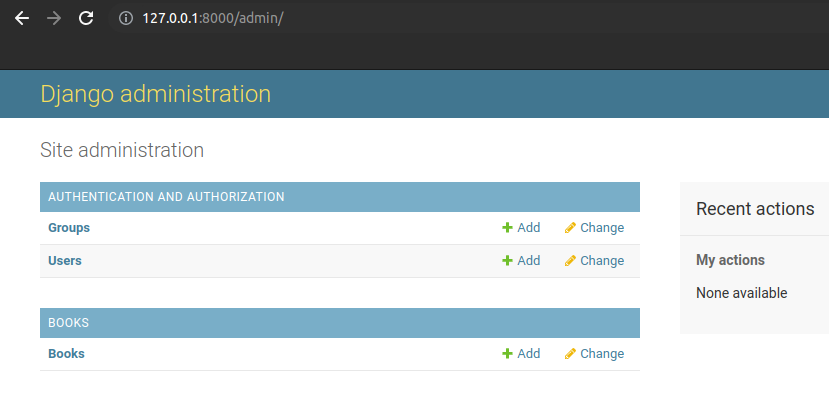
Add Books


Views
The views.py file controls how the database model content is displayed. Since we want to list all books we can use the built-in generic class ListView.
Edit the books/views.py as follow.
from django.views.generic import ListView

from .models import Book
# Create your views here.
class BookListView(ListView):
    model = Book
    template_name = "book_list.html"
We imported ListView and our Book model. Then we create a BookListView class that specifies the model to use and the template.
URLS
When a user visits our site they will initially interact with the django_project/urls.py file. Configure it as follows.
from django.contrib import admin
from django.urls import path, include

urlpatterns = [
    path('admin/', admin.site.urls),
    path("",include("Books.urls")),
]
We imported the built-in admin app, path for our routes and include which willbe used with our Books app. We use the empty string, ” “, for the Books app route which means a user on the homepage will be redirected directly to the Books app.
Next we need to create Books/urls.py and fill it with following code.
from django.urls import path
from .views import BookListView

urlpatterns = [
    path("",BookListView.as_view(),name="home"),
]
We import our views file, configure BookListView at the empty string, ” ” , and add a named URL home.
When a user goes to the homepage of our website they will first hit the django_project/urls.py file, then be redirected to Books/urls.py which specifies using the BookListView. In this view file, the Book model is used along with the ListView to list out all books.
Templates
Create templates folder within Books app.
Within templates folder, create Books folder and within that create book_list.html.
Edit templates/Books/book_list.html
<!DOCTYPE html>
<h1>My Books</h1>
{% for book in book_list %}
<ul>
    <li>ID: {{ book.id }}</li>
    <li> Title: {{ book.title }}</li>
    <li> Author: {{ book.author }}</li>
    <li> ISBN: {{ book.isbn }} </li>
</ul>

{% endfor %}
Django ships with a template language that allows for basic logic. Here we use the for tag to loop over all available books. Template tags must be included within opening/closing brackets and parentheses. So the format is always {% for … %} and then we must close our loop later with {% endfor %}.
What we are looping over is the object containing all available books in our model courtesy of ListView. The name of this object is <model>_list which, given our model in named book, means it is book_list. Therefore to loop over each book we write {% for book in book_list % } and then display each field from our model.
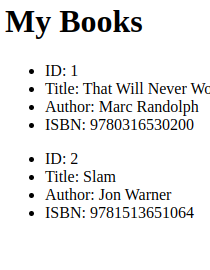
Run the server and visit homepage.
Django REST Framework
Adding REST framework
#Terminal
pip3 install djangorestframework~=3.14.0
Add rest_framework in our INSTALLED_APPS to formally notify Django about REST framework installation.
Edit django_project/settings.py as follow.
..........................
# Application definition

INSTALLED_APPS = [
    'django.contrib.admin',
    'django.contrib.auth',
    'django.contrib.contenttypes',
    'django.contrib.sessions',
    'django.contrib.messages',
    'django.contrib.staticfiles',
    #3rd Party
    "rest_framework",
    #My own
    "Books",
]
...........................
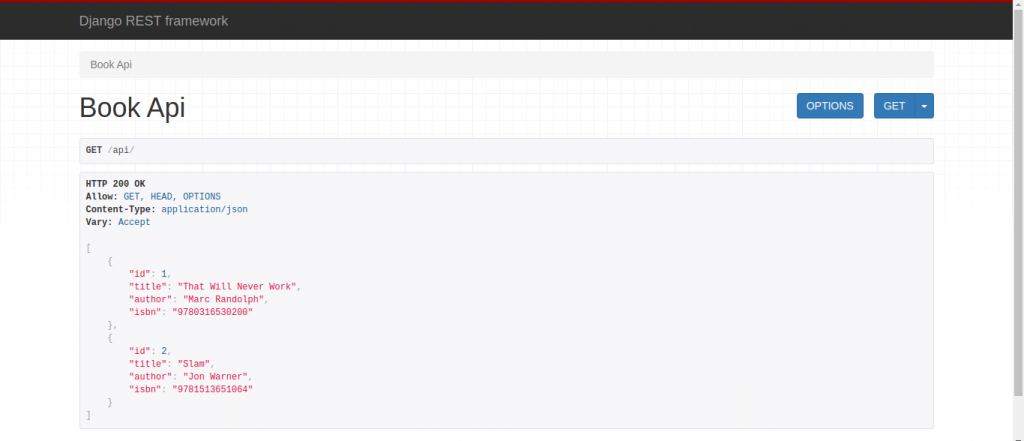
Our web API will expose a single endpoint that lists out books in JSON. To do this, we will need a new URL route, a new view and a new serializer.
Create a new app named apis
#terminal
python manage.py startapp apis
Add this app to project
..........................
# Application definition

INSTALLED_APPS = [
    'django.contrib.admin',
    'django.contrib.auth',
    'django.contrib.contenttypes',
    'django.contrib.sessions',
    'django.contrib.messages',
    'django.contrib.staticfiles',
    #3rd Party
    "rest_framework",
    #My own
    "Books",
    "apis",
]
..................
Serializers
A serializer translates complex data like querysets and model instances into a format that is easy to consume over the internet, typically JSON.
Create Books/serializers.py and add following code.
from rest_framework import serializers

from Books.models import Book

class BookSerializer(serializers.ModelSerializer):
    class Meta:
        model = Book
        fields = ("id","title","author","isbn")
Views of API
Django views are used to customize what data to send to the templates. Django REST Framework views are similar except the end result is serialized data in JSON format, not the content for a webpage. Django REST views rely on a model, a URL and serializer.
There is generic Django REST Framework views for common use cases and we will use ListAPIView here to display all books.
Edits apis/views.py as follow:
from rest_framework import generics

from books.models import Book
from .serializers import BookSerializer

# Create your views here.
class BookAPIView(generics.ListAPIView):
    queryset = Book.objects.all()
    serializer_class = BookSerializer
URLS of API
Let us start with our URL configuration. Adding an API endpoint is just like configuring a traditional Django URL route. In the django_project/urls.py file include the apis app and configure its URL route.
from django.contrib import admin
from django.urls import path, include

urlpatterns = [
    path('admin/', admin.site.urls),
    path("api/",include("apis.urls")),
    path("",include("Books.urls")),

]
Create a new file called apis/urls.py. This file will import BookAPIView and set it to the URL route of “” so it will appear at api/.
from django.urls import path

from .views import BookAPIView

urlpatterns = [
    path("",BookAPIView.as_view(),name="book_list"),
]
Output
Run the server and visit http://127.0.0.1:8000/api/
Tests
We will test API endpoint, specifically that it uses the URL we except, has the correct status code of 200 and contains the correct content. Edit the apis/tests.py as follows.
from django.urls import reverse
from rest_framework import status
from rest_framework.test import APITestCase

from Books.models import Book
# Create your tests here.
class APITests(APITestCase):
    @classmethod
    def setUpTestData(cls):
        cls.book = Book.objects.create(
            title = "The book",
            author = "The author",
            isbn = "123",
        )
    def test_api_listview(self):
        response = self.client.get(response("book_list"))
        self.assertEqual(response.status_code,status.HTTP_200_OK)
        self.assertEqual(Book.objects.count(),1)
        self.assertContains(response,self.book)
We imported reverse from Django and from Django REST Framework both status and APITestCase. We also imported our Book model. We extended APITestCase in a new class called APITests that starts by configuring set up data. Then we run four different checks. First we check that the named URL of the “book_list” is being used. Second we confirm that HTTP status code matches 200. Third we check that there is a single entry in the database and finally we confirm that the response contains all the data from our created book object.
#run the test in terminal
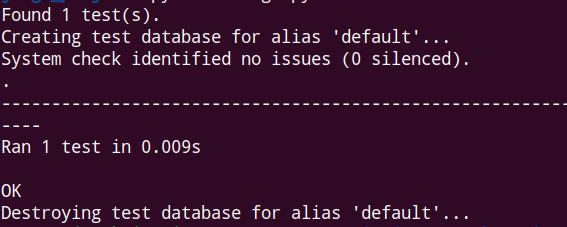
python manage.py test