Django News App Part III
In this tutorial we will article page where journalists can post articles, set up permissions so only the author of an article can edit or delete it.
Table of Contents
Articles App
Create a new articles app.
#Terminal
python3 manage.py startapp articles
Go to django_projects/settings.py and add articles app to our in INSTALLED_APPS and update the time zone since we will be timestamping our articles.
# Application definition

INSTALLED_APPS = [
    'django.contrib.admin',
    'django.contrib.auth',
    'django.contrib.contenttypes',
    'django.contrib.sessions',
    'django.contrib.messages',
    'django.contrib.staticfiles',
    #3rd party
    'crispy_forms',
    'crispy_bootstrap5',
    #local
    'accounts.apps.AccountsConfig',
    'pages.apps.PagesConfig',
    'articles.apps.ArticlesConfig',
]
........................................
TIME_ZONE = "Asia/Kathmandu"
Now we define our database model which contains four fields: title, body, date and author. Note that we are letting Django automatically set the time and date based on our TIME_ZONE setting. For the author field we want to reference our custom user model “accounts.CustomUser” which we set in the django_project/settings.py file as AUTH_USER_MODEL. We will also implement the best practice of defining a get_absolute_url and a __str__ method for viewing the model in our admin interface.
Edit articles/models.py as follow.
from django.conf import settings
from django.db import models
from django.urls import reverse

# Create your models here.
class Article(models.Model):
    title = models.CharField(max_length=255)
    body = models.TextField()
    date = models.DateTimeField(auto_now_add=True)
    author = models.ForeignKey(
        settings.AUTH_USER_MODEL,
        on_delete=models.CASCADE,
    )

    def __str__(self):
        return self.title

    def get_absolute_url(self):
        return reverse("article_detail",kwargs={"pk":self.pk})
There are two main ways to refer to a custom user model: AUTH_USER_MODEL and get_user_model.
- AUTH_USER_MODEL makes sense for references within a models.py file.
- get_user_model() is recommended everywhere else such as views, tests, ect.
For our new app and model, we need to make new migration file and then apply it to the database.
#terminal
python3 manage.py makemigrations articles
python3 manage.py migrate
Visit articles/admin.py and register our app there so that our app will be displayed.
from django.contrib import admin
from .models import Article

# Register your models here.
admin.site.register(Article)
Run the server and visit http://127.0.0.1:8000/admin
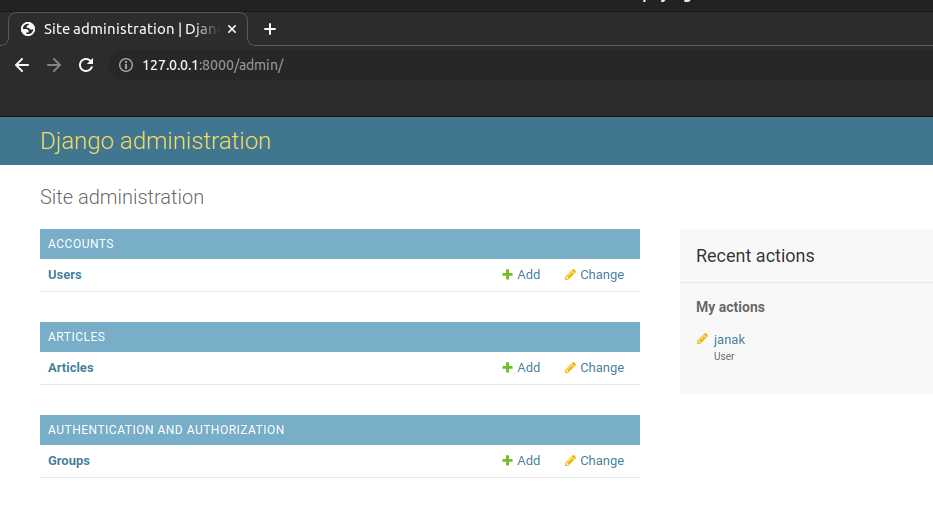
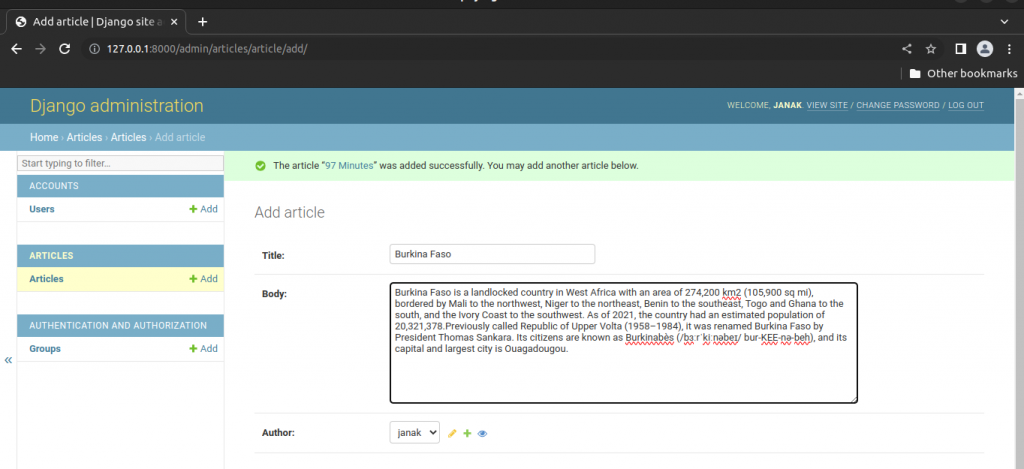
If you click on “+ Add” next to “Articles” at the top of the page to add an article.
Add Few articles with your superuser as author.
Views, Urls and Templates for List Article
View
We create our view using the built-in generic ListView from Django. The only two fields we need to specify are the model Article and our template name which will be article_list.html.
#articles/views.py
from django.views.generic import ListView

from .models import Article

# Create your views here.
class ArticleListView(ListView):
    model = Article
    template_name = "article_list.html"
Create articles/urls.py file in the text editor and populate it with following routes.
from django.urls import path

from .views import ArticleListView

urlpatterns = [
    path("",ArticleListView.as_view(),name="article_list"),
]
Edit django_project/urls.py and add url pattern for articles.
from django.contrib import admin
from django.urls import path,include


urlpatterns = [
    path('admin/', admin.site.urls),
    path("accounts/",include("accounts.urls")),
    path("accounts/",include("django.contrib.auth.urls")),
    path("articles/",include("articles.urls")),
    path("",include("pages.urls")),
]
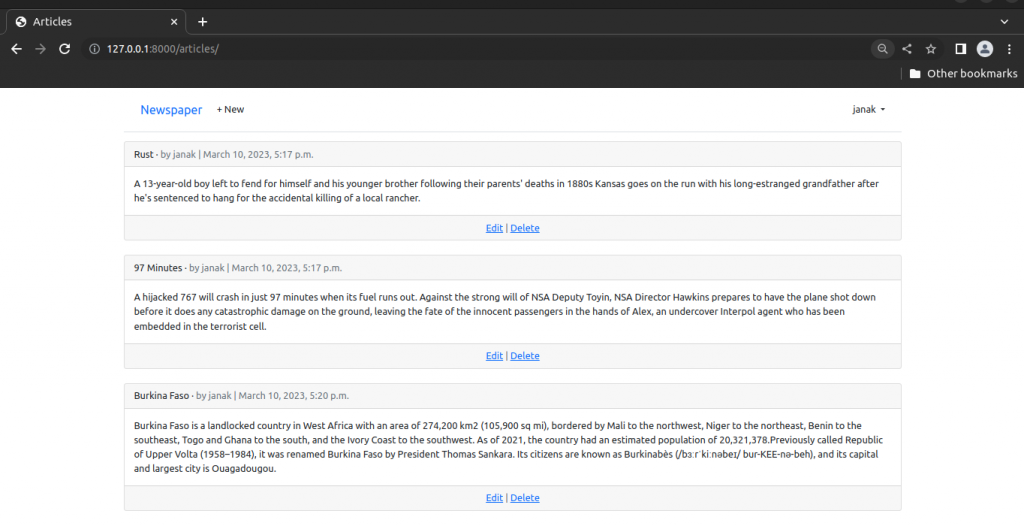
Finally create templates/article_list.html which will display title, body, author and date of each article.
{% extends "base.html" %}
{% block title %}Articles{% endblock title %}
{% block content %}
{% for article in article_list %}
<div class="card">
<div class="card-header">
<span class="font-weight-bold">
{{ article.title }}
</span>
·
<span class="text-muted">by {{ article.author }} | {{ article.date }}</span>
</div>
<div class="card-body">
{{ article.body }}
</div>
<div class="card-footer text-center text-muted">
<a href="#">Edit</a> | <a href="#">Delete</a>
</div>
</div>
<br/>
{% endfor %}
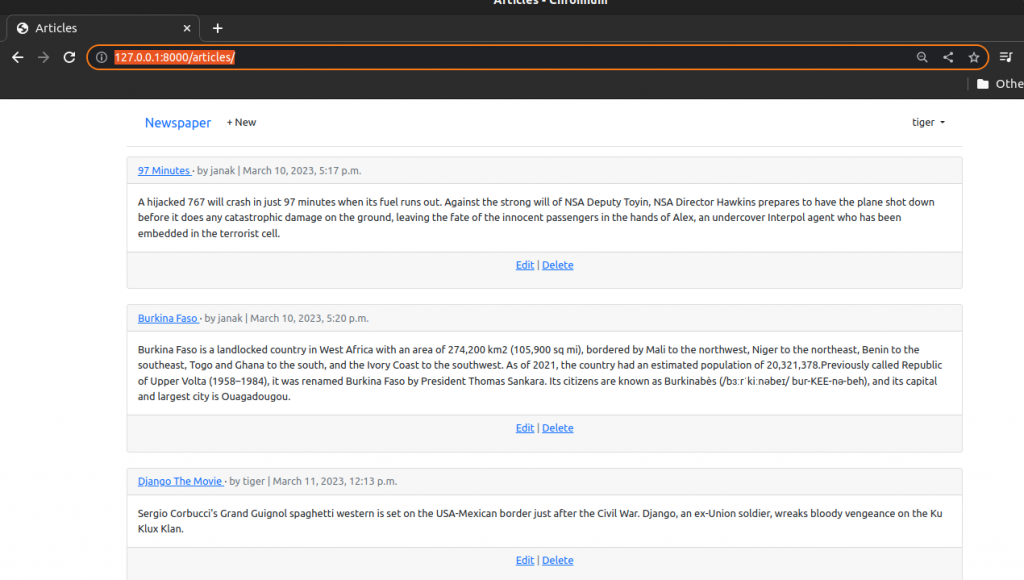
{% endblock content %}Run server and visit http://127.0.0.1:8000/articles/.
Detail, Edit and Delete
We will use Django’s generic class-based views for DetailView, UpdateView and DeleteView. The detail view only requires listing the model and template name. For the update/edit view we also add the specific fields title and body that can be changed. And for the delete view we must add a redirect for where to send the user after deleting the entry. That requires importing reverse_lazy and specifying the success_url along with a corresponding named URL.
Edit articles/views.py as follow.
from django.views.generic import ListView, DetailView
from django.views.generic.edit import UpdateView, DeleteView
from django.urls import reverse_lazy

from .models import Article

# Create your views here.
class ArticleListView(ListView):
    model = Article
    template_name = "article_list.html"

class ArticleDetailView(DetailView):
    model = Article
    template_name = "article_detail.html"

class ArticleUpdateView(UpdateView):
    model = Article
    fields = {
        "title",
        "body",
    }
    template_name = "article_edit.html"

class ArticleDeleteView(DeleteView):
    model = Article
    template_name = "article_delete.html"
    success_url = reverse_lazy("article_list")
The Django ORM automatically adds a primary key to each database entry, meaning that the first article has a pk value of 1, the second of 2, and so on. We can use this to craft our URL paths.
For our detail page we want the route to be at articles/<int:pk>. The int here is known as a path converter and essentially tells Django we want this value to be treated as an integer and not another data type like a string. Therefore the URL route for the first article will be at <articles/1/. Since we are in the articles app all URL routes will be prefixed with articles because we set that in django_projet/urls.py. We only need to add the <int:pk> part here.
The edit and delete routes will also use the primary key and be at articles/1/edit/ and articles/1/delete/ as the eventual routes.
Update articles/urls.py as follow.
from django.urls import path

from .views import (ArticleListView,ArticleDetailView,ArticleUpdateView,ArticleDeleteView)


urlpatterns = [
    path("<int:pk>/",ArticleDetailView.as_view(),
         name="article_detail"),
    path("<int:pk>/edit/",ArticleUpdateView.as_view(),
         name="article_edit"),
    path("<int:pk>/delete/",ArticleDeleteView.as_view(),
         name="article_delete"),
    path("",ArticleListView.as_view(),name="article_list"),
]
Finally, we need to create templates for detail, update and detail.
Create templates/article_detail.html and fill it with following code.
{% extends "base.html" %}
{% block content %}

    <div class="article-entry">
        <h2>{{ object.title }}</h2>
        <p>by {{ object.author }} | {{ object.date }}</p>
        <p> {{ object.body }}</p>

    </div>

    <p>
        <a href="{% url 'article_edit' article.pk %}">Edit</a> |
        <a href="{% url 'article_delete' article.pk %}">Delete</a>
    </p>
    <p>Back to <a href="{% url 'article_list' %}">All Articles</a>
    </p>

{% endblock content %}
Create templates/article_edit.html and fill it with following code.
{% extends "base.html" %}
{% load crispy_forms_tags %}

{% block content %}

<h1>Edit</h1>
    <form action="" method="post">
        {% csrf_token %}
        {{ form|crispy }}
        <button class="btn btn-info ml-2" type="submit">
            Update
        </button>
    </form>
{% endblock content %}
Create templates/article_delete.html and write following codes in it.
{% extends "base.html" %}
{% block content %}
    <h1>Delete</h1>
    <form action="" method="post">
        {% csrf_token %}
        <p>
            Are you sure you want to delete "{{ article.title }}"?
        </p>
        <button class="btn btn-danger ml-2" type="submit">
            Confirm
        </button>
    </form>

{% endblock content %}
Add links to individual articles in article list by editing templates/article_list.html as follow.
................................
<span class="font-weight-bold">
                    <a href="{% url 'article_detail' article.pk %}">{{ article.title }} </a>

                </span>
............................
As a final step, in the card-footer section of the article_list.html we can add our URL routes to the current a href placeholders by using the url template tag, the URL name and the pk of each article.
.........................................
  <div class="card-footer text-center text-muted">
                <p>
                    <a href="{% url 'article_edit' article.pk %}">Edit</a> |
                    <a href="{% url 'article_delete' article.pk %}">Delete</a>
                </p>

            </div>
...............................
Run the server and visit http://127.0.0.1:8000/articles/
Click on first article.
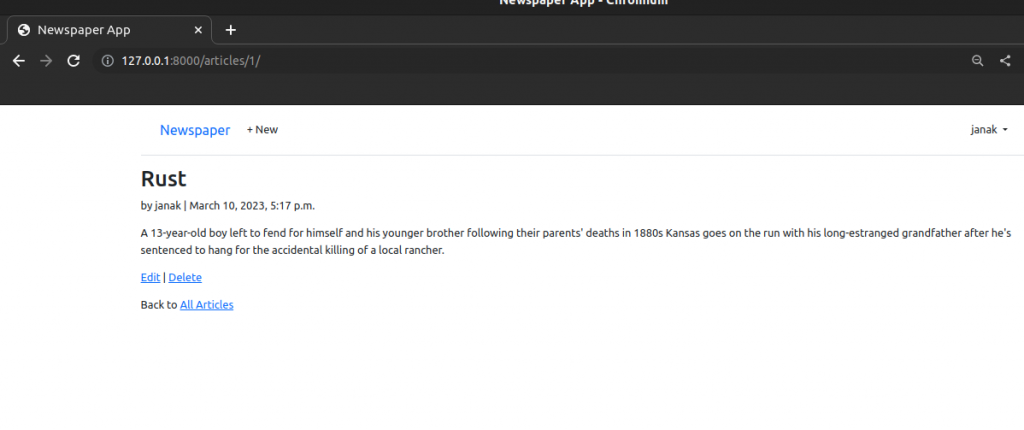
Click On Edit
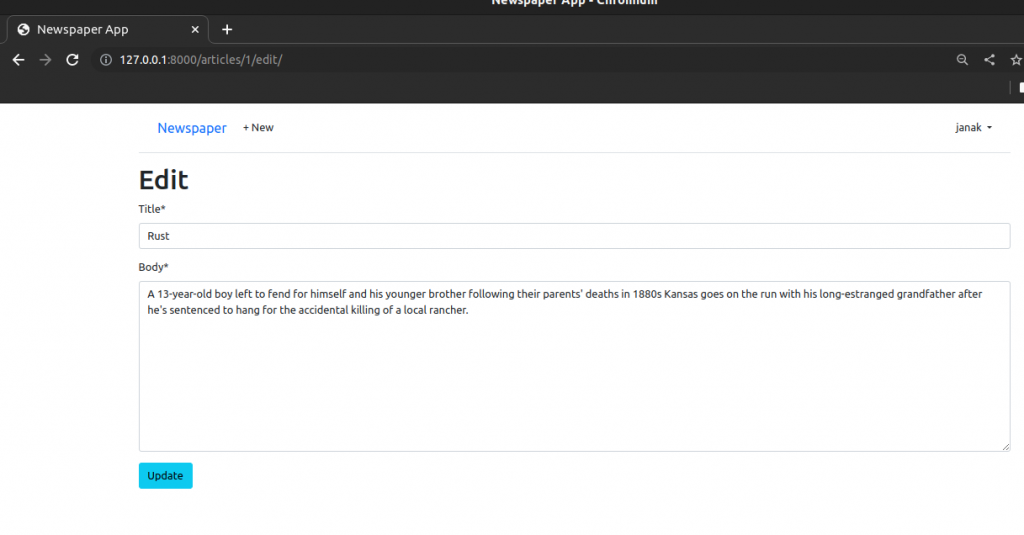
Update it and click on Update button, you will be directed back to article detail page.
On article detail page click on Delete.
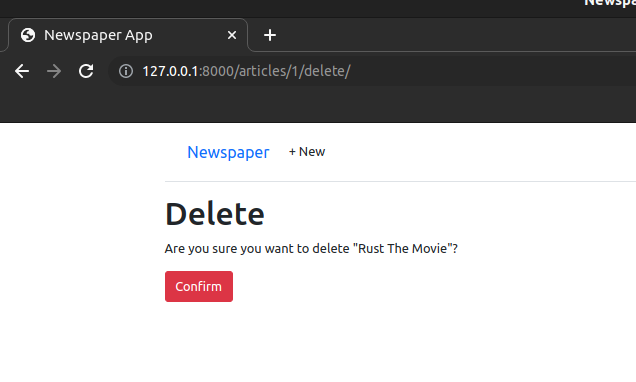
Click on Confirm to delete the article.
Create
We will use Django’s built-in CreateView to implement create page for new articles.
First edit articles/views.py to add ArticleCreateView
...............................
from django.views.generic.edit import UpdateView, DeleteView, CreateView
.........................................
class ArticelCreateView(CreateView):
    model = Article
    template_name = "article_new.html"
    fields = (
        "title",
        "body",
        "author",
    )
..........................
Now update the articles/urls.py file with the new route for the view.
from django.urls import path
from .views import (
    ArticleListView,
    ArticleDetailView,
    ArticleUpdateView,
    ArticleDeleteView,
    ArticleCreateView,
)


urlpatterns = [
    path("<int:pk>/",ArticleDetailView.as_view(),
         name="article_detail"),
    path("<int:pk>/edit/",ArticleUpdateView.as_view(),
         name="article_edit"),
    path("<int:pk>/delete/",ArticleDeleteView.as_view(),
         name="article_delete"),
    path("new/",ArticleCreateView.as_view(),
         name="article_new"),
    path("",ArticleListView.as_view(),
         name="article_list"),
]
Create templates/article_new.html and update it with following code.
{% extends "base.html" %}
{% load crispy_form_tags %}
{% block content %}

<h1>New Article</h1>
    <form action="" method="post">
        {% csrf_token %}
        {{ form|crispy }}
        <button class="btn btn-success ml-2" type="submit">
            Save
        </button>
    </form>

{% endblock content %}
Finally we should add the URL link for creating new articles to our navbar so it is accessible everywhere on the site to logged-in users.
Update templates/base.html with following code.
..................................
{% if user.is_authenticated %}
          <li><a href="{% url "article_new" %}" class="nav-link px-2 link-dark">+ New</a></li>
        </ul>
...........................
Run the server and login

Click on the + New
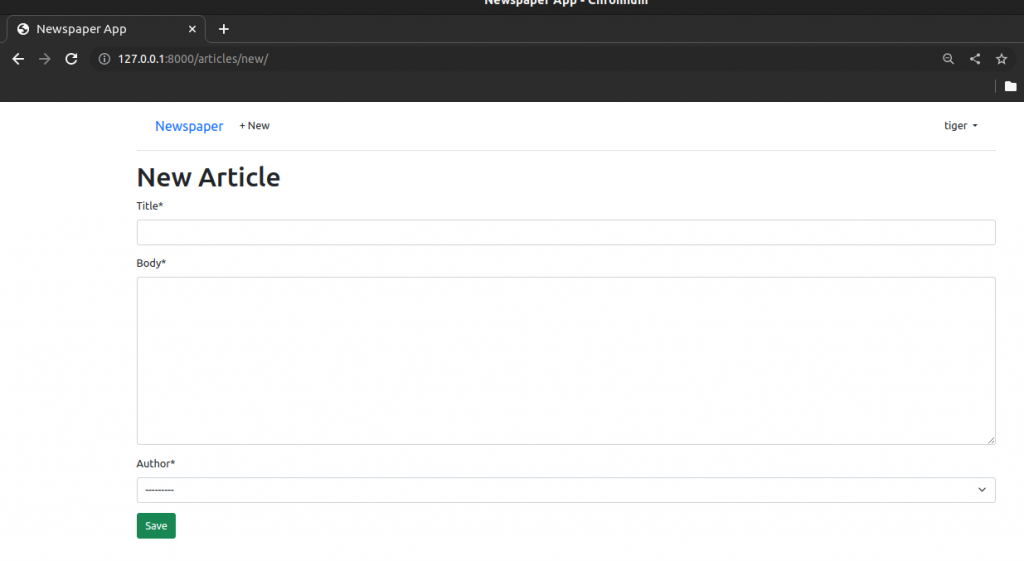
Create a new article
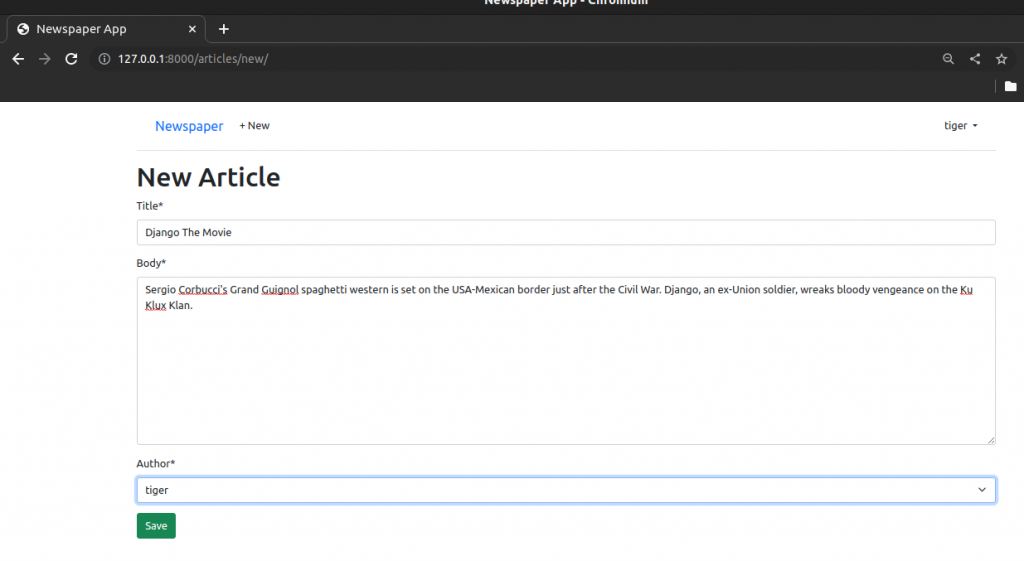
Save and you will be taken to article detail page.
Got to link: http://127.0.0.1:8000/articles/ and you will see your article there.
