
Django News App Part I
Part one of making news application in Django. Here we go through initial setup which includes creating virtual environment, creating repository in Github, installing Django and creating basic app. This is followed by creating sign up, login and log out for users. Finally we test our code.
Table of Contents
Initial Setup
#Terminal
mkdir News_App_Django
cd News_App_Django
python3 -m venv venv
source venv/bin/activate
gh repo create
#then walk through
After creating a github repository of name “News_App_Django”
#Terminal
cd News_App_Django
#Install Django
pip3 install django==4.1.7
#After installation start a Django Project
django-admin startproject django_project
cd django_project
#Run to check the installation
python3 manage.py runserver
Visit http://127.0.0.1:8000/
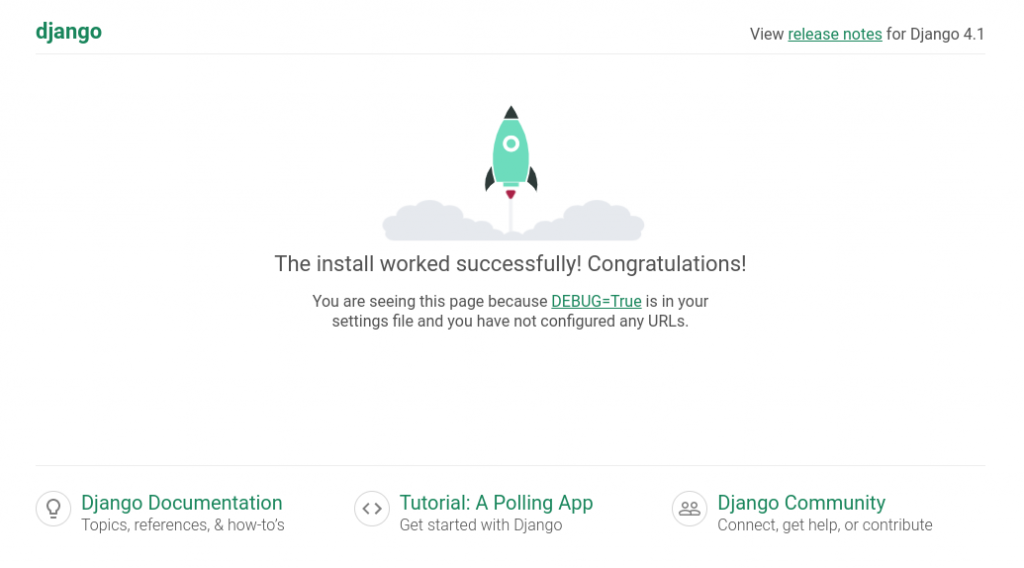
Add, commit and push in github
git add .
git commit -m "Django News App"
git push
Create an add named accounts
#terminal
python3 manage.py startapp accounts
Custom User Model
To create our custom user model we require four steps:
- create a new CustomUser model
- create new form for UserCreationForm and UserChangeForm
- update django_project/settings.py
- update accounts/admin.py
Update accounts/models.py with a new User model called CustomUser that extends the existing AbstractUser. We also include our a custom field for age here.
from django.contrib.auth.models import AbstractUser
from django.db import models

# Create your models here.
class CustomUser(AbstractUser):
    age = models.PositiveIntegerField(null=True,blank=True)
Note that we use both null and black with our age field.
- null is database-related. When a field has null=True it can store a database entry as NULL, meaning no value.
- blank is validation-related. If blank=True then a form will allow an empty value, whereas if blank=False then a value is required.
In practice, null and blank are commonly used together in this fashion so that a form allows an empty value and the database stores that value as NULL.
Create a new file called accounts/forms.py and update it with the following code to extend the existing UserCreationForm and UserChangeForm forms.
from django.contrib.auth.forms import UserCreationForm, UserChangeForm

from .models import CustomUser

class CustomUserCreationForm(UserCreationForm):
    class Meta(UserCreationForm):
        model = CustomUser
        fields = UserCreationForm.Meta.fields + ("age",)

class CustomUserChangeForm(UserChangeForm):
    class Meta:
        model = CustomUser
        fields = UserChangeForm.Meta.fields
For both new forms we are using the Meta class to override the default fields by setting the model to our CustomUser and using the default fields via Meta.fields which includes all default fields. To add our custom age field we simply tack it on the end and it will display automatically on our future sign up page.
Django the default form only asks for a username, email and password.
In django_project/settings.py we need add the accounts app to our INSTALLED_APPS. Then at the bottom of the file use the AUTH_USER_MODEL config to tell Django to use our new custom user model in place of the built-in User model. Since our custom user model CustomUser exists within our accounts app, we should refer to it as accounts.CustomUser.
#django_project/settings.py

.....................................
# Application definition

INSTALLED_APPS = [
    'django.contrib.admin',
    'django.contrib.auth',
    'django.contrib.contenttypes',
    'django.contrib.sessions',
    'django.contrib.messages',
    'django.contrib.staticfiles',
    'accounts.apps.AccountsConfig',#new
]

...........................................
AUTH_USER_MODEL = "accounts.CustomUser" #new
Now we need to update accounts/admin.py as it is tightly coupled to the default User model. We will extend the existing UserAdmin class to use our new CustomUser model. To control which fields are listed we use list_display. But to actually edit and add new custom fields, like age, we must also add fieldsets (for fields used in editing users) and add_fieldsets (for fields used when creating a user).
from django.contrib import admin
from django.contrib.auth.admin import UserAdmin

from .forms import CustomUserCreationForm, CustomUserChangeForm
from .models import CustomUser

# Register your models here.
class CustomUserAdmin(UserAdmin):
    add_form = CustomUserCreationForm
    form = CustomUserChangeForm
    model = CustomUser
    list_display = [
        "email",
        "username",
        "age",
        "is_staff",
    ]

    fieldsets = UserAdmin.fieldsets + ((None,{"fields":("age",)}),)
    add_fieldsets = UserAdmin.add_fieldsets + ((None, {"fields":("age")}),)


admin.site.register(CustomUser,CustomUserAdmin)
Run makemigrations and migrate for the first time to create a new database that uses the custom user model.
#Terminal
python3 manage.py makemigrations accounts
python3 manage.py migrate
Superuser
python3 manage.py createsuperuserAfter creating the superuser run the server and visit http://127.0.0.1:8000/admin/
Login with your superuser privileges.
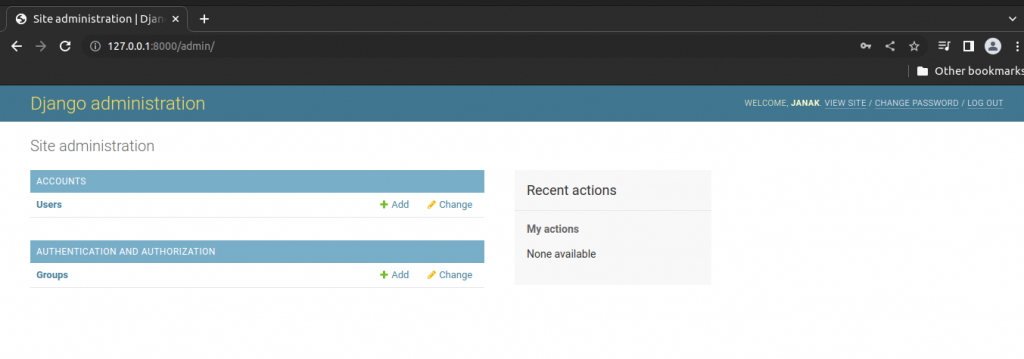
If you click on the link for “Users” you should see your superuser account as well as the default fields of Email, Address, Username, Age and Staff Status. These were set in list_display in our accounts/admin.py file
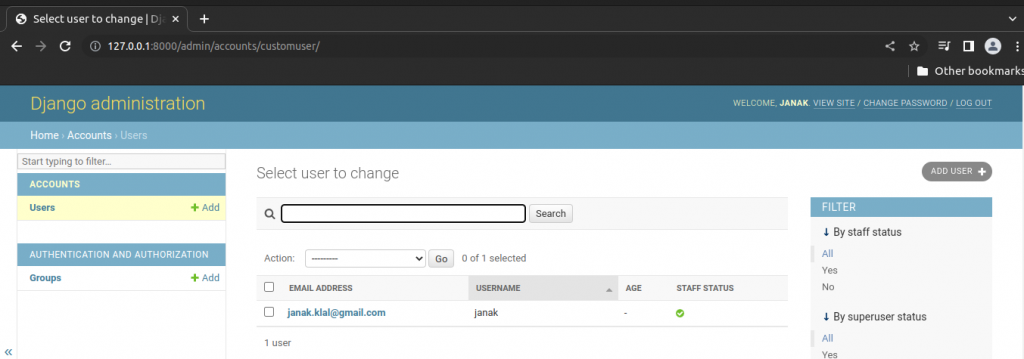
The age filed is empty because we have yet set it yet. The default prompt for creating a superuser does not ask for it.
One can click on the highlighted link for ones superuser’s email address which brings up the edit user interface.
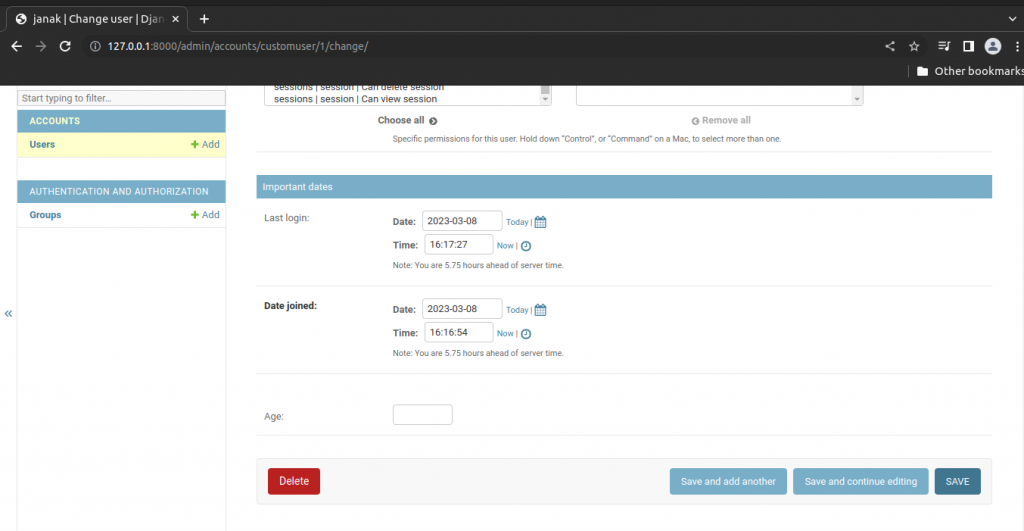
At bottom we can see there is the age field we added. After entering the age and saving, we will be redirected back to the main Users page listing our superuser. now that the age filed is updated.

User Authentication
Now that we have a working custom user model we can add the functionality so that the user can sign up, log in and log out users. Django provides everything we need for log in and log out but we will need to create our own form to sign up new users. We will also a basic homepage with links to all three features.
Templates
By default, the Django template loader looks for templates is a nested structure within each app. The structure accounts/templates/accounts/home.html would be needed for a home.html template within the accounts app. But a single templates directory within django_project approach is cleaner and scales better so that’s what we will use.
Now create a new templates directory and within it a registration directory as that’s where Django will look for templates related to log in and sign up.
#terminal inside our project folder
mkdir templates
mkdir templates/registration
Now we need to tell Django about this new directory by updating the configuration for “DIRS” in django_project/settings.py.
..............................................
TEMPLATES = [
    {
        'BACKEND': 'django.template.backends.django.DjangoTemplates',
        'DIRS': [],
        'APP_DIRS': True,
        'OPTIONS': {
            'context_processors': [
                'django.template.context_processors.debug',
                'django.template.context_processors.request',
                'django.contrib.auth.context_processors.auth',
                'django.contrib.messages.context_processors.messages',
            ],
        },
        "DIRS":[BASE_DIR / "templates"],
    },
]
...................................
When we log in or log out of a site, we are immediately redirected to a subsequent page. We need to tell Django where to send users in each case. The LOGIN_REDIRECT_URL and LOGOUT_REDIRECT_URL settings do that. We will configure both to redirect to our homepage which will have the named URL “home”.
Add these two lines at the bottom of the django_project/settings.py file.
#django_project/settings.py
...........................
LOGIN_REDIRECT_URL = "home" #new
LOGOUT_REDIRECT_URL = "home" #new
First we need to create base.html with templates directory.
<!DOCTYPE html>
<html>
    <head>
        <meta charset="utf-8">
        <title>{% block title %}Newspaper App {% endblock title %}</title>

    </head>
    <body>
        <main>
            {% block content %}
            {% endblock content %}
        </main>
    </body>
</html>
Now, create templates/home.html and fill with following code.
<!DOCTYPE html>
{% extends "base.html" %}
{% block title %} Home {% endblock title %}
{% block content %}
    {% if user.is_authenticated %}
        Hi {{ user.username }}
        <p><a href="{% url "logout" %}">Log Out</a></p>
    {% else %}

        <p>You are not logged in</p>
        <a href="{% url "login" %}">Log In</a> |
        <a href="{% url "signup" %}">Sign Up</a>
    {% endif %}

{% endblock content %}
Now create templates/registration/login.html
{% extends "base.html" %}
{% block title %}Log In {% endblock title %}

{% block content %}
<h2>Log In</h2>
<form method="post">
    {% csrf_token %}
    {{ form.as_p }}
    <button type="submit">Log In</button>
</form>
{% endblock content %}
Finally create template for signup: templates/registration/signup.html
{% extends "base.html" %}
{% block title %}Sign Up {% endblock title %}
    {% block content %}
    <h2>Sign Up</h2>
        <form method="post">
            {% csrf_token %}
            {{ form.as_p }}
            <button type="submit">Sign Up</button>
        </form>
    {% endblock content %}
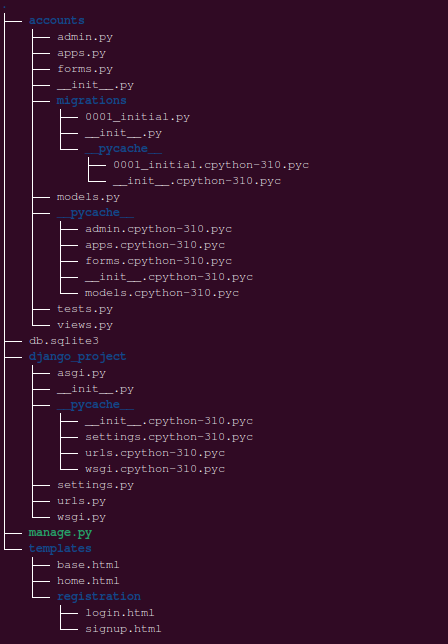
After addition of all these directory and files our project directory will look as follow:
URLS
In our django_project/urls.py file, we want to have our home.html template to appear as the homepage. We can import TemplateView and set the template_name right in our url pattern. We need to include both the accounts app and the built-in auth app. The reason is that the built-in auth app provides views and urls for log in and log out. But we need to create our own view and url for signup.
Edit django_project/urls.py as follows.
from django.contrib import admin
from django.urls import path,include #new
from django.views.generic.base import TemplateView #new

urlpatterns = [
    path('admin/', admin.site.urls),
#nes
    path("accounts/",include("accounts.urls")),
    path("accounts/",include("django.contrib.auth.urls")),
    path("",TemplateView.as_view(template_name="home.html"),name="home"),
]
Now we need to create accounts/urls.py and update it with following code.
from django.urls import path
from .views import SignUpView

urlpatterns = [
    path("signup/",SignUpView.as_view(),name="signup"),
]
We need to create SignUpView class. Update accounts/views.py with the following code.
from django.urls import reverse_lazy
from django.views.generic import CreateView

from .forms import CustomUserCreationForm

# Create your views here.
class SignUpView(CreateView):
    form_class = CustomUserCreationForm
    success_url = reverse_lazy('login')
    template_name = "registration/signup.html"
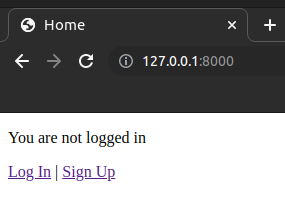
Run the server and visit: http://127.0.0.1:8000/
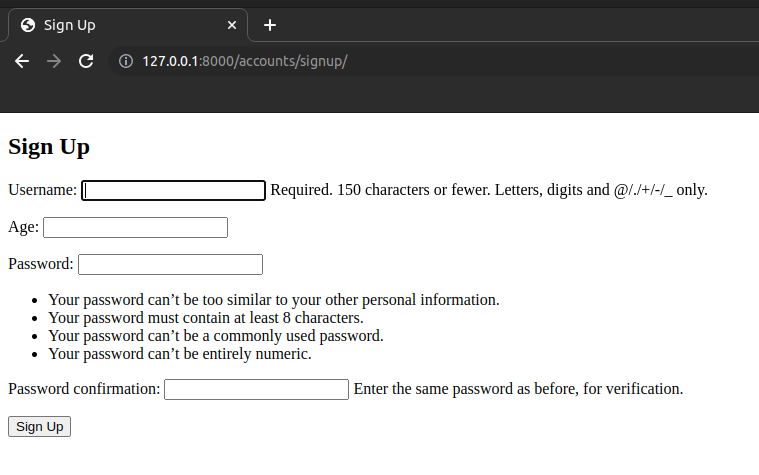
Click on Sign up and fill the form.
After successful sign up you will be redirected to http://127.0.0.1:8000/accounts/login/
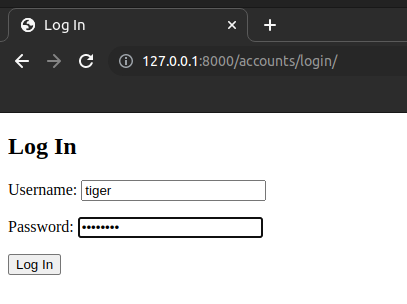
Login
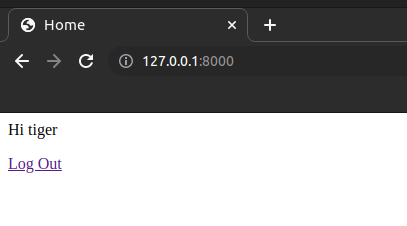
Click on logout and you will be redirected back to home page.
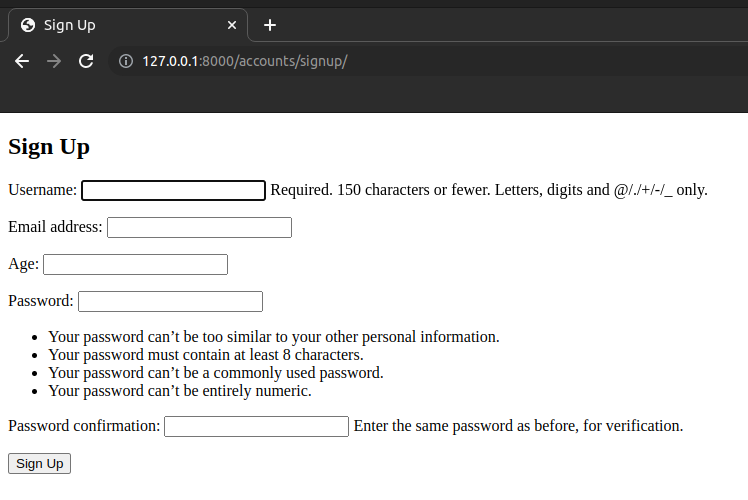
You might have noticed that we are not asking users for e-mail during signup. To add e-mail during signup edit accounts/forms.py as follow.
from django.contrib.auth.forms import UserCreationForm, UserChangeForm

from .models import CustomUser

class CustomUserCreationForm(UserCreationForm):
    class Meta(UserCreationForm):
        model = CustomUser
        fields = (
            "username",
            "email",
            "age",
        )

class CustomUserChangeForm(UserChangeForm):
    class Meta:
        model = CustomUser
        fields = (
            "username",
            "email",
            "age",
        )
Now, we have user need to provide email address during sign up.
Tests
The new signup page has its own view, URL and template which should all be tested. Open the accounts/tests.py and update it with following code.
from django.contrib.auth import get_user_model
from django.test import TestCase
from django.urls import reverse

# Create your tests here.
class SignupPageTests(TestCase):
    def test_url_exists_at_correct_location_signupview(self):
        response = self.client.get("/accounts/signup/")
        self.assertEqual(response.status_code,200)

    def test_signup_view_name(self):
        response = self.client.get(reverse("signup"))
        self.assertEqual(response.status_code,200)
        self.assertTemplateUsed(response,"registration/signup.html")

    def test_signup_form(self):
        response = self.client.post(reverse("signup"),
                                    {
            "username":"testuser",
            "email":"testuser@email.com",
            "password1" : "testpass123@",
            "password2":"testpass123@",
                                    },)
        self.assertEqual(response.status_code,302)
        self.assertEqual(get_user_model().objects.all().count(),1)
        self.assertEqual(get_user_model().objects.all()[0].username,"testuser")
        self.assertEqual(get_user_model().objects.all()[0].email,"testuser@email.com")
At the top we imported get_user_model() so we can test our sign up form. Then we also import TestCase to run tests that touch the database and reverse so we can verify the URL and view work properly.
Our class of tests is called SignupPageTests and extends TestCase. The first test checks that our sign up page is at the correct URL and returns a 200 status code. The second test checks the view. It reverses signup which is the URL name, confirms a 200 status code and that our signup.html template is being used.
The third test checks our form by sending a post request to fill to out. We except a 302 redirect after the form is submitted and then confirm that there is now one user in the test database with a matching username and email address. We do not check the password because Django automatically encrypts them by default.
#terminal
python3 manage.py test